Sweet Apple Slices How to Make Caramel Apples
There’s nothing quite like the aroma of freshly baked bread filling the house on a lazy Sunday morning. I remember sneaking bites of my grandma’s zucchini bread as a kid — the slight crunch of nuts, the sweet warmth of cinnamon, and of course, that moist, tender crumb that makes every slice feel like a cozy hug. Over the years, I’ve tweaked her classic recipe and added my own little touches, eventually landing on what I call my “ultimate zucchini cinnamon swirl bread.” It’s insanely good, super easy to make, and honestly, it’s become a weekend tradition around here. My kids ask for this all the time — they love helping swirl the cinnamon or sneaking a taste of batter before it hits the oven. Plus, it’s a sneaky way to get some veggies into the family diet without fuss. Trust me, once you try this, it’ll be your go-to comfort food too — it’s like a slice of nostalgia with every bite.
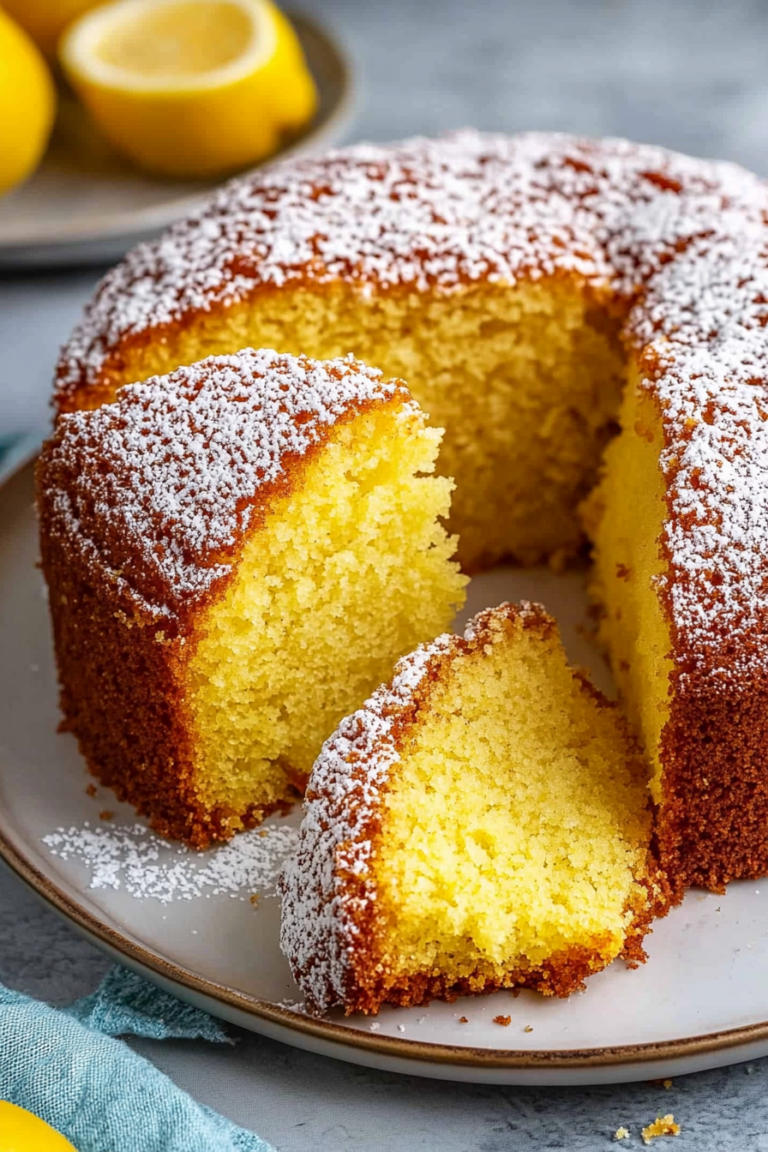
What is Zucchini cinnamon swirl bread?
This bread is basically a clever, moist loaf packed with grated zucchini, tender spices, and swirled with a cinnamon sugar mixture. Think of it as a cozy, breakfast-inspired quick bread — soft, slightly sweet, and with just the right hint of spice. The name says it all: zucchini is the secret behind its incredible moisture, making each bite tender and rich without feeling heavy. It’s essentially a mash-up of zucchini bread and cinnamon swirl coffee cake — perfect for breakfast, brunch, or even a midday snack. Because it’s so straightforward to make, I always do this when I want something comforting but don’t want to spend hours in the kitchen. Plus, the kids go crazy for the cinnamon swirl — I swear, it’s like giant cinnamon roll in bread form! It’s a simple little treat that feels like a warm hug, no matter what day it is.
Why you’ll love this recipe?
What I love most about this zucchini cinnamon swirl bread is how insanely versatile and forgiving it is. It’s a lifesaver on busy nights or lazy weekends when you want something homemade but don’t want to slave over complicated recipes. The flavor? Oh, it’s got that perfect balance of sweet, spice, and just a hint of earthiness from the zucchini — the cinnamon swirl is like the final flourish, making each slice a little celebration. And talk about budget-friendly: the ingredients are staples most of us already have in the pantry and fridge. Plus, it’s a sneaky way to get greens into kids or picky eaters who typically turn up their noses at vegetables. I’ve made this with whole wheat flour, almond milk, and even added chopped nuts on top — it always turns out amazing. What really makes this bread stand out is the texture; it’s moist, tender, with a beautiful swirl that looks like it took ages but really took just minutes to assemble. Honestly, I think it’s what I crave most on cozy mornings — it’s simple, nostalgic, and absolutely addictive.
How do you make Zucchini Swirl Bread?
Quick Overview
This bread comes together in a matter of minutes once you’ve grated the zucchini and mixed your ingredients. The batter is moist but sturdy enough to hold the swirl of cinnamon sugar, which you’ll layer just before baking. It’s like creating a little treasure within each loaf — a cinnamon surprise in every bite. The oven does most of the work, and trust me, your kitchen will smell divine. The trick is to not overmix — a common mistake I’ve learned from countless trials — and to let it cool just enough before slicing so the beautiful swirl stays intact. It’s honestly so forgiving, making it perfect for bakers of all skill levels.
Ingredients
For the Main Batter:
– 1 ½ cups all-purpose flour (or whole wheat for a healthier twist)
– 1 teaspoon baking soda
– ½ teaspoon baking powder
– ½ teaspoon salt
– 1 teaspoon ground cinnamon
– ½ cup granulated sugar
– ⅓ cup brown sugar
– ½ cup vegetable oil or melted butter
– 2 large eggs
– 1 teaspoon vanilla extract
– 1 cup grated zucchini (squeeze out excess moisture)
– ½ cup buttermilk or almond milk (I tested with almond milk and it’s creamier!)
For the Filling:
– ¼ cup granulated sugar
– 2 teaspoons ground cinnamon
For the Glaze (optional but highly recommended):
– ½ cup powdered sugar
– 1-2 teaspoons milk or lemon juice
– Vanilla extract (a tiny splash for extra flavor)
Step-by-Step Instructions
Step 1: Preheat & Prep Pan
Set your oven to 350°F (175°C). Grease a loaf pan with butter or non-stick spray — I like lining mine with parchment for easier removal. That smell when you’re just prepping the pan? It’s like the beginning of a cozy baking day. I always do this first because it gets the whole process feeling organized and calm.
Step 2: Mix Dry Ingredients
In a large bowl, whisk together the flour, baking soda, baking powder, salt, and cinnamon. This step ensures everything is evenly distributed and saves you from clumps later. Proper mixing here makes all the difference for a light, airy loaf.
Step 3: Mix Wet Ingredients
In another bowl, beat the eggs and sugars until well combined — I usually do about 2 minutes with a whisk or mixer. Add the oil, vanilla, and buttermilk (or almond milk), mixing until smooth. The mixture should look slightly frothy and glossy, almost like a thick batter.
Step 4: Combine
Pour the wet ingredients into the dry and fold gently — no overmixing. That’s how you get the tender crumb. A few streaks of flour are okay; the goal is just combined. Overmixing makes the bread dense, and nobody wants that!
Step 5: Prepare Filling
In a small bowl, mix the sugar and cinnamon. This sweet spicy combo is what makes the swirl irresistible. I test the filling by sprinkling a tiny bit on my tongue — if it tastes like a cinnamon roll, you’re good to go!
Step 6: Layer & Swirl
Pour about half of the batter into your prepared loaf pan. Sprinkle half of the cinnamon sugar on top. Then add the rest of the batter and finish with the remaining cinnamon mixture. Using a skewer or knife, swirl gently — don’t overdo it — just enough to create marbled lines. I like a few good swirls because it looks pretty and tastes amazing.
Step 7: Bake
Pop it in the oven for 50-60 minutes. Every oven is different, so start checking at the 50-minute mark. A toothpick inserted in the center should come out clean. If it’s still gooey, give it 5-minute increments, but don’t open the door too often — the steam helps it rise and stay moist.
Step 8: Cool & Glaze
Let the bread cool in the pan for 10-15 minutes, then transfer to a wire rack — this prevents sogginess. When it’s just warm but not hot, drizzle with your glaze or dust with powdered sugar if you prefer a simpler look. The glaze especially shines when the bread is still warm — it melts just a bit, creating that glossy, irresistible top.
Step 9: Slice & Serve
Use a serrated knife for clean slices. Serve warm or at room temp. I often toast a slice the next day — it’s even crispier and complements a cup of coffee perfectly. If I’m feeling fancy, I drizzle a little honey or add chopped nuts to the top for extra crunch. Honestly, this disappeared in minutes at my house, and I always get asked for seconds.
What to Serve It With
This bread is wildly versatile. In the mornings, it pairs beautifully with a good cup of coffee or a cold glass of milk — I love serving slices with a smear of butter or cream cheese. It’s also perfect for brunch, alongside fresh fruit and yogurt, or even as part of a weekend breakfast spread with sausage or bacon on the side. When I want dessert, I usually warm a slice and top it with a dollop of whipped cream or a scoop of vanilla ice cream — the cinnamon swirl paired with something cold is the best combo ever. And for a casual snack, I keep slices in the fridge, warmed slightly, and spread with peanut butter or Nutella. This bread is like a little hug for your taste buds — cozy, sweet, and always satisfying.
Top Tips for Perfecting Your Zucchini Cinnamon Swirl Bread
After making this countless times, I’ve learned a few tricks that help me get that perfect loaf every single time. First, squeezing out excess moisture from the grated zucchini is a game-changer. I wrap it in a clean towel and press down — this prevents sogginess and keeps the bread tender. When mixing, I always fold gently — overmixing is the enemy here, leading to dense bread. For the swirl, I like to sprinkle cinnamon sugar evenly and swirl just enough so every slice gets that beautiful marbled effect — too much swirling, and it might get messy, but too little, and it’s not satisfying enough. If you want to switch it up, try adding chopped nuts or a splash of almond extract in the batter — both work beautifully. I tested with whole wheat flour, and while it’s a bit denser, it still tastes fantastic — just add a touch more liquid if needed. As for the baking, oven placement matters: middle rack helps with even baking, and keep an eye on the clock because ovens vary. For the glaze, I sometimes add a splash of maple syrup or vanilla for extra flavor, but honestly, a simple powdered sugar drizzle is my favorite. It’s all about balancing moisture and flavor — trust me, you’ll get this down after a couple of tries. The biggest lesson I’ve learned is patience — let it cool completely before slicing, and you’ll see that beautiful swirl stay intact.
Storing and Reheating Tips
This bread keeps well for a few days in an airtight container at room temperature, covered loosely with foil or a towel. Just don’t leave it out forever — after 2-3 days, it might start to dry out. For longer storage, I pop it in the fridge, wrapped tightly in plastic wrap or in a zip-top bag. It’s still moist and flavors stay intact for about 4-5 days. To freeze, double wrap slices or the whole loaf tightly with plastic wrap and then foil — it’ll last up to three months. Thaw on the countertop or in the fridge overnight. I like to toast slices straight from the freezer — it brings back that fresh-baked warmth and makes the cinnamon swirl extra tasty. As for the glaze, it’s best added fresh, but if you want to re-glaze after refrigerating, just warm the glaze slightly to loosen it up before drizzling again.
Frequently Asked Questions
Final Thoughts
This zucchini cinnamon swirl bread is one of those recipes I keep coming back to because it’s comforting, straightforward, and endlessly adaptable. It’s become a staple morning treat, a cozy afternoon snack, and even a little gift to friends — because honestly, who doesn’t love a homemade loaf with that irresistible cinnamon swirl? Every time I make it, I’m reminded of lazy weekends, my kids’ excited faces, and the smell that drifts through the house — pure happiness in bread form. It’s funny how something so simple can make such a big impact, right? So go ahead, give this a try — I promise, it’ll become a beloved favorite in your house too. Happy baking! And I can’t wait to hear how yours turns out — share your pics and tweaks in the comments!
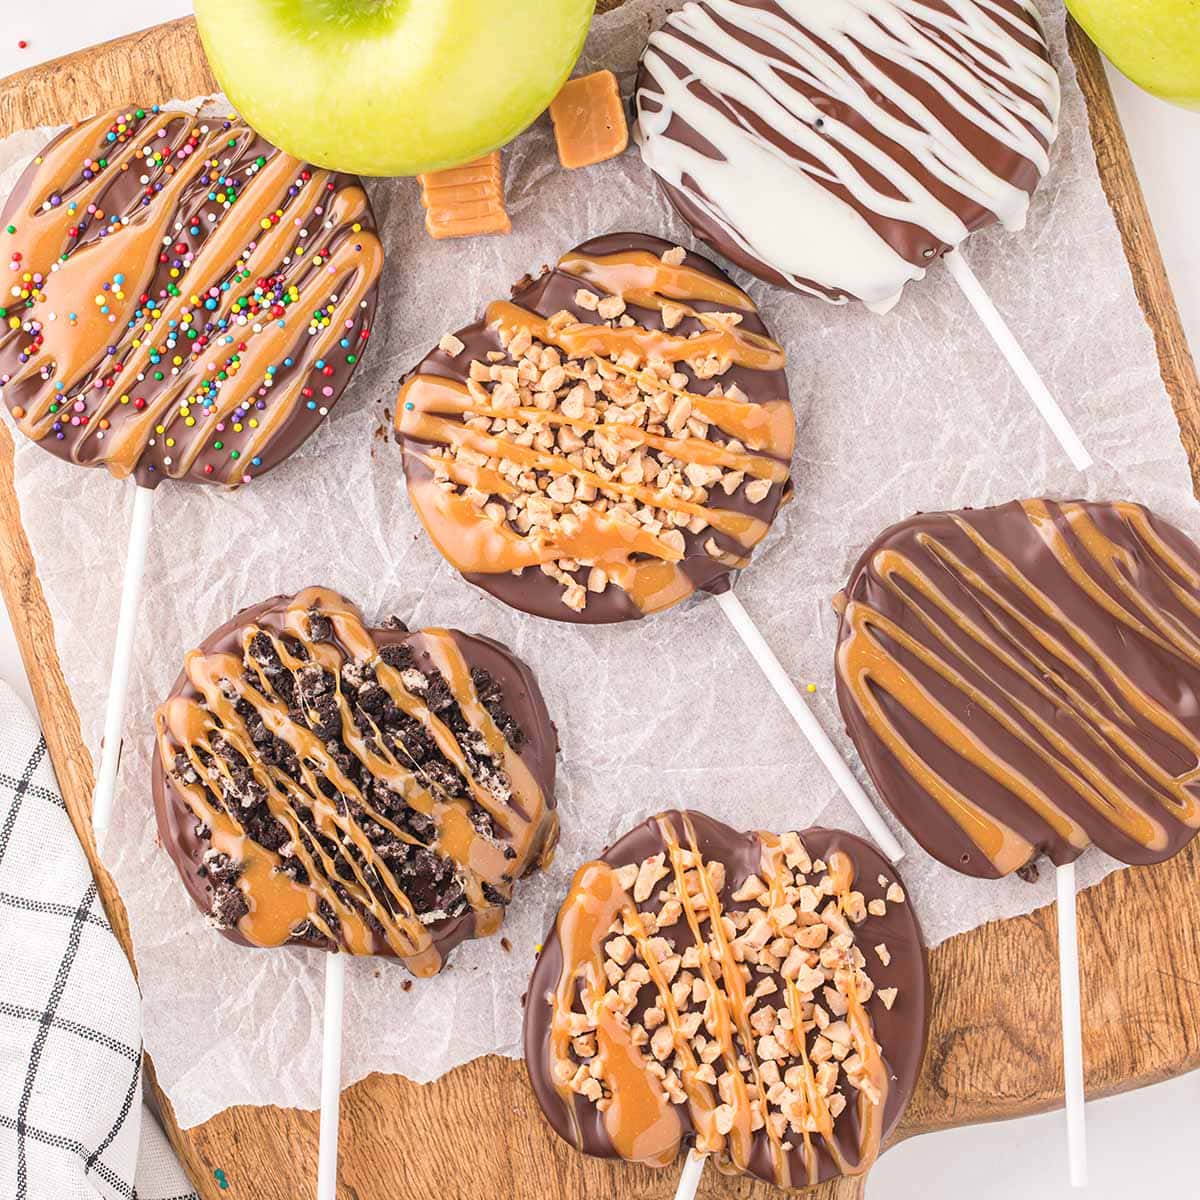
caramel apples
Ingredients
Method
- Prepare baking sheets with parchment paper.
- Wash and thoroughly dry the apples. Insert a candy sucker stick into the bottom of each apple.
- Place the chocolate chips in a microwave-safe bowl and microwave in 30-second intervals, stirring until fully melted.
- Dip each apple into the melted chocolate, coating evenly, and place on prepared baking sheets.
- In a microwave-safe bowl, combine caramel squares and water. Microwave in 30-second intervals, stirring until smooth.
- Drizzle the caramel over the chocolate-coated apples in any pattern.
- Add optional toppings like sprinkles, M&Ms, or chopped nuts on top of the caramel before it sets.
- Refrigerate the apples for 15-20 minutes to set the caramel and chocolate.