Simple Scandinavian Apple Pie Recipe
There’s something about biting into a lemon bar that instantly takes me back—like a little ray of sunshine. But let’s be honest, sometimes plain old lemon bars can feel a bit too sweet or heavy after a while. That’s why I fell in love with this zucchini version—yes, zucchini!—because it sneaks in a veggie, making it just a tad healthier and way more interesting. I remember the first time I tried making these—I was craving something tangy, but also wanted that buttery, crumbly topping. I tossed in a handful of shredded zucchini, thinking, “Why not?” and wow, it added a subtle moisture that kept the bars soft and luscious. Plus, my kids ask for these all the time—they love the swirl of cream cheese on top. This recipe is honestly a lifesaver on busy nights when I want a quick dessert that looks fancy but is super simple to pull together. Trust me, once you try these, they’ll become a family favorite—you might even hide a few slices for yourself!
What is Zucchini Lemon Bars with Cream Cheese Swirl?
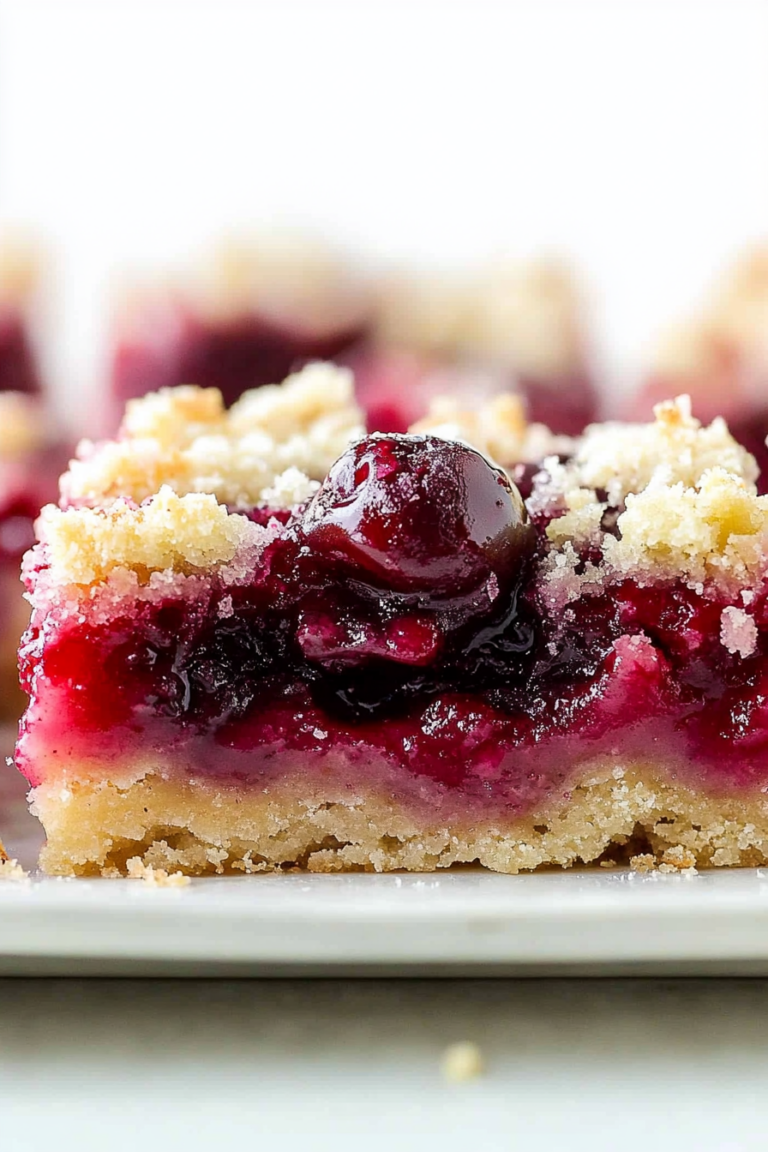
This is basically a delightful twist on the classic lemon bar, but with a sneaky addition—shredded zucchini—that adds moisture and a hint of vegetable goodness. Think of it as a tart, tangy dessert with a buttery crumb base, topped with a swirl of rich cream cheese that’s about as addictive as anything you’ve ever made. The name might sound fancy, but honestly, it’s straightforward—think of it as a lemon bar, but more tender and moist thanks to zucchini, which keeps everything extra soft and flavorful. The cream cheese swirl on top not only looks gorgeous but gives that irresistible creamy tang that pairs perfectly with the zingy lemon filling. I always do this when I want to impress friends or just treat my family—they’re always asking for seconds!
Why you’ll love this recipe?
What I love most about these zucchini lemon bars is how surprisingly versatile they are. First, the flavor—tangy, bright, with just enough sweetness to keep everyone coming back for more. The hint of zucchini keeps them super moist without changing the flavor too much, which means even those who claim not to like zucchini usually can’t tell. Plus, they look oh-so-lovely with that swirled cream cheese on top—that marbled effect makes them perfect for a casual get-together or a fancy brunch. The best part? They’re insanely easy to make. No complicated techniques or fancy equipment required. You literally just mix, layer, and bake. This one’s a lifesaver on busy nights or when you’re craving a quick homemade treat. Budget-wise, the ingredients are simple pantry staples—flour, sugar, eggs, zucchini, lemon, and cream cheese—and you probably already have most of them at home. Since the base and topping come together in one bowl, cleanup’s a breeze. And let’s not forget how adaptable it is—you can swap lemon for lime, add a dash of vanilla, or even sprinkle some berries on top for a different twist. Honestly, once I made this batch, it disappeared in minutes at my house, and I knew I’d found a keeper.
How do I make Zucchini Lemon Bars with Cream Cheese Swirl?
Quick Overview
This recipe involves a buttery, crumbly crust layered with a zingy lemon-zucchini filling, topped with a creamy swirled mixture of cream cheese and lemon zest. It’s kind of like a “lazy summer afternoon” in dessert form—bright, refreshing, and just the right hint of indulgence. You mix up the crust first, press it into your pan, then pour over that tangy filling. Meanwhile, the cream cheese mixture gets dolloped and swirled around on top before baking. Honestly, you’ll be surprised at how quick and forgiving it is—no fancy techniques needed. Trust me, it’s just a matter of mixing ingredients, pouring, swirling, and then waiting patiently for the oven to do its magic.
Ingredients
For the Main Crust:
– 1 1/2 cups all-purpose flour
– 1/2 cup powdered sugar
– 1/2 teaspoon salt
– 1/2 cup unsalted butter, cold and cubed
For the Lemon-Zucchini Filling:
– 2 large eggs
– 1 cup granulated sugar
– 1/4 cup all-purpose flour
– 1/4 teaspoon baking powder
– Zest and juice of 2 lemons
– 1 cup finely shredded zucchini (squeezed dry)
– 1/2 teaspoon vanilla extract (optional)
For the Cream Cheese Swirl:
– 4 oz (half a block) cream cheese, softened
– 1/4 cup powdered sugar
– Zest of 1 lemon
– 1/2 teaspoon vanilla (optional)
Step-by-Step Instructions
Step 1: Preheat & Prep Pan
Preheat your oven to 350°F (175°C). Line an 8×8-inch square baking pan with parchment paper or lightly grease it. That way, the bars will come out smoothly and you won’t struggle to lift them out after baking. I always do this first—makes the whole process so much easier!
Step 2: Mix Dry Ingredients for the Crust
In a medium bowl, whisk together the flour, powdered sugar, and salt. This ensures everything is evenly distributed. Then, add the cold butter cubes and use a pastry cutter or your fingers to blend until the mixture resembles coarse crumbs. It should hold together a little when pressed—it’s that buttery crumbly texture that gives these bars their signature melt-in-your-mouth crust.
Step 3: Bake the Crust
Press this mixture evenly into your prepared pan—use the back of a spoon or the bottom of a glass to smooth it out. Bake for about 15 minutes until it’s lightly golden. Keep an eye on it; you don’t want the edges to burn, just a gentle golden hue that promises a crisp topping.
Step 4: Prepare the Lemon-Zucchini Filling
While the crust bakes, whisk together the eggs, sugar, flour, baking powder, lemon zest, and juice. Stir in the shredded zucchini and vanilla if using. This batter looks a little thick but don’t worry—it’s just right. The zucchini adds a subtle moisture and keeps everything tender.
Step 5: Make the Cream Cheese Swirl
In a small bowl, beat the softened cream cheese with powdered sugar, lemon zest, and vanilla until smooth. It should be creamy and spreadable. You can add a splash of milk if it’s too thick, but I find the natural softness of the cream cheese does the trick without extra liquids.
Step 6: Layer & Swirl
Pour the lemon-zucchini filling over the partially baked crust. Spoon the cream cheese mixture in dollops over the filling. Using a toothpick or skewer, swirl the two together in a figure-eight pattern. This creates a beautiful marbled effect and distributes the cream cheese perfectly—you don’t want to overdo it, just a gentle swirl.
Step 7: Bake
Bake for about 25-30 minutes, until the filling is set and the edges are golden. The middle might still jiggle a little when you shake the pan—that’s okay, it will firm up as it cools. Keep an eye out for those slightly puffed edges and the lovely aroma of lemon and baking butter filling your kitchen!
Step 8: Cool & Glaze
Let the bars cool completely in the pan on a wire rack—this is important so they set fully. Once cooled, you can dust them with a little powdered sugar or drizzle some extra lemon glaze if you want to make them look extra fancy. I prefer a simple dusting; the natural beauty of the marbled topping already does the trick.
Step 9: Slice & Serve
Use a sharp knife to cut into squares, wiping the blade clean between cuts for crisp edges. Serve these slightly chilled or at room temperature. They’re lovely on their own but pair beautifully with a cold glass of iced tea or bubbly water with lemon. My family always asks for these on Sundays—they disappear faster than I can grab seconds!
What to Serve It With
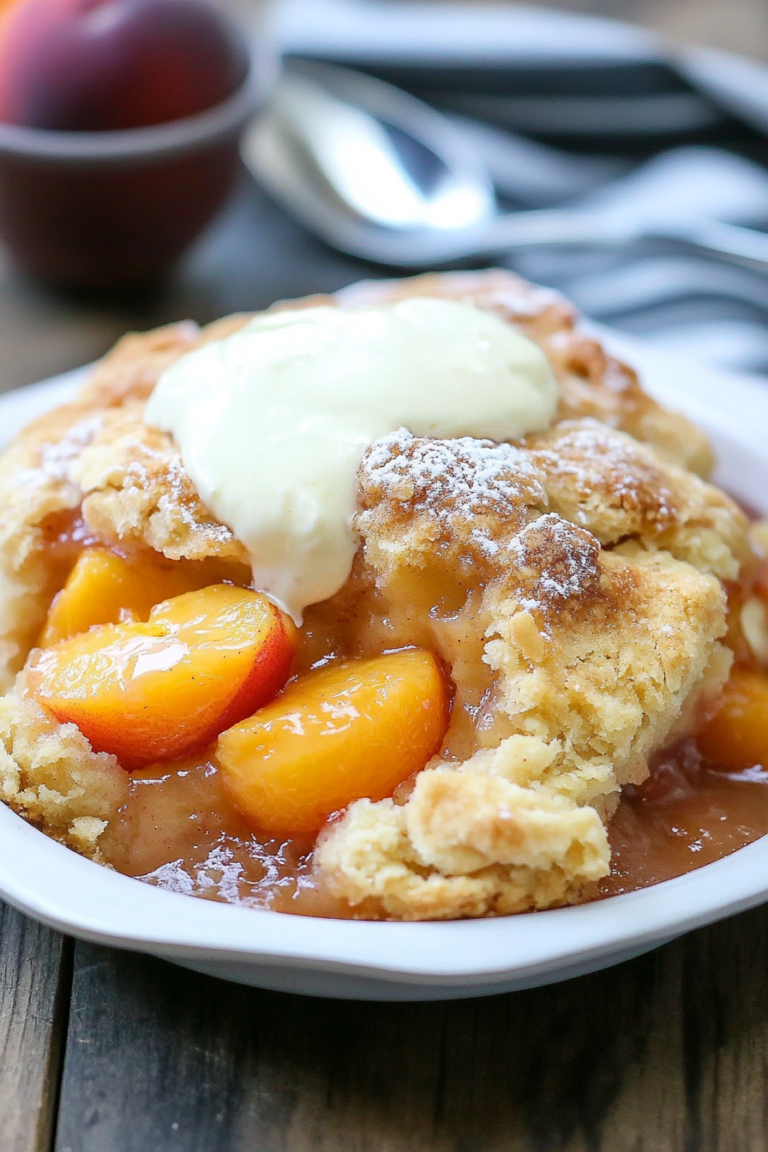
Though these zucchini lemon bars are quite satisfying on their own, I love pairing them with a few side dishes or drinks depending on the occasion. For a lazy weekend brunch, serve with a fresh fruit salad and a big mug of coffee or herbal tea. The bright citrus flavors complement the warmth of coffee so beautifully—it’s almost like a breakfast-dessert hybrid. When I have friends over, I often deck out the plate with a few edible flowers or mint sprigs for a touch of elegance. On a cozy night in, I serve these with a dollop of whipped cream or a scoop of vanilla ice cream—the cold creamy contrast really makes the flavors pop. Sometimes, I even sprinkle a few toasted almonds on top for extra crunch and richness. Honestly, I’ve made these at every gathering, and there’s always someone asking for the recipe. This is one dessert that’s versatile enough for the simplest family dinner or a more dressed-up celebration.
Top Tips for Perfecting Your Zucchini Lemon Bars with Cream Cheese Swirl
Having made these more times than I can count, I’ve gathered a few insider tips that’ll take your bars from good to wow. First, when shredding zucchini, give it a good squeeze in a clean towel or paper towel—moisture is the enemy of a flaky crust or a firm filling. If the zucchini is too wet, your filling may turn out runny, which isn’t what you want. I’ve also learned that overmixing the batter can make the filling dense—so stir just until combined. For the swirl, I like adding a touch more lemon zest—it brightens everything and gives a lovely color contrast. If you’re craving extra flavor, a teaspoon of fresh thyme or basil stirred into the filling can add a surprising herbaceous note, which pairs nicely with the lemon and zucchini. One mistake I made early on was baking too long, making the bars dry instead of tender. Every oven’s different, so I always start checking around the 25-minute mark; look for golden edges and a slightly puffed center. For the glaze or final dusting, I prefer powdered sugar sifted over the top—no lumps! If you want a glossier finish, a light lemon glaze made with powdered sugar and lemon juice is fantastic. Lastly, try experimenting with different toppings—berries, toasted coconut, or candied ginger can all elevate these bars into something uniquely yours. That’s part of the fun—making it your own!
Storing and Reheating Tips
This batch keeps really well, which is great for leftovers or prepping ahead. Store in an airtight container at room temperature for up to 2 days—you can cover with foil or a tight lid. I find that keeping them at room temp preserves the soft, tender texture the best. If you want to keep them longer, pop them into the fridge for up to 4 days. Just remember to bring them to room temperature (or give them a quick pop in the microwave for 10-15 seconds) before serving—they taste even better that way. For longer storage, these can be frozen—wrap each piece tightly in plastic wrap, then store in a freezer-safe bag for up to 2 months. Thaw overnight in the fridge or at room temp for about 30 minutes before serving. If youve added the glaze, I’d recommend sprinkling powdered sugar just before serving to keep that fresh, sweet finish. I’ve found that this keeps the bars tasting fresh and moist—even days later, they’re still delicious. The key is to avoid exposing them to too much humidity or heat—those moisture tricks can make the crust soggy, and nobody wants a soggy lemon bar! The freezer method works like a charm for when I want a sweet treat in a pinch. Just be mindful to reheat gently, and they’ll taste almost like fresh out of the oven.
Frequently Asked Questions
Final Thoughts
If you’re anything like me, you love a dessert that’s comforting but also a little unexpected. These zucchini lemon bars with cream cheese swirl are just that—they’re full of sunshine, moisture, and a touch of veggie goodness that’s almost sneaky. I’ve tested this recipe so many times, and each batch gets a little tweak—it’s become my go-to when I want something just a little special but still effortless. The smell alone when baking is enough to fill the house with happiness, and the taste? Bright, tangy, creamy, and perfectly balanced. Honestly, I think this might be one of my all-time favorites—and judging by how quickly it disappears, I’m pretty sure I’m not alone. If you try making these, I’d love to hear how it goes. Snap a picture, leave a comment, or just tell me how your family enjoyed it. Happy baking—may your kitchen always be filled with good scents and even better memories!
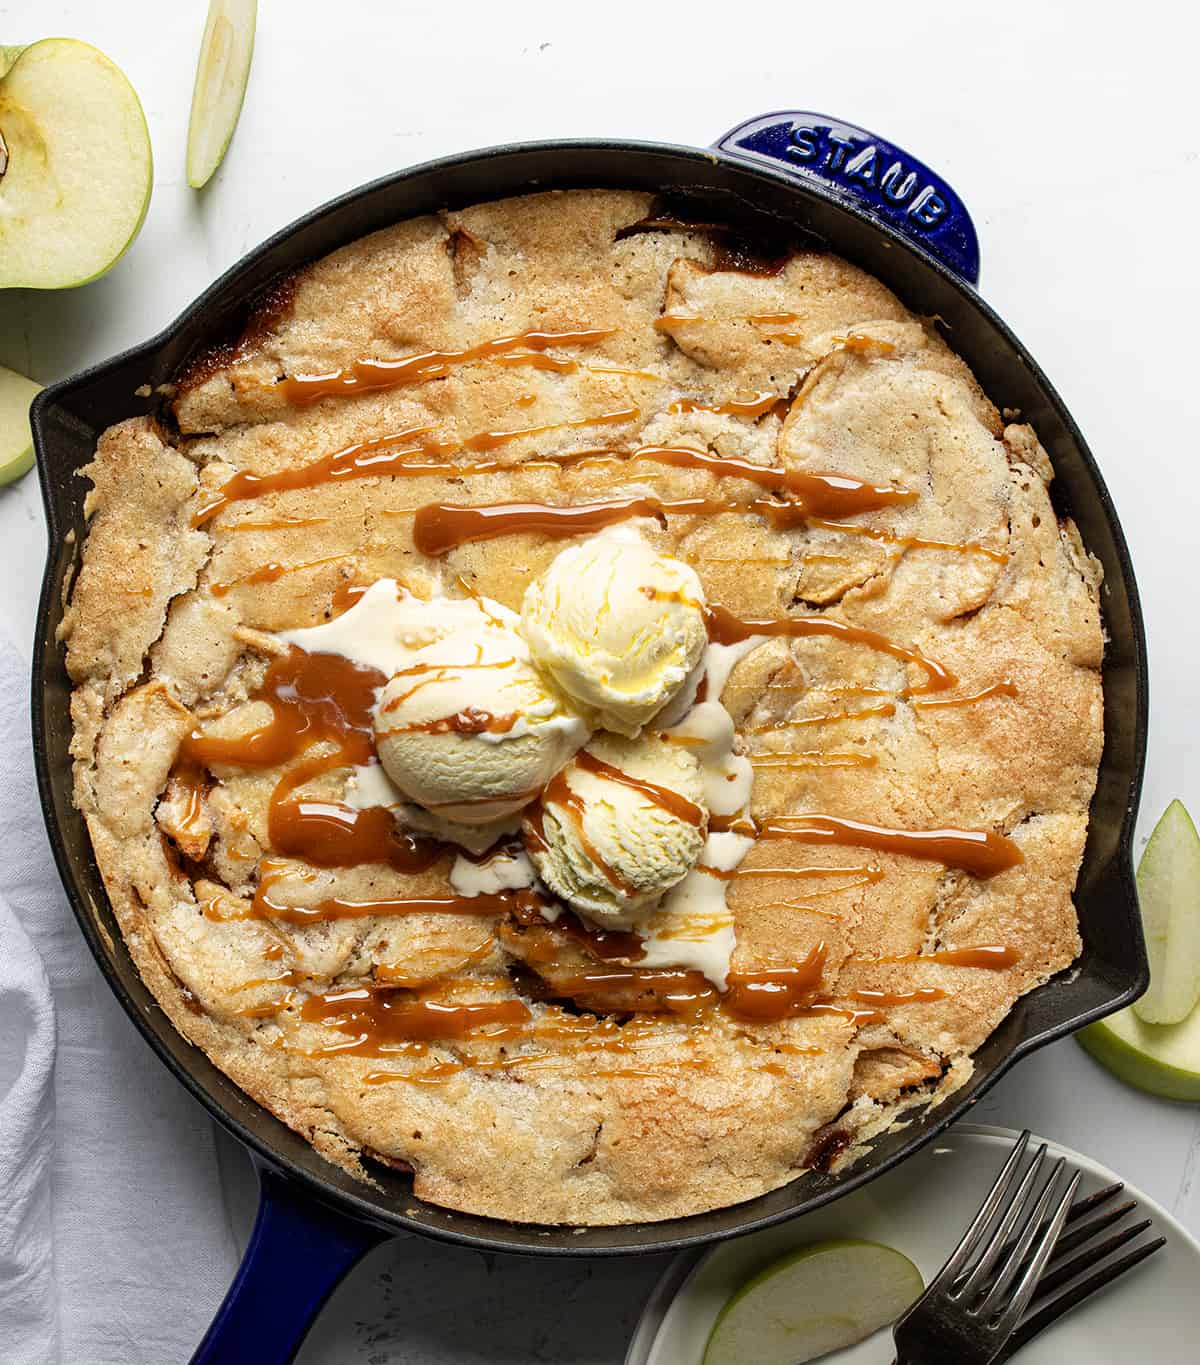
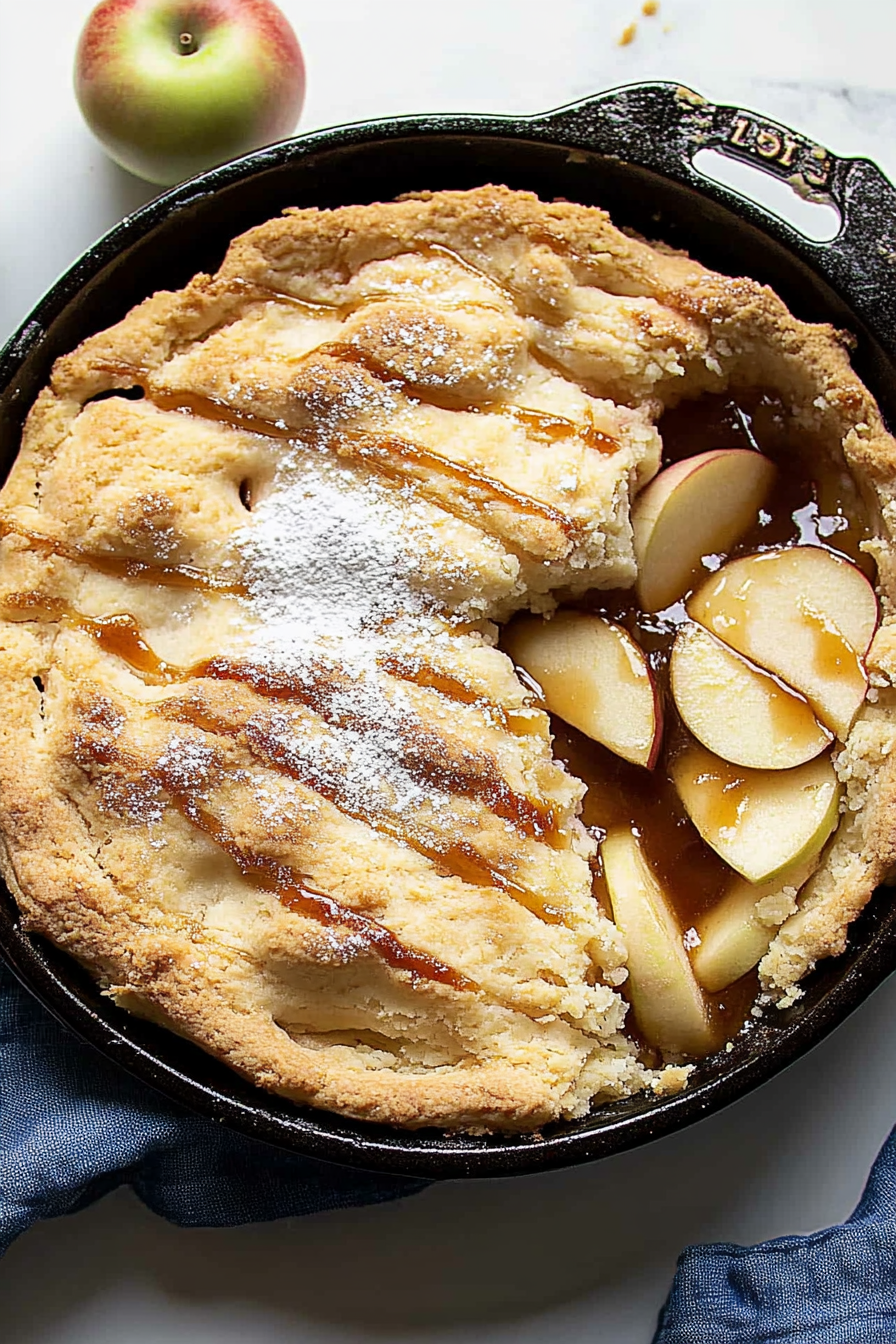
Swedish apple pie
Ingredients
Method
- Preheat oven to 350°F and spray a 9-inch oven-safe skillet with nonstick cooking spray.
- In a large bowl, combine sliced apples with sugar and cinnamon. Toss until evenly coated. Pour into the prepared pie pan.
- In a medium bowl, mix melted butter, egg, sugar, and flour until creamy.
- Spread the mixture evenly over the apples.
- Bake for 60 minutes, or until the top is golden and apples are tender.
- Allow the pie to cool slightly before serving. Top with a scoop of ice cream if desired.