
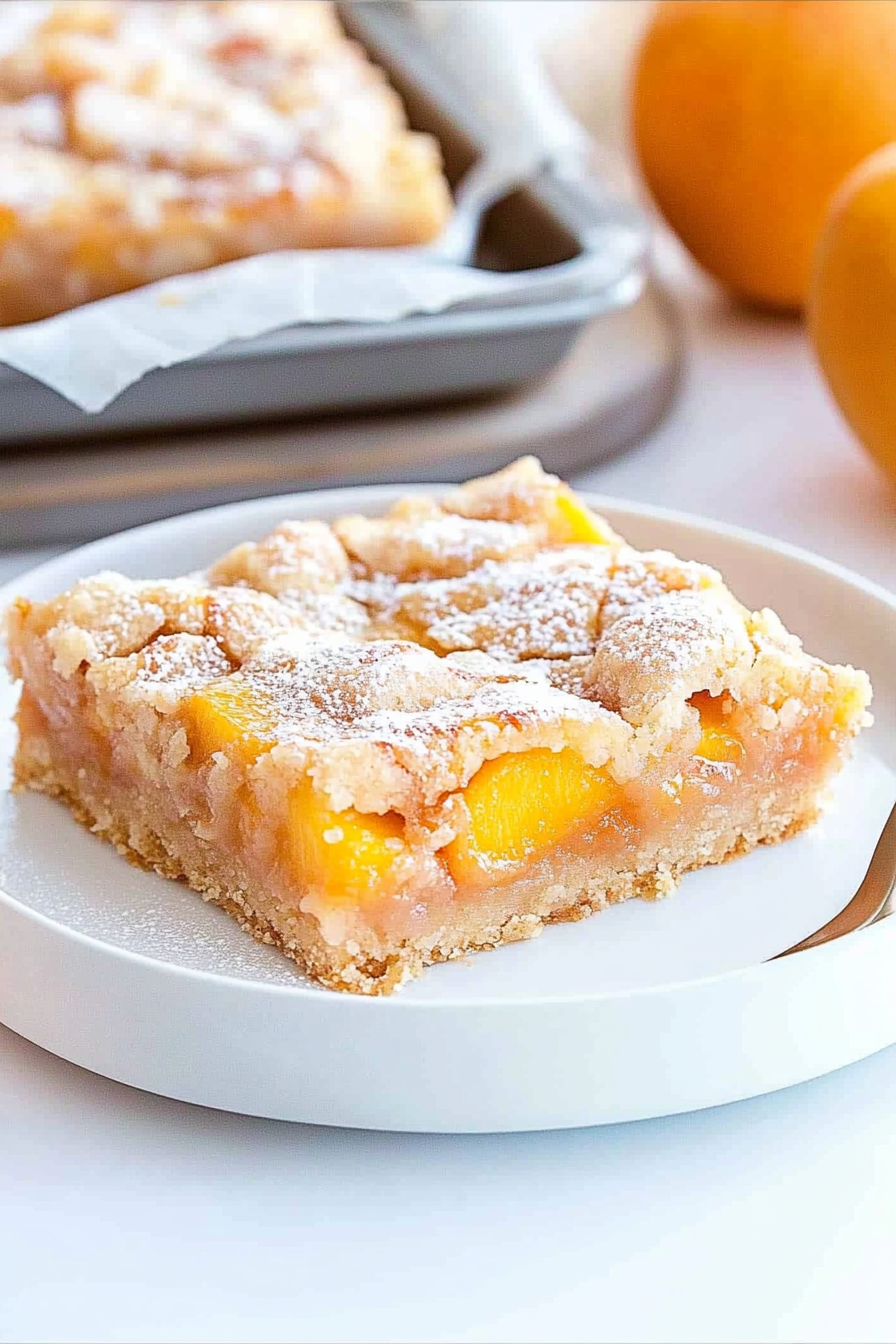
Easy Peach Pie Bars Recipe
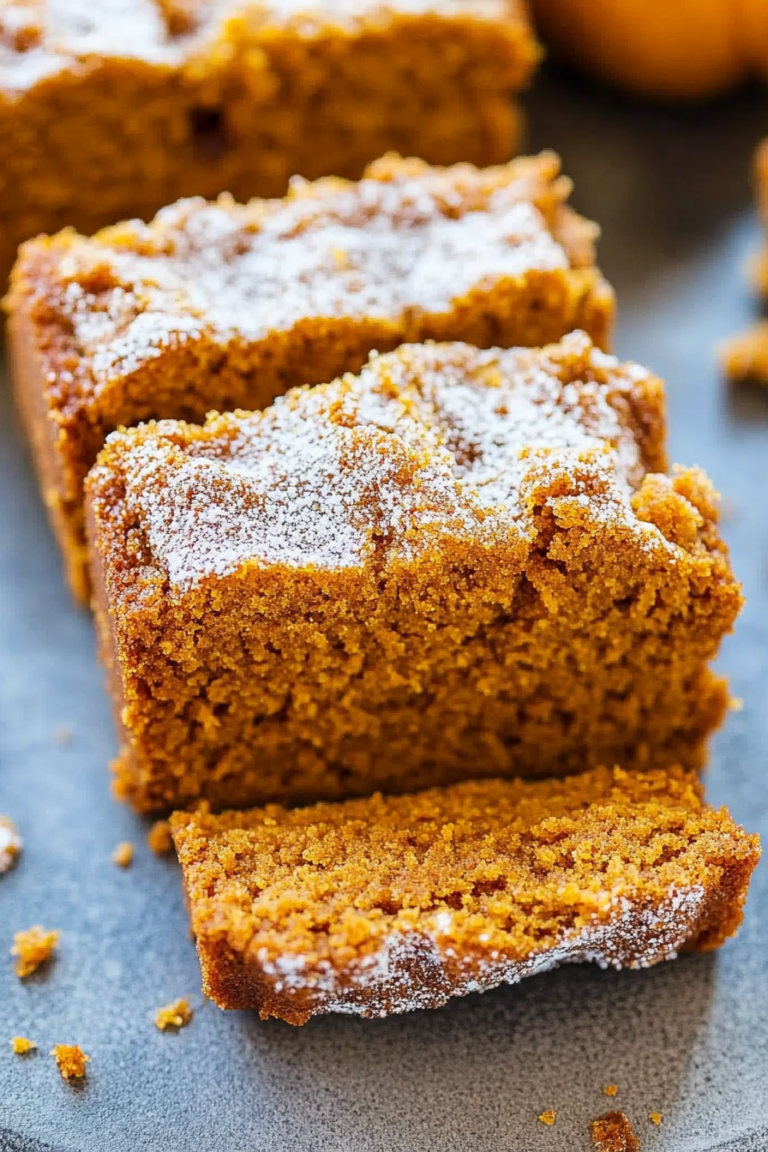
There’s something so comforting about a warm slice of banana bread, right? But what if I told you this version — packed with zucchini and just a hint of vanilla — is not only healthier but also ridiculously moist and flavorful? I remember the first time I threw this together on a rainy Sunday afternoon. My kids were bouncing off the walls, craving something sweet, and I had a bunch of spotted bananas and a lonely zucchini sitting in the fridge. I thought, “Why not?” To my surprise, it turned into a recipe everyone at my house asks for now — seriously, they ask for this all the time. The smell alone, when it’s baking, kind of lures everyone into the kitchen like a magnet. And the best part? It’s honestly so simple to make. No fancy ingredients, no complicated steps, just honest, cozy baking that feels like a warm hug. Trust me, once you try this zucchini banana bread, it’ll become your go-to when you want something sweet but still feel good about it.
What is Zucchini Banana Bread?
Think of this as a delightful twist on classic banana bread — only it’s infused with shredded zucchini, which keeps it so moist and tender. It’s essentially a mash-up of two humble vegetables that, when combined, create pure magic. The name might sound a little unusual at first, but I swear, no one will notice the zucchini once they take a bite! It’s like sneaking in a vegetable without anyone realizing. This bread is perfect for breakfast, a quick snack, or even a dessert when you want something sweet but not overly indulgent. It’s a forgiving recipe, too — you can swap in different kinds of sweeteners or add nuts or chocolate chips if you’re feeling fancy. The concept is simple: mash ripe bananas into your batter for sweetness, grate zucchini for moisture, and add a hint of vanilla for that warm, cozy aroma. Think of it as an all-in-one treat that’s healthy enough to feel good about eating any time.
Why you’ll love this recipe?
What I love most about this zucchini banana bread is how it hits all those sweet spots — literally and figuratively. First, the flavor. The bananas provide a rich, caramelized sweetness, and the zucchini adds a subtle earthiness that perfectly balances it out. It’s like comfort food meets health food, and honestly, it’s impossible to tell there’s zucchini in it unless I tell my friends to look for it. Second, the ease. I’ve made this so many times that I’ve practically memorized the process — just dump, mix, pour, bake. It’s that simple. No fuss, no complicated steps, and it’s still impressive enough to serve to guests. Plus, it’s super budget-friendly. Ripe bananas are usually on sale, and zucchinis are cheap and plentiful, especially in summer. I’ve experimented with different add-ins, like chopped walnuts or chocolate chips, and it never fails to elevate the whole experience. And here’s a fun fact — I once tested this with almond milk instead of regular milk, and it made the bread even creamier and richer! It’s versatile, forgiving, and honestly, one of those recipes that just makes you smile every time you bake it.
How do you make Zucchini Banana Bread?
Quick Overview
This zucchini banana bread comes together in a snap. You start by preheating your oven and preparing your loaf pan with parchment or butter. Then, you mash bananas and grate zucchini — don’t forget to squeeze out excess moisture — before mixing everything together. The batter is super forgiving, so don’t overthink it. Pour it into your prepared pan, swirl in any extras like chocolate chips, and bake until a toothpick comes out clean. The entire process takes about an hour, and the aroma alone makes it worth every minute. Best of all, it stays moist and delicious for days — if it lasts that long!
Ingredients
For the Main Batter:
– 3 ripe bananas (trust me, the overripe ones are perfect)
– 1 cup grated zucchini (squeeze out excess water)
– 1/2 cup olive oil or melted unsalted butter
– 3/4 cup brown sugar (or honey/maple syrup for natural sweetness)
– 2 large eggs
– 1 teaspoon vanilla extract
– 1 1/2 cups all-purpose flour (or gluten-free blend)
– 1 teaspoon baking soda
– 1/2 teaspoon baking powder
– 1/2 teaspoon salt
– 1 teaspoon cinnamon (optional but adds a lovely warmth)
For the Filling (Optional):
– 1/2 cup chocolate chips
– 1/2 cup chopped walnuts or pecans
– 1/4 cup shredded coconut (if you’re into it)
For the Glaze (Optional but dreamy):
– 1/2 cup powdered sugar
– 1-2 teaspoons milk or lemon juice
– A few drops of vanilla
Step-by-Step Instructions
Step 1: Preheat & Prep Pan
Heat your oven to 350°F (175°C). Grease a standard loaf pan with butter or line it with parchment paper — I find that makes cleaning up a breeze. Set it aside while you get everything ready.
Step 2: Mix Dry Ingredients
In a small bowl, whisk together the flour, baking soda, baking powder, salt, and cinnamon. This step ensures all the leaveners are evenly distributed, which gives your bread that perfect rise and fluffy texture.
Step 3: Mix Wet Ingredients
In a large mixing bowl, mash the bananas until smooth — I do this with a fork, but a potato masher works, too. Add the sugar, eggs, vanilla, and melted butter or oil. Mix until everything’s combined and a little frothy.
Step 4: Combine
Gradually add the dry ingredients into the wet, gently folding with a spatula just until combined. Overmixing can make the bread dense, so stir until it’s just blended — no more. It’s okay if a few streaks of flour remain; you’re aiming for a tender crumb.
Step 5: Prepare Filling
If you’re adding chocolate chips or nuts, now’s the time — fold them into the batter. For a more marbled effect, reserve a handful of batter and swirl it into the top with a skewer or knife after pouring into the pan.
Step 6: Layer & Swirl
Pour half the batter into your pan. Drop spoonfuls of the rest, then swirl gently with a knife to create pretty marbling. This technique is surprisingly simple but makes your bread look so professional!
Step 7: Bake
Pop it into the oven for about 50-60 minutes. Check doneness with a toothpick inserted in the center — if it comes out clean, you’re good. If not, give it another 5-10 minutes. Ovens vary, so keep an eye on it after 45 minutes.
Step 8: Cool & Glaze
Allow the bread to cool in the pan for about 15 minutes, then transfer to a wire rack. If you’re glazing, mix your powdered sugar with a splash of milk and vanilla, then drizzle over the top once the bread is fully cooled.
Step 9: Slice & Serve
Use a serrated knife for clean slices. Warm or at room temperature, it’s divine either way. I love serving this with a dollop of Greek yogurt or a scoop of vanilla ice cream for an extra treat. Or just enjoy it plain — it’s that good.
What to Serve It With
This bread is so adaptable. For breakfast, I often slice it thick and serve it with my favorite coffee — think a big mug of black coffee or a frothy cappuccino. The rich banana flavor pairs beautifully with a little smear of butter or cream cheese. On weekends, I love turning it into a brunch centerpiece — maybe with fresh berries and a drizzle of honey. For dessert, a scoop of vanilla ice cream or a splash of caramel sauce turns this humble loaf into an impressive treat. And honestly, my kids ask for this on lazy afternoons as a cozy snack. They love to warm a slice and spread a little butter on top, which melts perfectly into the crumb. It’s also fantastic toasted the next day — the edges get delightfully crispy, and the flavor deepens even more. The versatility of this bread means it’s always a hit, whether we’re celebrating or just enjoying a simple, comforting afternoon.
Top Tips for Perfecting Your Zucchini Banana Bread
Over the years, I’ve learned a few tricks to make this recipe even better. First, don’t skip squeezing out excess moisture from your zucchini — a damp zucchini can make your bread too dense or soggy. I used to forget this step and wonder why my loaf was a bit flat or watery in the middle. Also, if you want a more decadent treat, swap in dark chocolate chips or a handful of chopped nuts — just fold them in at the last minute. When mixing, be gentle. Overmixing the batter makes a tough loaf, trust me — stir until just combined. If you want that beautiful swirl, use a skewer to drag through the batter in zigzags after pouring it into the pan; it creates those lovely marbled patterns I love to photograph. Want to switch things up? Try using coconut sugar or honey instead of white sugar for natural sweetness. And if you’re keto or grain-free, experiment with almond or coconut flour — but remember, they absorb differently, so adjust your liquids accordingly. I tested this with a tiny splash of almond milk, and honestly, it made it even creamier. My biggest tip? Don’t peek too often during baking — opening the oven lets out heat and can make your bread crack or sink. Trust the timer, and you’ll be rewarded with perfection every time.
Storing and Reheating Tips
This bread keeps surprisingly well — I usually wrap it tightly in plastic wrap or store it in an airtight container. If kept at room temp, it stays fresh for about 2 days, though I prefer refrigerating it after that. To prevent it from drying out, I recommend slicing it only when you’re ready to serve. In the fridge, it lasts up to a week, still moist and yummy. For longer storage, freeze slices individually — just wrap each slice in plastic, then pop them in a zipper bag. To reheat, I just warm a slice in the microwave for about 15-20 seconds. The bread comes out warm and soft, like freshly baked. If you’ve glazed it, I’d recommend adding that just before serving — glazing a cold loaf can make the glaze less appealing or uneven. I also love to warm it up and top with a little butter or cream cheese for that extra indulgence. Whether you’re keeping leftovers or prepping in advance, this bread is a resilient, lovable treat that tastes even better the next day.
Frequently Asked Questions
Final Thoughts
Honestly, this zucchini banana bread has become a staple in my kitchen. It’s wholesome, moist, and so satisfying — I often make a double batch because it disappears in minutes whenever I set it out. The blend of flavors and textures keeps things interesting, and I love how adaptable it is; I’ve added blueberries, switched out sugar for maple syrup, and experimented with gluten-free flour, and each time, it turns out amazing. To me, baking is about creating comfort and joy, and this recipe always does the trick. I hope you give it a try and find your own little tweaks that make it perfect for your family. Remember, even if you’re not a pro baker, a little spoonful of batter tasting the raw mixture is the best way to check sweetness — just don’t blame me if you end up eating half the bowl! Happy baking — can’t wait to hear how yours turns out!

peach pie bars
Ingredients
Method
- Preheat oven to 350°F. Line a 13x9 baking dish with parchment paper and set aside.
- In a large bowl, beat melted butter with powdered sugar until smooth. Add vanilla extract and mix well.
- Gradually add flour and mix until crumbly dough forms. Reserve 1 cup of crumbs for topping.
- Press remaining crumbs into the prepared baking dish to form a crust.
- In a bowl, combine peach pie filling with cinnamon. Pour over the crust.
- Sprinkle the reserved crumbs evenly over the filling.
- Bake for 30 minutes or until edges are lightly browned. Allow to cool.
- Cut into bars and serve.


This sounds amazing! I love how it combines comfort with a healthy twist—definitely adding it to my baking list.