
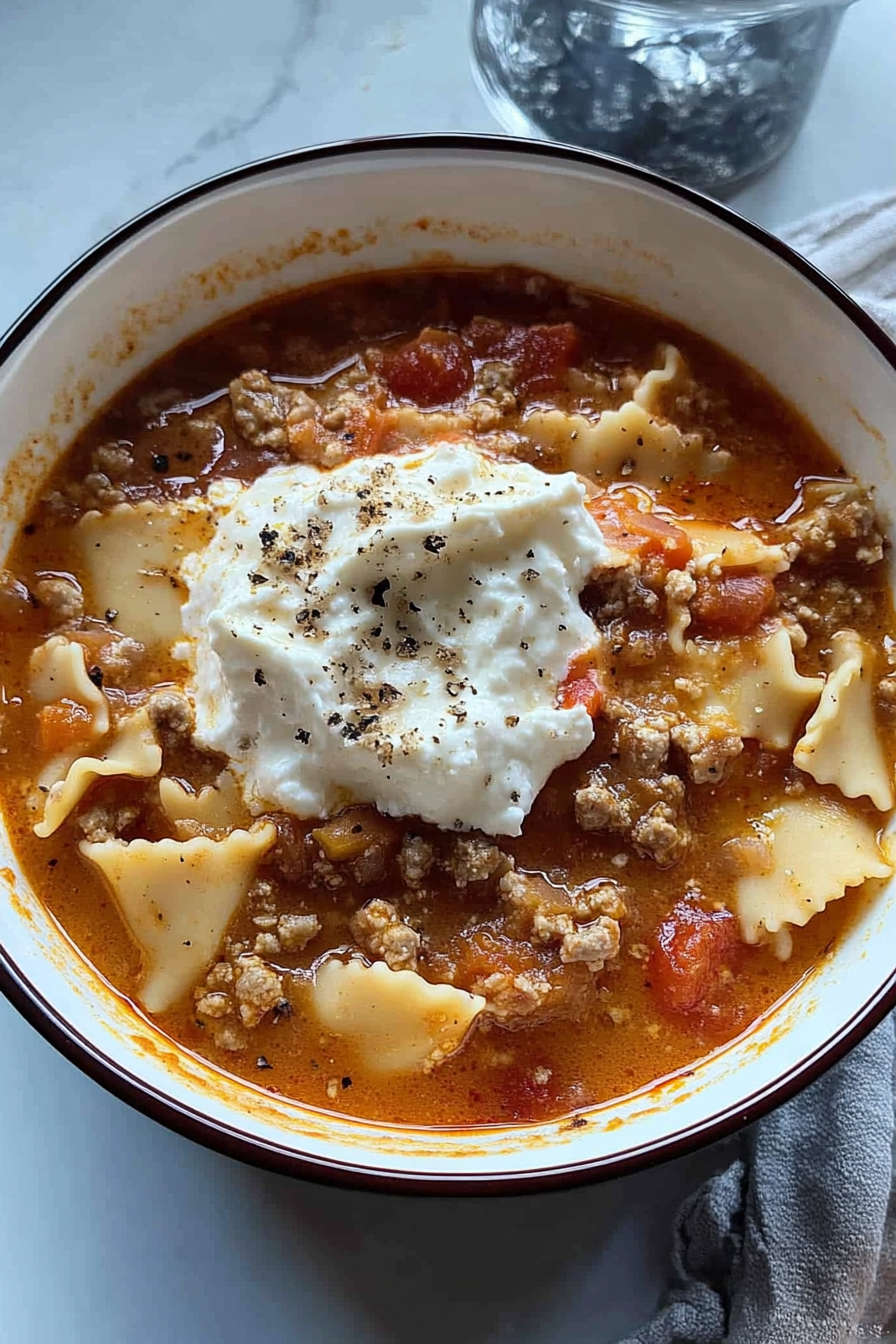
Easy Lasagna Soup Recipe
There’s this cozy little bakery in my neighborhood that makes the most incredible chocolate zucchini cake, and I swear, it’s the one thing that reconnected me with my childhood love for baking. The smell of warm chocolate and fresh zucchini baking together? It’s honestly heaven. I always do this when I want something sweet but don’t want to go through the fuss of frosting a full cake — this snack cake is more like a homemade secret weapon. It’s so moist, so rich, and the best part? It’s practically foolproof. My kids ask for this all the time, especially on weekends, and I have to admit, I sneak a piece with my coffee in the mornings, too. If I’m honest, it’s become my go-to when I’ve got a bunch of zucchini from the garden and need something quick to satisfy that sweet tooth. Trust me on this one — once you make it, it’s going to disappear in minutes at your house, too.
What is a Zucchini Snack Cake?
This isn’t your typical zucchini bread, although it’s close relatives with that same sneaky veggie twist. Think of it as a decadent, chocolatey little cake that uses grated zucchini as its secret ingredient to keep everything ultra-moist and tender. It’s essentially a cross between a moist brownie and a soft crumb cake, but with a light, bright flavor that’s more than just chocolate. The name might sound fancy, but really, it’s just a cozy, straightforward treat that’s perfect for anytime — breakfast, snack, or dessert. The zucchini adds such a wonderful texture and gentle earthiness that balances out all that chocolate richness. I love how versatile it is—cut it into squares for a quick snack, or serve it with whipped cream for dessert. It’s a celebration of simple ingredients coming together in a way that feels like a warm hug from the inside out.
Why you’ll love this recipe?
What I love most about this zucchini snack cake is how it manages to be indulgently chocolatey while still feeling sneaky-healthier because of the zucchini. It’s got this incredible, fudgy flavor that doesn’t scream “healthy,” but knowing what’s tucked inside keeps me smiling. Plus, it’s absurdly easy to whip up — I’ve made this countless times and it never fails. The batter is practically foolproof; I just toss everything in one bowl and whisk away, which makes quick clean-up a dream. And honestly, it’s super budget-friendly. The ingredients are staples I always have at home: flour, cocoa powder, sugar, zucchini, eggs. No fancy extras. I’ve tested this with almond milk and it actually made it even creamier! The best part? It’s versatile. Serve it plain, dusted with powdered sugar, or topped with a drizzle of caramel. Either way, it’s a guaranteed crowd-pleaser, and I promise, once you try it, it’s going to become a staple in your kitchen too.
How do I make Zucchini Snack Cake?
Quick Overview
This cake comes together in about 45 minutes, from start to finish, which is perfect when you’ve got a craving for chocolate and need something quick. The magic lies in mixing all the ingredients at once — no creaming or fussing — then pouring it into a loaf or square pan. After baking for about 40 minutes, you’ll end up with a soft, fudgy cake that practically melts in your mouth. The grated zucchini keeps it super moist, so you don’t even need frosting—the cake’s rich enough on its own. Trust me, once it’s out of the oven and cooled just a little, you’ll want to dive right in. It’s perfect for when you want something homemade but don’t want to spend hours in the kitchen.
Ingredients
For the Main Batter:
– 1 ½ cups grated zucchini (about 2 small zucchinis; I always squeeze out excess moisture so the batter isn’t watery)
– 1 cup all-purpose flour
– ½ cup unsweetened cocoa powder (use good quality for max flavor)
– 1 cup granulated sugar
– 1 teaspoon baking powder
– ½ teaspoon baking soda
– ½ teaspoon salt
– 2 large eggs
– ½ cup vegetable oil (or melted coconut oil if you love a subtle coconut flavor)
– 1 teaspoon vanilla extract
For the Filling (optional but recommended):
– ½ cup mini chocolate chips or chunks
– A handful of chopped nuts (pecans or walnuts add great crunch)
For the Glaze (optional):
– ½ cup melted chocolate or chocolate chips
– 2 tablespoons heavy cream or coconut milk (for a thinner glaze)
Step-by-Step Instructions
Step 1: Preheat & Prep Pan
Set your oven to 350°F (175°C). Grease a 9×9-inch square pan or a loaf pan with butter or non-stick spray. Line with parchment if you want easy removal, but it’s optional. I always do this when I want perfect slices — it’s a lifesaver!
Step 2: Mix Dry Ingredients
In a big bowl, whisk together the flour, cocoa powder, sugar, baking powder, baking soda, and salt. I always do this first because it ensures everything is evenly distributed and prevents clumps. Plus, it sets the stage for smooth mixing later.
Step 3: Mix Wet Ingredients
In a separate bowl, beat the eggs, then stir in the oil and vanilla. Grate the zucchini, squeeze out any excess moisture, and fold it into the wet mixture. I’ve learned to really squeeze out that moisture — it helps keep the batter from becoming too watery and ensures a nice, tender crumb.
Step 4: Combine
Add the wet mixture into the dry ingredients. Gently fold everything together until just combined. Don’t overmix, or the cake could turn denser than I want it to be. If you see streaks of flour, that’s okay — fold just a little more until it’s almost smooth.
Step 5: Prepare Filling
If you’re using chocolate chips or nuts, fold them into the batter here. I love to sprinkle a few extra on top before baking for that irresistible chocolatey burst in every bite.
Step 6: Layer & Swirl
Pour half of the batter into the prepared pan. If you want a marbled effect, drop spoonfuls of the remaining batter and use a knife to swirl it slightly. This adds a little eye-catching pattern and makes each slice look pretty — I always get compliments when I do this!
Step 7: Bake
Bake for about 40 minutes, or until a toothpick inserted in the center comes out with moist crumbs — not wet batter. Every oven is a little different, so I check around the 35-minute mark to avoid overbaking. Trust me, a slightly fudgier cake is better than a dry one!
Step 8: Cool & Glaze
Let it cool in the pan for about 15 minutes, then transfer to a wire rack if you used parchment. If you’re glazing, do it while the cake is still warm so the chocolate melts beautifully on top. I love pouring a glossy chocolate glaze over and letting it drip down the sides — it’s decadent and makes your kitchen smell like cocoa heaven.
Step 9: Slice & Serve
Once cooled, cut into squares or slices. For clean cuts, use a sharp serrated knife and wipe it clean between slices. Serve it plain, dusted with powdered sugar, or with a dollop of whipped cream. Warm or room temperature — either way, it’s pure comfort.
What to Serve It With
This cake is so versatile, I serve it pretty much anywhere. For breakfast, pair it with a strong cup of coffee or a glass of cold milk — that contrast is just irresistible. At brunch, I love to cut it into thick slices and top with fresh berries; a little whipped cream can turn it into a fancy little dessert without any extra fuss.
As an after-dinner treat, I sometimes warm a slice for a minute in the microwave and serve it with vanilla ice cream. The warm chocolate and moist zucchini make it feel like a little hug on a plate. During cozy weekends, I keep a stash in the fridge, and it’s my kids’ favorite when they want something sweet but don’t want to wait for a cake to cool or frost. Honestly, it’s become a family favorite — I even sneak in a bit more zucchini next time just to keep everyone happily indulging while feeling a little “healthy”.
Top Tips for Perfecting Your Chocolate Zucchini Snack Cake
After making this so many times, I’ve picked up a few secret tricks. First, always squeeze out the excess moisture from the zucchini; it makes a huge difference between a dense cake and a fluffy one. I’ve tried blending the zucchini in a food processor, but I prefer grating it with a box grater — faster and keeps that nice texture.
To prevent overmixing, I fold the wet and dry ingredients gently — it’s the key to keeping everything tender and soft. If you want a prettier swirl or want to add a pop of color, try swirling in some red or white chocolate chips. A tip I tested recently was adding a teaspoon of espresso powder — it deepens the chocolate flavor and makes the cake taste extra luxurious.
Baking can be tricky because oven temperatures vary, so I always start checking around 35 minutes. A toothpick with a few moist crumbs is perfect — you don’t want it completely dry, or it loses that fudgy moistness. When it’s done, I let it cool a little, but not completely — that’s when I pour my glaze on and watch it seep into every corner, creating that irresistible shiny finish.
For gluten-free friends, I’ve tested almond or oat flour, and while the texture changes slightly, it still turns out fantastic. Just remember that gluten-free flours often need a little extra moisture or binding agents like xanthan gum. As for the glaze, sometimes I skip it altogether and sprinkle with powdered sugar — simple but just as delicious.
Storing and Reheating Tips
This cake stays delicious for days if stored properly. I keep leftovers in an airtight container at room temperature for up to two days — just make sure it’s covered well to retain moisture. After that, I pop it in the fridge. It lasts about five days refrigerated, though I find it tastes best within the first three. Just cover with plastic wrap or transfer to an airtight container. It’s so good cold or slightly warmed up.
If you want to freeze it, I recommend slicing first. Wrap individual pieces tightly with plastic wrap, then pop into a zip-top bag. It keeps well for up to three months. Thaw at room temperature or warm slightly in the microwave for a quick, cozy treat. For the best taste, I usually add the glaze or dust it with powdered sugar after reheating — that way, it’s as fresh as when it first came out of the oven.
Frequently Asked Questions
Final Thoughts
Honestly, this chocolate zucchini snack cake has become one of my all-time favorites for a reason. It’s simple, forgiving, and packed with flavor — plus, that sneaky healthy twist makes me feel a little better about indulging. Every time I make it, I hear “mmm, this is the best,” from my family, and it warms my heart. If you’re craving something chocolatey, moist, and just a little bit wholesome, give this a try. Once you do, I promise, it’ll be on repeat in your kitchen, too. I’d love to hear how yours turns out — share your pics, variations, or secret tips in the comments below. Happy baking, friends!

lasagna soup
Ingredients
Method
- In a large pot, heat olive oil over medium high heat. Add diced onion and cook for a few minutes. Add minced garlic and cook for 30 seconds. Add sausage and break it up with a spoon, cooking until no longer pink, about 5 minutes. Drain excess fat if desired.
- Add chicken broth, crushed tomatoes, tomato paste, Italian herbs, sugar (if using), salt, and pepper. Stir to combine and bring to a boil. Reduce heat, cover, and simmer for 10 minutes.
- Add broken lasagna noodles to the pot, stir, cover, and cook another 10 minutes or until al dente. Stir in heavy cream right before serving.
- In a bowl, mix ricotta, mozzarella, parmesan, chopped basil, salt, and pepper. Serve soup hot with a scoop of the cheese mixture on top.


I totally get that—there’s something about a comforting dessert that just hits different and brings back such warm memories!
I love how comforting this lasagna soup is—and that chocolate zucchini cake story brought a smile to my face! Reminds me of simple joys.
That bakery story is so sweet! I need to find a place like that near me.
I love that—sometimes the simplest treats hold the deepest memories. That sounds absolutely heavenly!
I totally agree—sometimes it’s the simplest treats that bring back the warmest memories. That sounds absolutely delicious!