
Italian Dream Cake How to Make It
I remember the first time I tasted a slice of this zucchini swirl cake — it was at my grandma’s house, a lazy Sunday afternoon, the scent of fresh coffee filling the air. The moment I took that first bite, I was hooked. It’s not your typical cake; it’s moist, subtly sweet, and has this lovely, almost secret swirl of flavors that makes it feel cozy and special. Honestly, I was surprised at how incredibly easy it is to make. I always do this when I want something homemade but don’t want to spend hours in the kitchen. Plus, it’s a sneaky way to get some sneaky veggies into my kids’ diets without a fuss. My kids ask for this all the time, especially when they’re craving something sweet but I don’t feel like baking a big dessert. Trust me, this one’s a lifesaver on busy nights or when you want to impress someone with very little effort. I’ve made it with almond milk, and honestly, it made it even creamier — that’s a little hack I love sharing. So, grab some zucchini and let’s get baking — you’re going to adore this as much as we do!
What is Zucchini Swirl Cake?
This zucchini swirl cake is like the best of both worlds — a tender, fluffy cake with a delightful hint of vegetable goodness swirling through it. Think of it as a cross between a quick bread and a classic vanilla cake, but with an unexpected twist that keeps everyone guessing. It’s essentially a simple batter infused with freshly grated zucchini, which adds moisture and a lightness you can’t quite replicate with anything else. The “swirl” part is usually a sweet cinnamon or nutty mixture that gets beautifully marbled through the batter, making each slice look like a work of art. Its name might sound fancy, but I promise, it’s as approachable as grandma’s apple pie — or even easier. When I say it’s a crowd-pleaser, I’m not just being polite; I’ve watched friends, family, and neighbors gobble this up in minutes. It’s perfect for breakfast, dessert, or even a sneaky snack when you need a little comfort. The best part? It’s adaptable — light, gluten-free, or sugar-free versions work beautifully too. Think of it as your new favorite cake that feels fancy but is truly foolproof.
Why you’ll love this recipe?
What I love most about this zucchini swirl cake is how it ticks all the boxes — it’s super flavorful, incredibly simple, and budget-friendly. The flavor? Oh boy, it’s soft, just slightly sweet, with a cozy cinnamon kick that makes every bite feel like a hug. The zucchini keeps it moist and tender, so there’s no dry cake drama here. Plus, the smell that wafts through the kitchen while it’s baking? It’s pure comfort — like Sunday mornings in a slice. When it comes to simplicity, I promise you, there’s no complicated frosting or fancy techniques. Just grated zucchini, a handful of pantry staples, and a quick mix, and you’re good to go. This recipe is also a real rescue on busy nights — I always keep some grated zucchini in the freezer for moments like these. And the best part? You can easily customize it. Want a little more vanilla? A handful of chopped nuts? Or maybe a drizzle of honey instead of sugar? No problem. It’s a versatile little number that adapts to your mood and ingredients. My favorite thing? The swirl reveals itself during baking, creating little marbled pockets of cinnamon goodness that delight the eye and the palate. Honestly, what I love most about this is how it makes me feel — cozy, accomplished, and a little bit like I’ve created something truly special without too much fuss. That’s a true win in my book!
How do I make Zucchini Swirl Cake?
Quick Overview
This zucchini swirl cake is a breeze to whip up, especially once you get the hang of it. The process involves whisking dry ingredients, mixing wet ones, and then gently combining them to keep the batter light. I love making the swirl filling while the oven preheats — it all comes together quickly, and the aroma begins to fill the house before you even bake it. The secret to that gorgeous swirl? A quick swirl of cinnamon sugar over the batter, then a gentle spooning of the filling on top, followed by a swirl with a knife for that perfect marbled look. It’s perfect for last-minute gatherings or when you want to feel like a fancy baker, even if you’re not. Once baked to golden perfection, a quick glaze brings the whole thing together. Trust me, the hardest part is waiting for it to cool before slicing — but I promise, it’s worth it. The texture is so moist and tender that one slice just isn’t enough.
Ingredients
For the Main Batter:
– 2 cups all-purpose flour (You can swap in almond or coconut flour for gluten-free, but I test with regular first!)
– 1 ½ teaspoons baking powder
– ½ teaspoon baking soda
– ½ teaspoon salt
– 1 teaspoon ground cinnamon (For that warm, cozy flavor)
– 1 cup sugar (or honey for natural sweetness)
– ½ cup vegetable oil or melted butter
– 2 large eggs
– 1 teaspoon vanilla extract
– 1 cup grated zucchini (Squeeze out excess moisture; I always do this cotton ball trick)
For the Filling:
– ¼ cup brown sugar or coconut sugar
– 1 tablespoon cinnamon
– ½ cup chopped walnuts or pecans (optional but adds nice crunch)
– ¼ cup softened butter (or coconut oil for dairy-free)
– ½ cup cream cheese (for extra richness, but optional)
For the Glaze:
– ½ cup powdered sugar
– 1-2 teaspoons milk or lemon juice
– A few drops of vanilla (if you like)
Step-by-Step Instructions
Step 1: Preheat & Prep Pan
Set your oven to 350°F (175°C). Grease a 9-inch round cake pan or line it with parchment paper. I like to spray it well and then dust with a little flour or sugar — no sticking magic here! While it heats, grate your zucchini, then squeeze out as much moisture as possible — a cotton towel works wonders. I tested the batter with almond milk instead of regular milk, and honestly, it made the cake even creamier and lighter. Tip: If you want a taller cake, double the recipe and use a bigger pan.
Step 2: Mix Dry Ingredients
In a large bowl, whisk together the flour, baking powder, baking soda, salt, and cinnamon. When I do this, I pay attention to how evenly it’s combined — you don’t want any clumps of baking soda or cinnamon. It sets the stage for that airy, tender crumb we’re after.
Step 3: Mix Wet Ingredients
In a separate bowl, whisk the sugar, oil, eggs, and vanilla until smooth and slightly frothy. I always do this first because it helps the flavors meld. I’ve tested adding a splash of almond extract, and honestly, it adds a lovely little twist!
Step 4: Combine
Gradually fold the wet into the dry ingredients, stirring gently until just combined. Be careful not to overmix — a few lumps are okay; you want a fluffy batter, not glue. Overmixing makes the cake dense, and nobody wants that. The batter should be thick but pourable.
Step 5: Prepare Filling
Mix the brown sugar, cinnamon, nuts, and softened butter together until crumbly. If you’re feeling indulgent, swirl in some softened cream cheese for extra richness. I’ve tested this with different nuts, and honestly, walnuts are my favorite — they add that perfect crunch factor.
Step 6: Layer & Swirl
Pour half the batter into your prepared pan. Spread the cinnamon-sugar mixture over this layer, then dollop spoonfuls of the cheese mixture if using. Top with the remaining batter gently over the filling. Use a butterknife or a skewer to swirl through the batter — slow and gentle, creating beautiful marbled streaks.
Step 7: Bake
Place in the oven and bake for about 40-45 minutes. Check for doneness by inserting a toothpick into the center — it should come out clean or with just a few crumbs attached. Ovens vary, so I start checking at 38 minutes. The top should be golden, and your kitchen will smell incredible.
Step 8: Cool & Glaze
Let the cake cool in the pan for about 15 minutes, then transfer to a wire rack. I prefer it slightly warm for glazing — the glaze will seep in just right. Mix the powdered sugar with a splash of milk or lemon juice until smooth. Drizzle over the cake and let it set for a few minutes. I usually do this right before serving because it just adds that little extra flair.
Step 9: Slice & Serve
Use a sharp serrated knife to slice carefully — the swirl pattern looks so pretty when sliced properly. Serve with a dollop of whipped cream or a scoop of vanilla ice cream if you’re feeling fancy. My family loves it slightly warm, with a cup of coffee on the side, but honestly, it’s delightful at room temperature too. Bonus: It’s just as good the next day, and somehow even better the day after that!
What to Serve It With
This cake is so versatile, I serve it in different ways depending on the occasion. For breakfast, a slice with your morning coffee or tea hits the spot — especially with a smear of butter or cream cheese. It’s also fabulous as a brunch centerpiece, paired with fresh fruit and a sparkling mimosa. As a dessert, it pairs beautifully with a dusting of powdered sugar or a drizzle of honey, and I love serving it warm with a scoop of vanilla ice cream or a dollop of whipped cream. For those cozy afternoons, I serve slices with a hot cup of herbal tea — it’s like a portable hug. Once baked, I find that this cake can transform from an everyday treat to something special with just a little garnishing. I also occasionally serve it as a snack — especially when the kids come home starving! Leftovers? They store beautifully — I’ll tell you how to keep them fresh and moist in a bit.
Top Tips for Perfecting Your Zucchini Swirl Cake
Over the years, I’ve learned a few tricks that make this cake turn out just right every time. First, always squeeze out as much moisture as you can from the grated zucchini — it prevents sogginess and keeps the texture moist but firm. I’ve tested with both fresh and slightly older zucchini, and honestly, even older ones work if you drain them well. When mixing, be gentle — overmixing toughens the gluten and makes the cake dense. Just fold, fold, fold! For the swirl, I recommend placing dollops of the cinnamon-sugar mixture on the batter’s surface, then swirling gently with a skewer or butter knife — it creates beautiful ribbons without blending everything into one color. Ingredient-wise, swapping in coconut sugar or honey almost always works. Just remember, when reducing sugar, keep an eye on the baking time as it can sometimes take a little longer. Baking at the right temperature is key — I double-checked my oven with an oven thermometer, and I suggest you do the same if you have that option. Also, don’t skip the cooling step; it helps the cake set perfectly and makes slicing so much easier. As for the glaze, I love playing around with flavors — vanilla, lemon, or even a splash of bourbon — go wild! The key is to keep it pourable but not runny, so it drapes beautifully over the warm cake. After many failed attempts and happy accidents, I can say this recipe is truly adaptable and forgiving. But my biggest tip? Have fun with it. Cooking should be joyful, after all!
Storing and Reheating Tips
This cake stays moist for days if stored correctly — I always wrap it tightly in plastic wrap or keep it in an airtight container. Room temperature is fine for about a day or two, especially if you’re planning to eat it sooner. For longer storage, pop it in the fridge; it’ll keep for up to 4 days. Just warm slices slightly before serving to revive their soft texture — trust me, it makes all the difference. If you want to keep it for even longer, it freezes beautifully — wrap slices individually in plastic wrap and then store in a resealable bag. Thaw at room temperature or gently warm in the microwave. The glaze can be added after reheating if you’re planning to serve leftovers, but I often enjoy it plain, especially if I want a less sweet snack. When reheating, I recommend doing it in short bursts in the microwave or warming in a low oven wrapped in foil. If you add fresh glaze or a dusting of powdered sugar after reheating, it keeps that fresh, just-baked feel. The key is to avoid overdoing it — you want the cake moist and tender, not dry or rubbery. And seriously? It’s just as delicious reheated as it is fresh. Sometimes, I even pop a slice in the toaster oven for a few minutes and finish with a drizzle of honey. The leftovers are a true testament to how forgiving and good this cake is!
Frequently Asked Questions
Final Thoughts
This zucchini swirl cake has become one of my go-to recipes when I want something that feels special but is ridiculously easy to prepare. It’s the kind of dessert that secretly sneaks in a vegetable, but everyone raves about how tasty it is. The combination of moist cake, aromatic cinnamon swirl, and that perfect glaze makes it a hit with my family and friends alike. I love how adaptable it is — you can swap ingredients, add nuts, or even toss in some chocolate chips if you’re feeling wild. It’s sturdy enough to serve at picnics or casual get-togethers, yet elegant enough to bring to a dinner party. If you’re new to baking or just want a foolproof recipe that’s sure to impress, this is it. I can already see you thinking about the next batch — because once you start, you’ll find yourself making this over and over. Don’t forget to share your photos and variations — I love hearing how you customize it! Happy baking, and I can’t wait to hear how yours turns out!
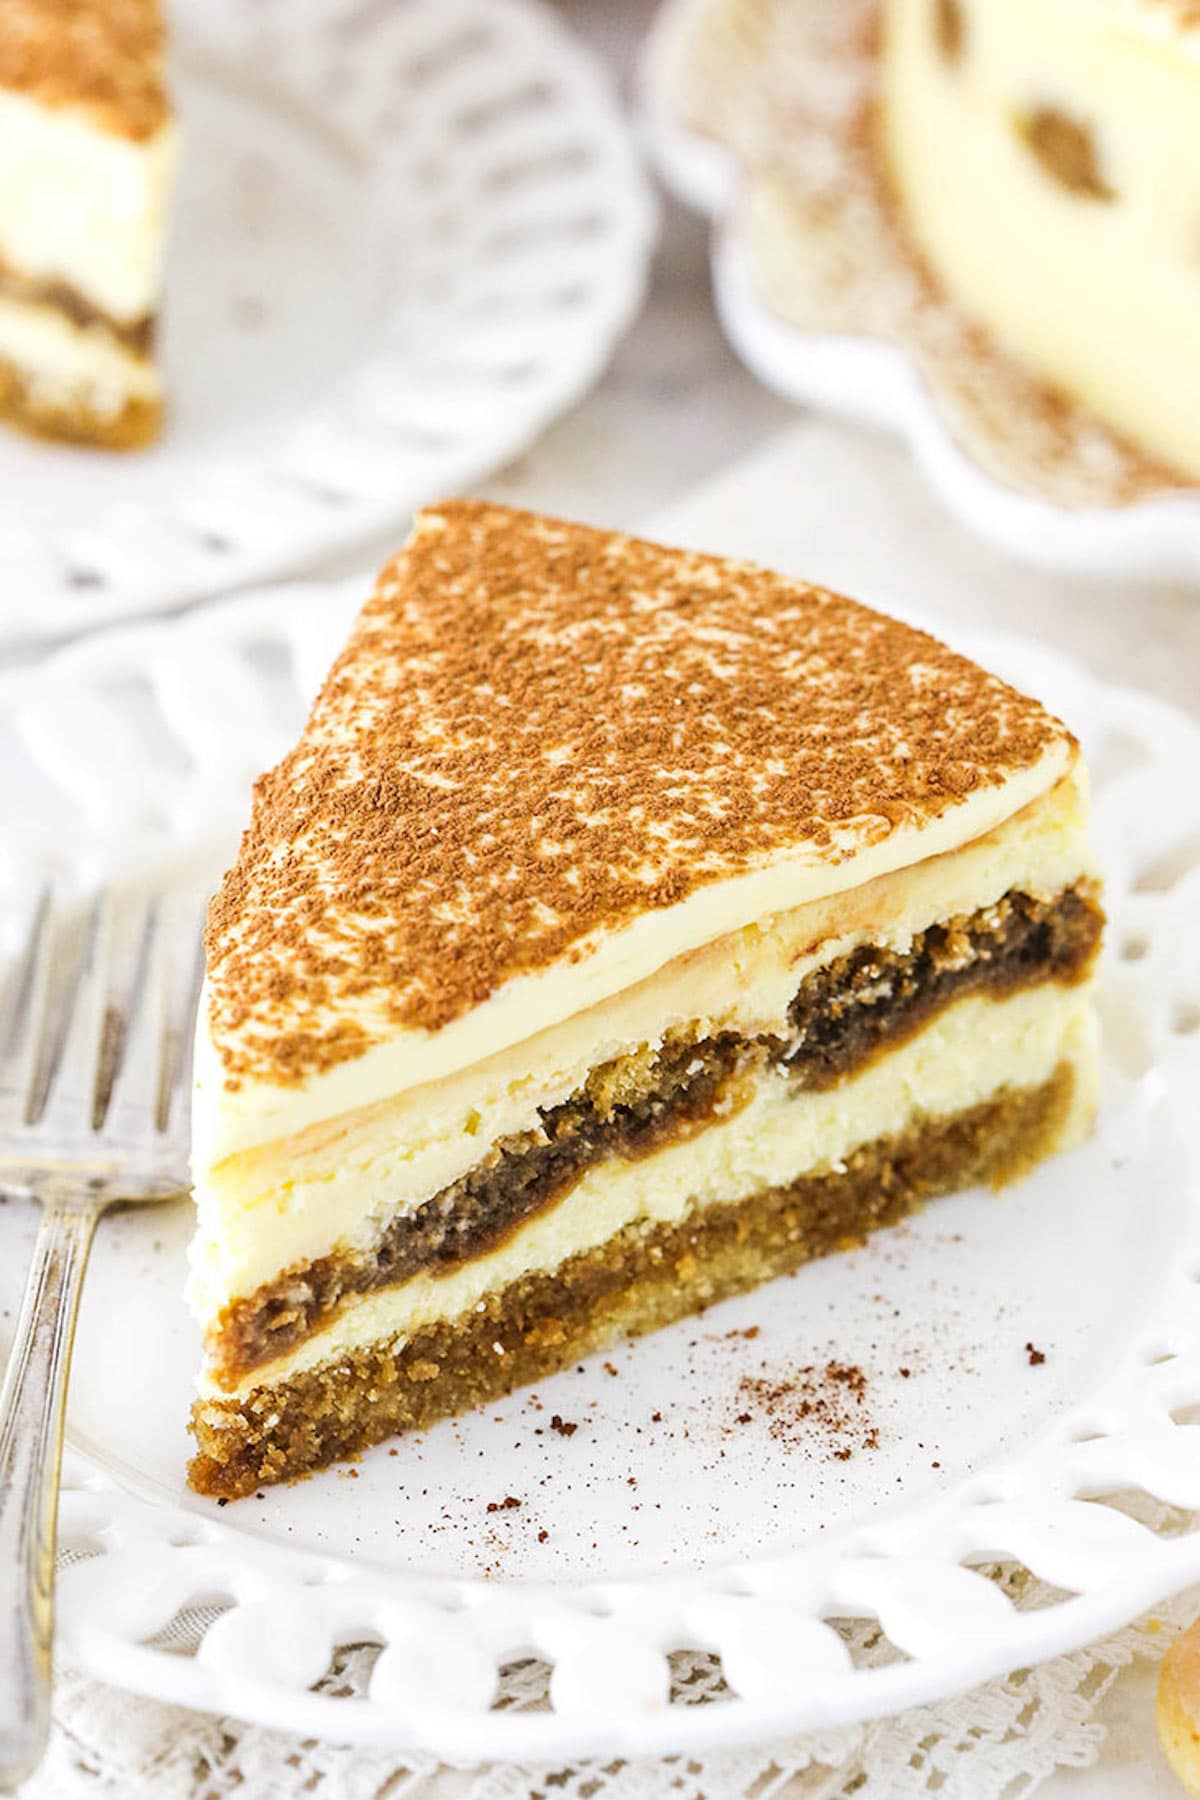
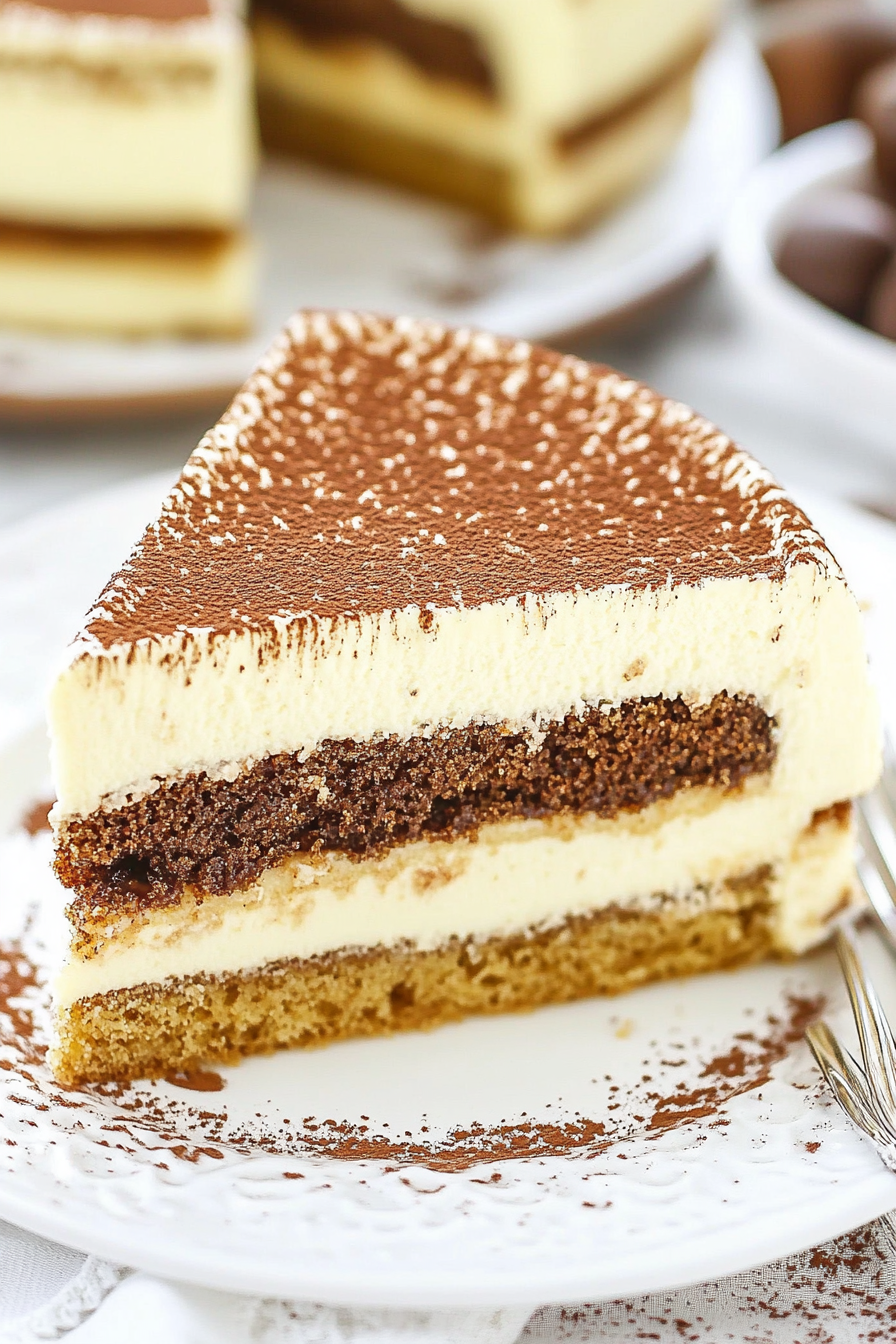
tiramisu cake
Ingredients
Method
- Preheat oven to 350°F. Prepare a 9-inch cake pan with parchment paper and greased sides.
- In a medium bowl, combine flour, baking powder, and salt. Set aside.
- Cream butter and sugar until fluffy, then add egg, vanilla, milk, and water. Mix well.
- Mix in espresso powder and sugar in hot water, add Kahlua.
- Combine cream cheese, mascarpone, sugar, and flour until smooth.
- Add sour cream, vanilla, eggs, and yolks; mix until smooth.
- Bake cake layer for 13-15 minutes, then cool.
- Dip ladyfingers in espresso mixture, layer over cake, and top with remaining filling.
- Wrap in aluminum foil, place in water bath, and bake at 300°F for about 1 hour 15 minutes.
- Cool, refrigerate for at least 6 hours, then decorate with cocoa powder.

That takes me back! My grandma used to make something like this — the scent of baking zucchini cake with coffee still lingers in my memory every spring.
That sounds absolutely wonderful—zucchini cake with a touch of coffee and memories? I’d love to try making it myself. Thanks for sharing!
This sounds so comforting—like a real family recipe with a story behind it. I’d love to try making it!
This cake takes me right back to grandma’s kitchen — such a comforting, nostalgic recipe. I can almost smell the coffee now!
This cake brings back such sweet memories — the smell alone takes me right back to grandma’s kitchen. Thanks for sharing this recipe!