
Easy Chocolate Cookie Pie Delight
There’s something about baking bread that feels like a warm hug, right? I remember weekends in my childhood kitchen, the smell of bananas and warm cinnamon swirling around, making the house feel cozy even on the coldest days. I always do this when I want a little comfort—whip up a batch of zucchini banana bread. It’s kind of like that classic banana bread you love, but with a sneaky veggie twist that makes it even moister and healthier. Honestly, it’s my go-to when my kids ask for something sweet but I don’t want to turn on the oven for a huge cake. And the best part? It disappears in minutes at my house, and I promise no one’s the wiser about the zucchini sneakily hiding in there! This recipe is so easy, it’s become our family’s little baking tradition, especially on those busy mornings or lazy Sunday afternoons. If you’re craving something warm, slightly sweet, and bursting with flavor, stick around—I’m about to share this secret family favorite that’s comfort food at its finest.
What is Zucchini Banana Bread?
Think of zucchini banana bread as a clever mashup that’s almost like a cake, but a loaf—think soft, moist, with a hint of sweetness and a tender crumb. It’s essentially banana bread, but with grated zucchini folded right into the batter. Why zucchini? Well, it adds a subtle vegetable goodness that keeps the bread moist for days—and trust me, no one can tell it’s there! The name might sound fancy, but it’s actually just a smart way to sneak in some extra nutrients while making your usual banana bread even richer. This dish is all about cozy comfort combined with a bit of a health kick, which my kids actually love because it tastes indulgent but feels sneaky. It’s perfect for breakfast, snack, or even dessert—I often slice a warm piece, slather on a bit of butter or honey, and call it a day. Think of it as a homemade hug in the shape of a loaf, guaranteed to make your kitchen smell amazing!
Why you’ll love this recipe?
What I love most about this zucchini banana bread is how incredibly versatile and forgiving it is. You don’t need fancy ingredients or complicated techniques—just simple pantry staples that you probably already have. The flavor? Oh, it’s heavenly. Rich, banana-y, with a hint of cinnamon and a subtle sweetness that’s never overpowering. The zucchini keeps everything tender and moist; I’ve tested this with just a touch more zucchini, and it still comes out perfect. Plus, this one’s a lifesaver on busy nights because it comes together pretty quickly—no complicated mixing, just a few bowls and a gentle fold. Budget-wise, it’s super friendly, especially since those ripe bananas and zucchinis often end up forgotten at the back of the fridge. I also love how adaptable it is—swap out walnuts for chocolate chips, or add a splash of vanilla for extra depth. This bread is truly one of those recipes that hits all the right notes: delicious, simple, and made with love. It’s become a staple in my house, and I bet it will be in yours too.
How do you make Zucchini Banana Bread?
Quick Overview
This zucchini banana bread is a straightforward batter that combines ripe bananas, shredded zucchini, and warm spices, then baked until golden and luscious. I love that it’s almost impossible to mess up—just mix the wet and dry ingredients, fold everything together gently so the texture stays tender, then pour into a loaf pan. The secret is not overmixing, which keeps the crumb light. Once baked, a quick cooling period makes slicing easy and presentation lovely. Trust me, once you get the hang of it, you’ll be whipping this up on lazy weekends for breakfast or whenever the craving hits—no need for fancy equipment or long prep times.
Ingredients
For the Main Batter:
– 3 ripe bananas, mashed (the overripe ones are perfect for this)
– 1 cup shredded zucchini, well-drained
– 1/2 cup granulated sugar (or honey if you prefer natural sweetness)
– 1/3 cup olive oil or melted butter
– 2 large eggs
– 1 teaspoon vanilla extract
– 1 1/2 cups all-purpose flour (or a gluten-free blend if you like)
– 1 teaspoon baking soda
– 1 teaspoon ground cinnamon
– Pinch of salt
For the Filling (Optional):
– 1/2 cup chopped walnuts or chocolate chips
– A sprinkle of extra cinnamon or nutmeg for flavor variation
For the Glaze (Optional but fabulous):
– 1/2 cup powdered sugar
– 1-2 teaspoons milk or almond milk
– A few drops of vanilla or lemon extract
Step-by-Step Instructions
Step 1: Preheat & Prep Pan
Set your oven to 350°F (180°C) and grease a loaf pan with butter or non-stick spray. Lining it with parchment paper makes removal even easier, especially if you’re picky about clean slices. I always do this—it’s a total game changer for presentation and cleanup.
Step 2: Mix Dry Ingredients
In a bowl, whisk together the flour, baking soda, cinnamon, and salt. I find that sifting or whisking well helps keep the batter super smooth—no clumps of baking soda or flour crumbs. This step is important because it distributes the leavening evenly, giving your bread a nice rise.
Step 3: Mix Wet Ingredients
Inanother large bowl, mash the bananas thoroughly—use a fork or a potato masher. Then add sugar, oil, eggs, and vanilla. Mix until everything is blended but not overbeat. The bananas should look silky, and the mixture should smell sweet and banana-y. I sometimes test the batter by tasting a tiny bit—trust me, it’s the best way to double-check the flavor!
Step 4: Combine
Pour the wet mixture into the dry and gently fold together until just combined. Avoid overmixing—that’s the fast track to dense bread. I like to use a rubber spatula and fold with slow, gentle strokes, especially around the edges. A few lumps don’t matter—this keeps it tender.
Step 5: Prepare Filling
If you’re adding nuts or chocolate chips, fold them into the batter now. For a more uniform swirl, sometimes I reserve some of the batter to create a layered effect—swirling with a toothpick for a marbled look. It’s totally optional but looks pretty fancy with minimal effort.
Step 6: Layer & Swirl
Pour half of the batter into the pan, add some filling, then top with the rest of the batter. Use a skewer or toothpick to swirl lightly for a marbled pattern. The best part? No two loaves look exactly the same—and that rustic charm makes it even more appealing.
Step 7: Bake
Pop it in the oven for about 50-60 minutes. Check for doneness inserting a toothpick in the center—if it comes out clean, it’s perfect. If it’s sticky, give it a few more minutes. Ovens vary, so start checking around the 50-minute mark. The top should be golden, and the smell will make your whole house smell like baked heaven.
Step 8: Cool & Glaze
Let the bread cool in the pan for about 15 minutes, then transfer to a wire rack. I love waiting until it cools just enough to slice without falling apart but still warm enough for butter or honey. If using glaze, drizzle it on now for a pretty, sweet finish—trust me, it’s the finishing touch.
Step 9: Slice & Serve
Use a serrated bread knife for clean slices, and serve it with tea, coffee, or even a dollop of whipped cream. My favorite way? Warm slice, butter melting on top, with a cup of strong coffee on a lazy Sunday morning. It’s even better the next day—if it lasts that long!
What to Serve It With
This zucchini banana bread is a chameleon, seriously. For breakfast, I love serving it with a steaming mug of coffee and a smear of cream cheese or almond butter. It’s an easy start to a busy morning—my kids actually ask for seconds! If I want to turn it into a brunch showstopper, I add a handful of fresh berries on the side or a drizzle of honey over each slice. For an afternoon snack, it pairs beautifully with a glass of milk or herbal tea, making the perfect pairing for those cozy afternoons. When I serve it as dessert, I like to heat a slice slightly, then top it with a scoop of vanilla ice cream or a dollop of Greek yogurt. It’s also excellent just plain—warm or at room temperature—and the smell alone keeps everyone coming back for more. This bread is a true family favorite because it hits all the right notes of sweet, moist, and wholesome, without feeling heavy or overly processed. Plus, it’s one of those recipes that gets better with a little age, meaning leftovers are almost always a good thing around here!
Top Tips for Perfecting Your Zucchini Banana Bread
Over the years, I’ve learned a bunch of tricks to make this bread absolutely flawless every time. First, I suggest squeezing out extra moisture from the zucchini—moisture equals a soggy loaf if you’re not careful. I always peel and grate, then press the shredded zucchini in a clean towel to remove excess liquid. It’s a small step but makes a big difference. When mixing, be gentle—I’ve gone overboard tackling the batter too vigorously and ended up with a dense loaf, which is the opposite of what we want. Also, don’t forget to really ripen those bananas. The browner, the better—they mash more easily and add a richer flavor. As for ingredient swaps, I tested this with half whole wheat flour, and it still came out tender and tasty—just add a tablespoon of extra liquid if you’re going this route. Want more flavor? Toss in some chopped apples or raisins. I’ve also played around with using applesauce instead of oil, which keeps it super moist but light. When baking, keep an eye on the oven’s heat—mine runs hot, so I lower the temperature a touch after the first 20 minutes. The golden trick is to test with a toothpick—if it sticks, it needs more time. And if you want an extra glossy glaze, try mixing in a little lemon juice—it gives a tangy brightness that elevates the whole loaf. These little tweaks help me get that perfect slice every time, and I hope they do the same for you.
Storing and Reheating Tips
Once baked and cooled, this bread keeps really well, which makes it perfect for making ahead. At room temperature, I store it wrapped loosely in a clean towel or in a breathable bread box for up to two days. Beyond that, a quick transfer to an airtight container and into the fridge keeps it fresh for about five days. I prefer slicing it before refrigerating—it’s so much easier to grab a piece for breakfast or a snack without thawing the whole loaf. If you want to keep it even longer, it freezes beautifully—wrap it tightly in plastic wrap, then foil, and it can last up to three months. Thaw at room temp or pop a slice in the microwave for about 15 seconds until warm. A little tip: don’t glaze the bread until just before serving if you plan to freeze straight away; the sugar might get a little sticky in the freezer. Instead, add the glaze right before serving to keep that shiny, sweet kick. Trust me, this makes it super convenient to enjoy it fresh whenever the craving hits, and leftovers reheat beautifully in a toaster oven or microwave.
Frequently Asked Questions
Final Thoughts
Honestly, this zucchini banana bread has become a comforting staple in my kitchen. It’s a warm, homey treat that’s just as good for breakfast as it is for a midnight snack. The combination of ripe bananas, tender zucchini, and spices creates a flavor that’s both nostalgic and fresh. Every time I bake it, I remember those lazy Sunday mornings filled with the smell of baking, and I’m reminded how simple ingredients can turn into something extraordinary. Trust me, once you try making it, it’ll become part of your family tradition too. Feel free to experiment with add-ins or swaps—sometimes I toss in a handful of dark chocolate or swap out walnuts for sliced almonds. Every loaf feels like a new adventure. Happy baking, and I can’t wait to hear how yours turns out! Drop a comment below or share your own twists—I love hearing from fellow bread lovers like you.
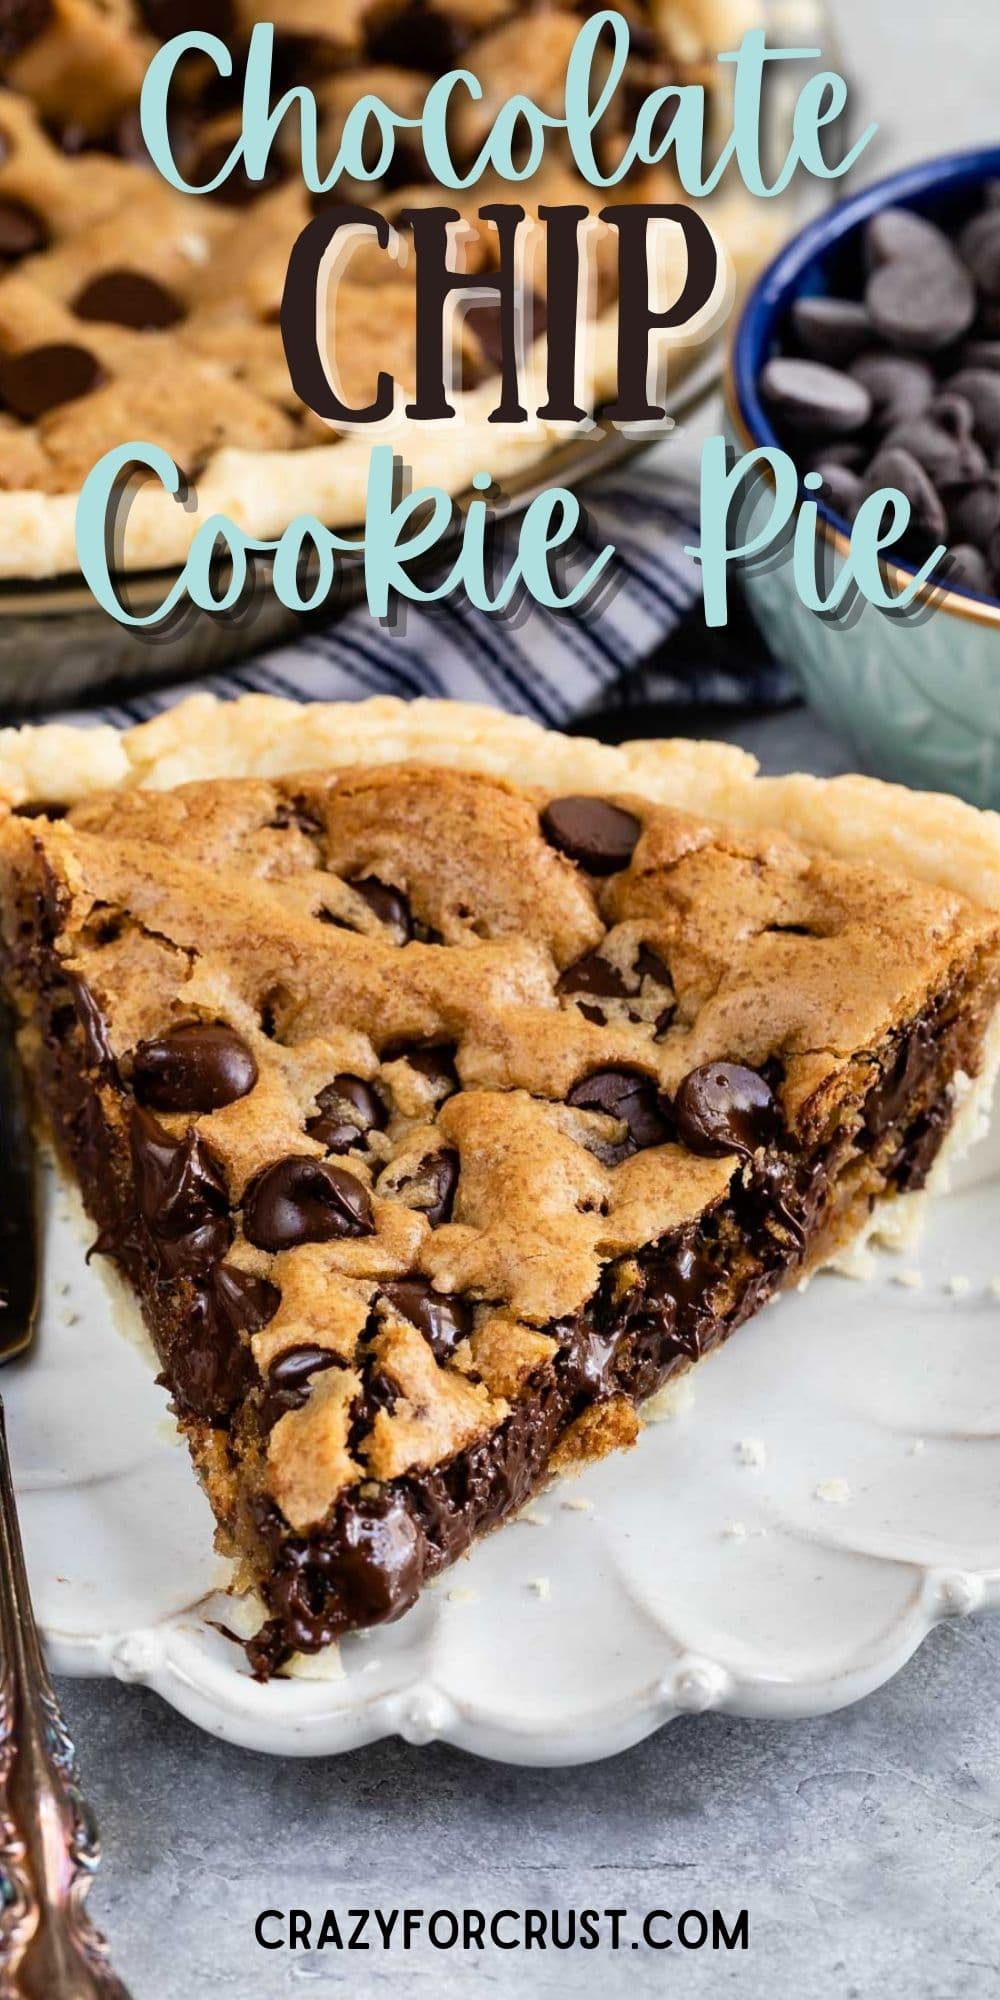
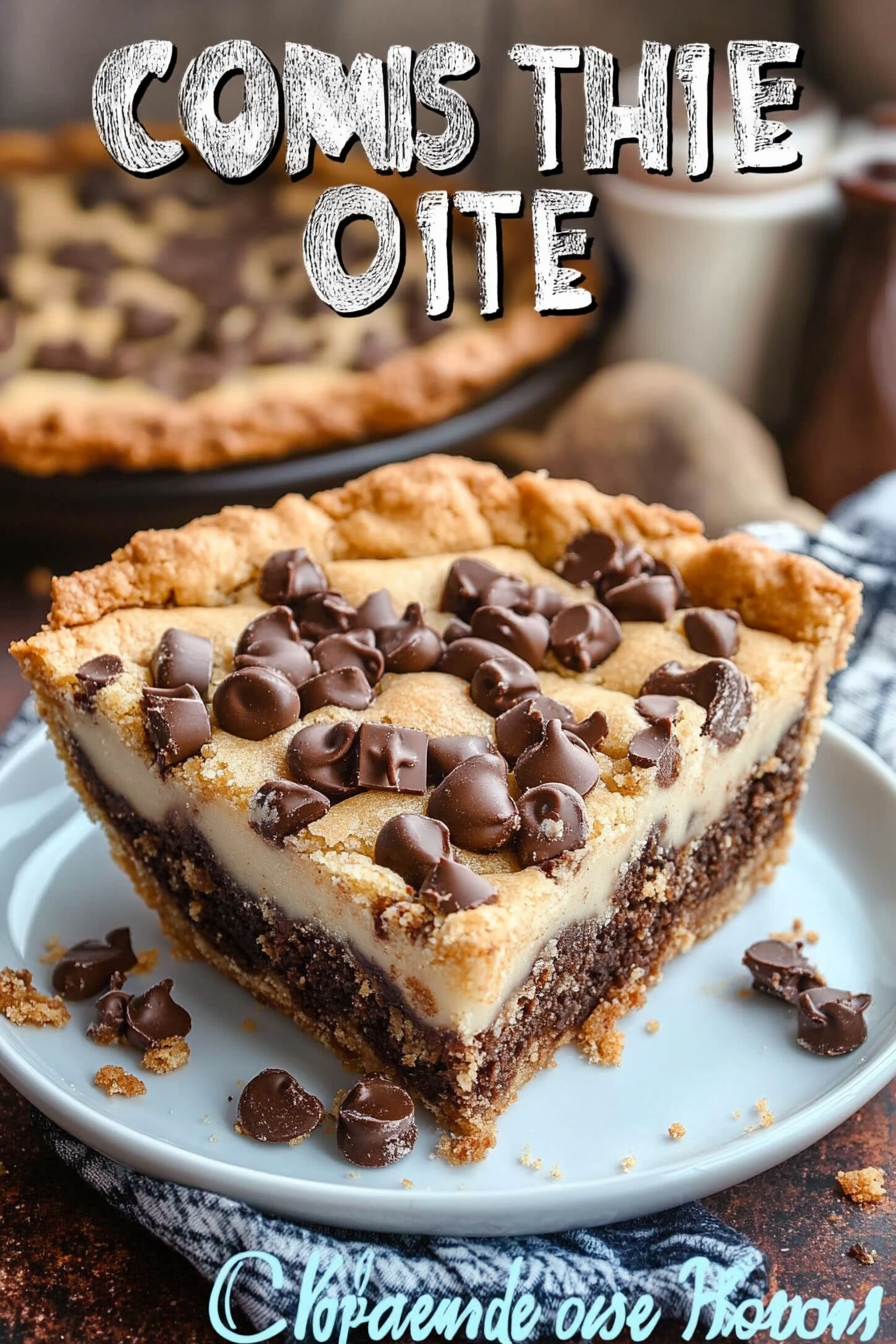
cookie pie
Ingredients
Method
- Preheat oven to 425°F.
- Place pie crust in pie plate and chill.
- Mix melted butter, granulated sugar, and brown sugar until smooth.
- Add egg, vanilla extract, baking soda, and salt. Mix well.
- Stir in flour and chocolate chips until dough forms.
- Spread cookie dough into the chilled pie crust.
- Sprinkle additional chocolate chips on top.
- Bake for 45 minutes, until golden brown.
- Cool before slicing and serving.


This recipe sounds so cozy and nostalgic—I love how baking brings back those sweet childhood memories!
This sounds like such a cozy and comforting recipe—love the nostalgic vibes!
This brings back such sweet memories! I love how baking can feel so comforting and personal.
This sounds so comforting! I love how baking brings back such sweet memories—especially when it’s something as cozy as this chocolate cookie pie.
This sounds so comforting! I love how baking brings back such sweet memories—definitely adding this recipe to my list.