
Easy Green Nut Dessert Salad Recipe
Let me tell you a little story. I remember sneaking into my grandma’s kitchen when I was about eight, hiding a crumbly piece of homemade cake behind my back so I could savor it quietly. That moment, that smell of butter and vanilla filling the air? It’s stuck with me ever since. Fast forward years later, I stumbled upon a recipe that reminded me of that exact feeling — a zucchini swirl cake. Yes, you read that right, zucchini! It sounds wild at first, but trust me on this one. This cake is like a cozy hug in dessert form, with its tender crumb, a hint of sweet and spice, and a swirl of something extra special—it’s basically a sneaky veggie disguised as indulgence. This one’s a lifesaver on busy nights, especially when I want something sweet but don’t want to spend hours in the kitchen. It disappears in minutes at my house, and I honestly think my kids ask for it more than cupcakes now. It’s so versatile, too — perfect for breakfast, a quick snack, or even a fancy weekend brunch. The best part? It’s easy enough that I don’t need a culinary degree — just a love of good flavors and a bit of patience. Ready to make it? Let’s go!
What is Zucchini Swirl Cake?
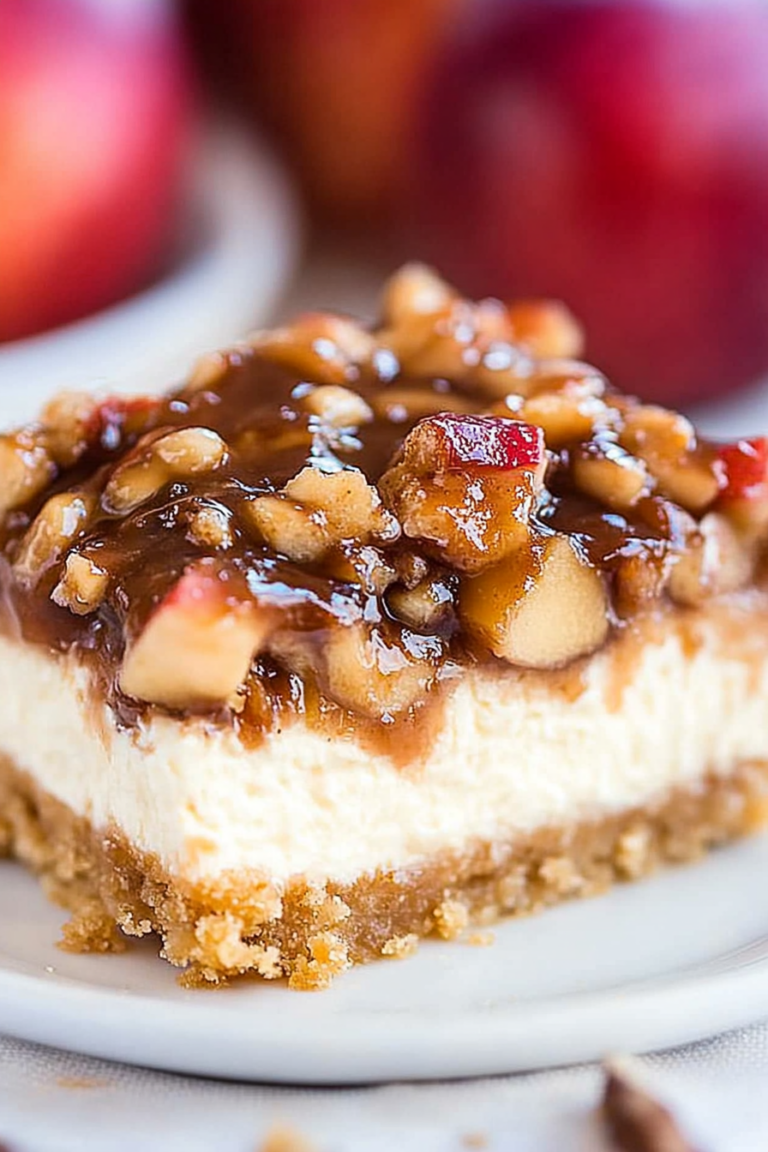
This zucchini swirl cake is like the lovechild of a moist, spiced coffee cake and a sneaky vegetable upgrade. Think of it as a cozy layered dessert, but—surprise!—the secret ingredient is zucchini. It’s essentially grated zucchini folded into a rich batter, then swirled with a cinnamon-spiced filling before baking. The name might sound fancy, but this cake is super forgiving. From the first time I made it, I realized it’s a wonderful way to use up extra zucchinis from the summer garden, or even frozen ones when the season’s over. The swirl of filling gives each bite a little burst of cinnamon, brown sugar, and nutty richness, and it pairs so well with a cup of coffee or tea. The texture? Moist as can be without being heavy. It’s kind of like a quick bread but in a cake form—familiar comfort with a fun twist. What I love most about this is how adaptable it is — swap in different spices, or try it with apples or carrots instead of zucchini if you’re feeling adventurous. But honestly, once you taste this, you might just stick with the classic!
Why you’ll love this recipe?
There’s honestly so much to love about this zucchini swirl cake. First off, the flavor. The cinnamon-spiced filling creates that warm, nostalgic aroma that makes your entire house smell like grandma’s kitchen—nothing beats waking up to the scent of sweet spices and baking cake. Plus, the cake itself is incredibly tender, moist, and fluffy. I’ve made this countless times, and it never fails to get rave reviews from family and friends. What’s also great is how simple it is to whip together — no fancy equipment or techniques needed. Just a handful of humble ingredients that most of us already have in the pantry and fridge. It’s budget-friendly too, especially when you’ve got zucchinis growing in your garden or frozen from summer. And let’s talk about versatility: I’ve served slices for breakfast with a dollop of yogurt, enjoyed it as an afternoon snack with tea, and turned leftovers into a fancy brunch presentation topped with powdered sugar or glaze. My kids actually ask for seconds—and that’s saying something for a vegetable in a cake! This recipe is a true all-rounder, and I honestly think it’s a keeper for anyone who loves baking that comforts your soul.
How do I make Zucchini Swirl Cake?
Quick Overview
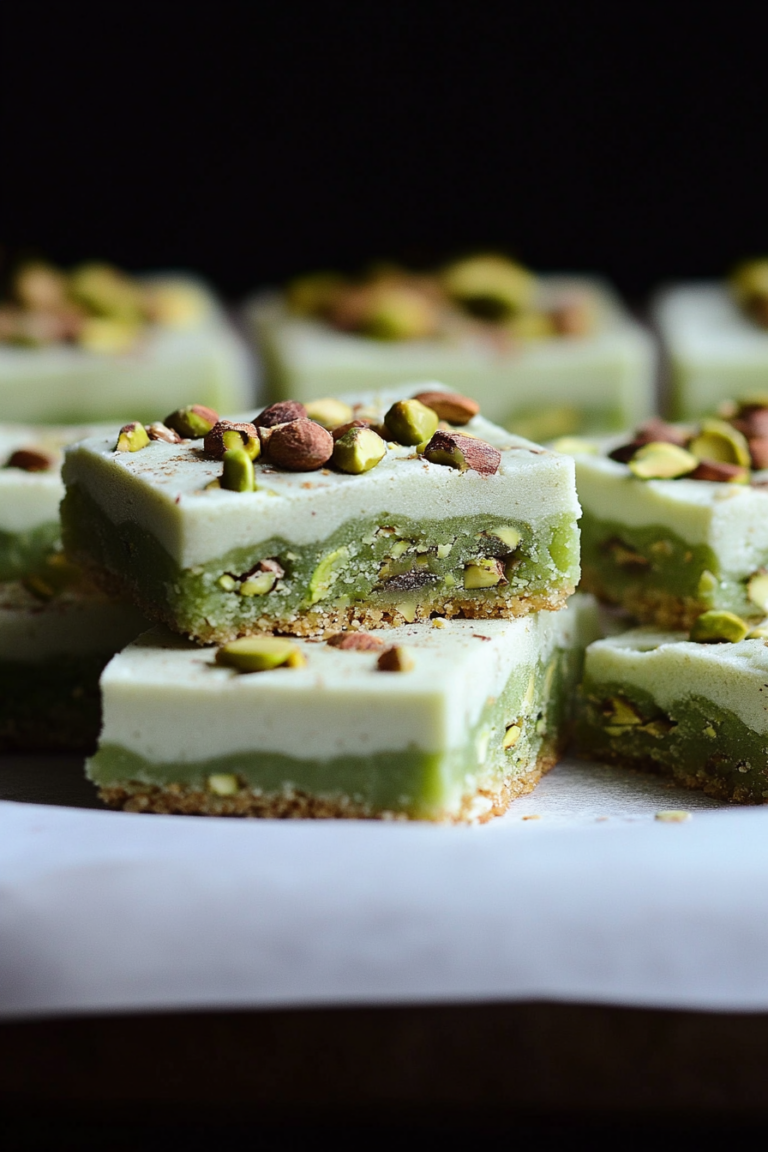
This cake comes together pretty quickly. You start by grating zucchinis, which, oddly enough, adds moisture and a tiny boost of nutrients. Then, whisk together your dry ingredients, and separately mix your wet ones—think oil, eggs, vanilla. Combine everything gently, pour half into your prepared pan, spread the cinnamon-sugar filling, then layer the rest on top and give it a gentle swirl. It goes into the oven for about 40-45 minutes—I always test with a toothpick to be sure. Once baked, I let it cool a bit before glazing or dusting with powdered sugar. The magic is in that swirl—you get perfect marbling that’s not too overwhelming but adds just enough visual flair. Honestly, what makes this special is how forgiving the process is; it’s more like a laid-back dance than a strict recipe. The result? A cake that’s beautifully moist inside, with lovely cinnamon-spiced pockets that surprise you with every bite.
Ingredients
For the Main Batter:
– 2 cups all-purpose flour (or gluten-free blend, see tips below)
– 1½ teaspoons baking powder
– ½ teaspoon baking soda
– ¼ teaspoon salt
– 1 teaspoon ground cinnamon
– ½ teaspoon ground nutmeg (optional but adds warmth)
– 1 cup granulated sugar
– ½ cup vegetable oil or melted butter
– 3 large eggs
– 1 teaspoon vanilla extract
– 1 cup grated zucchini (squeeze out excess moisture)
For the Filling:
– ½ cup brown sugar
– 1 tablespoon cinnamon
– ¼ cup chopped nuts (walnuts or pecans—optional, but I love the crunch)
– 2 tablespoons melted butter or coconut oil
For the Glaze:
– ½ cup powdered sugar
– 1-2 teaspoons milk or lemon juice
– A dash of vanilla or citrus zest (optional for extra zing)
Step-by-Step Instructions
Step 1: Preheat & Prep Pan
Set your oven to 350°F (175°C). Grease a 9-inch springform pan or line it with parchment paper—trust me, I’ve learned the hard way that a sticking cake is no fun. Toss in a little butter or non-stick spray and make sure the sides are well coated. Also, grate your zucchini now—I do this last because I want it as dry as possible. A quick salt sprinkle and squeeze of moisture is all that’s needed to prevent the batter from getting too wet.
Step 2: Mix Dry Ingredients
In a large bowl, whisk together the flour, baking powder, baking soda, salt, cinnamon, and nutmeg. It’s always satisfying seeing the contrast of the dry ingredients blend into that lovely, fragrant mixture—this is the base for all that tender crumb to come. A thorough mix ensures the baking agents are evenly distributed, so every slice bakes uniformly.
Step 3: Mix Wet Ingredients
In a separate bowl, stir together the sugar, oil, eggs, and vanilla. I like to make sure the eggs are at room temperature — it helps everything combine smoothly. Whisk until everything’s just combined but not overmixed. I’ve tested with almond milk too, and honestly, it made the cake even creamier — so feel free to experiment if you’re dairy-free!
Step 4: Combine
Pour the wet mixture into the dry ingredients and fold gently—think gentle as a lullaby. Overmixing can lead to dense, tough cakes, so stir just until the flour streaks disappear. Then, fold in the grated zucchini—don’t squeeze all the moisture out, just a gentle press before adding to the batter is enough. You want that moisture, but not so much that your cake sinks or gets gummy.
Step 5: Prepare Filling
Mix together the brown sugar, cinnamon, chopped nuts, and melted butter. It should look like a chunky streusel. If you want more spice or a dash of ginger, go for it. I often add a splash of orange zest here—it brightens everything up. Set aside while you prepare the batter for assembly.
Step 6: Layer & Swirl
Pour half of the batter into your pan, smoothing it out with the back of a spoon. Sprinkle the cinnamon filling evenly over this layer. Then, pour the remaining batter on top, gently spreading it out. Using a butter knife or skewer, swirl through the layers, creating beautiful marbled patterns. Don’t overdo it — you want the swirl to be visible but also not mess up the cake’s structure.
Step 7: Bake
Pop it into the oven and bake for about 40-45 minutes. The top should turn golden and a toothpick inserted into the center should come out clean. Oven times vary, so start checking at 38 minutes. If you notice browning too quickly, tent with foil. Let the cake cool in the pan for at least 15 minutes before transferring to a cooling rack—it’s tempting to slice immediately, but patience pays off!
Step 8: Cool & Glaze
Allow the cake to cool completely before glazing. This helps the glaze set and prevents sliding off. Mix powdered sugar with a splash of milk or lemon juice until you get that perfect drizzle consistency. I often add a little vanilla or lemon zest for flavor. Pour gently over the cooled cake, letting it drip down the sides for that irresistible homemade look.
Step 9: Slice & Serve
The best way to serve? Wait until it’s just warm or room temperature. Use a serrated knife, starting with gentle sawing motions, to get nice clean slices. I love serving it on a simple plate, maybe with a sprig of mint or a dusting of powdered sugar. It’s perfect alongside a hot cup of coffee or a cold glass of milk. Trust me—you won’t be able to resist grabbing seconds.
What to Serve It With
This cake is so versatile, it’s practically a chameleon. For breakfast or brunch, pair it with a cup of black coffee or a chai latte—they complement the spices beautifully. I love slicing it thick and topping with a dollop of thick Greek yogurt or whipped cream. It’s equally at home as a light dessert—warm with a drizzle of honey or a dusting of powdered sugar, maybe topped with some fresh berries. My family especially loves it as an afternoon treat, served with a steaming cup of tea, when the house smells like a bakery—and everyone’s mood instantly lifts. On special weekends, I like to serve it with vanilla ice cream or a splash of bourbon-spiked caramel sauce for something a little more indulgent. No matter how you do it, this cake makes everyone feel cozy and cared for, which is exactly how baking should be.
Top Tips for Perfecting Your Zucchini Swirl Cake
Honestly, I’ve made this so many times I’ve learned a few tricks I’d love to pass along. First, when grating zucchini, I always squeeze out as much excess moisture as possible—trust me, wet batter equals sinking cake! A simple salt sprinkle and a quick squeeze in a clean dish towel do wonders. Overmixing the batter is my biggest mistake—I used to do it and get tough, dense cakes. Now, I fold gently until just combined. When swirling, use a skewer or chopstick to create that marbled effect—go slow and steady for pretty layers that don’t mess up the rise. Substituting ingredients? I’ve tested with coconut oil, and it adds a subtle nutty flavor that’s lovely—just reduce the liquid slightly if needed. For the spice mix, I sometimes add a pinch of cloves or ginger, especially around the holidays. The oven times can vary—I always start checking around 38 minutes—your toothpick should come out just clean, but the center may still be a little soft—trust that gentle bounce. The glaze? Keep it thick enough to hold its shape but pourable. A little lemon zest in the glaze brightens the flavor, making each bite feel fresh. Honestly, I’ve learned to enjoy the process — this cake is forgiving, warm, and makes your kitchen smell like pure comfort. And oh, the smiles when others try it for the first time? Totally worth every minute.
Storing and Reheating Tips
This cake keeps beautifully, which is great because I often end up making double batches. If you’re planning to eat it within a day, just leave it covered at room temperature—mine stays moist for about 2 days this way. To keep it extra fresh, wrap it tightly with plastic wrap or store it in an airtight container in the refrigerator for up to 4 days. Reheating? Just give it a quick 10-15 second zap in the microwave or a gentle warm-up in the oven—don’t overdo it, we want that tender crumb to stay moist. If it’s glazed, best to add the glaze just before serving to keep it shiny and fresh. If I’m freezing leftovers, I wrap individual slices tightly in plastic wrap, then pop them into a freezer bag. They last about 2-3 months. To thaw, leave at room temperature for about 30 minutes or reheat gently in the microwave. The key is to avoid sogginess—so keep the glaze separate if you plan to freeze and add it fresh later. Whether you enjoy it warm or cool, this cake is a crowd-pleaser that always makes the house smell amazing and tastes just as good the next day.
Frequently Asked Questions
Final Thoughts
This zucchini swirl cake has become a family favorite in my kitchen — it’s simple, cozy, and sneaks in some veggie goodness without anyone batting an eye. Each time I bake it, I feel like I’ve rediscovered a little piece of childhood comfort, wrapped in warm spices and moist crumb. I love how adaptable it is — swapping out spices, adding nuts, or even trying different fillings — it’s a blank canvas for creativity. And honestly, the biggest compliment? My kids ask for it more than any store-bought treat! If you’re looking to impress friends or just want a slice of something sweet that’s a little different, give this a try. I promise, once you taste that first bite, you’ll be hooked. Happy baking! And please, let me know how yours turns out—I’d love to hear your tweaks and stories. Remember, the kitchen’s happiest when we’re a little messy and totally ourselves.
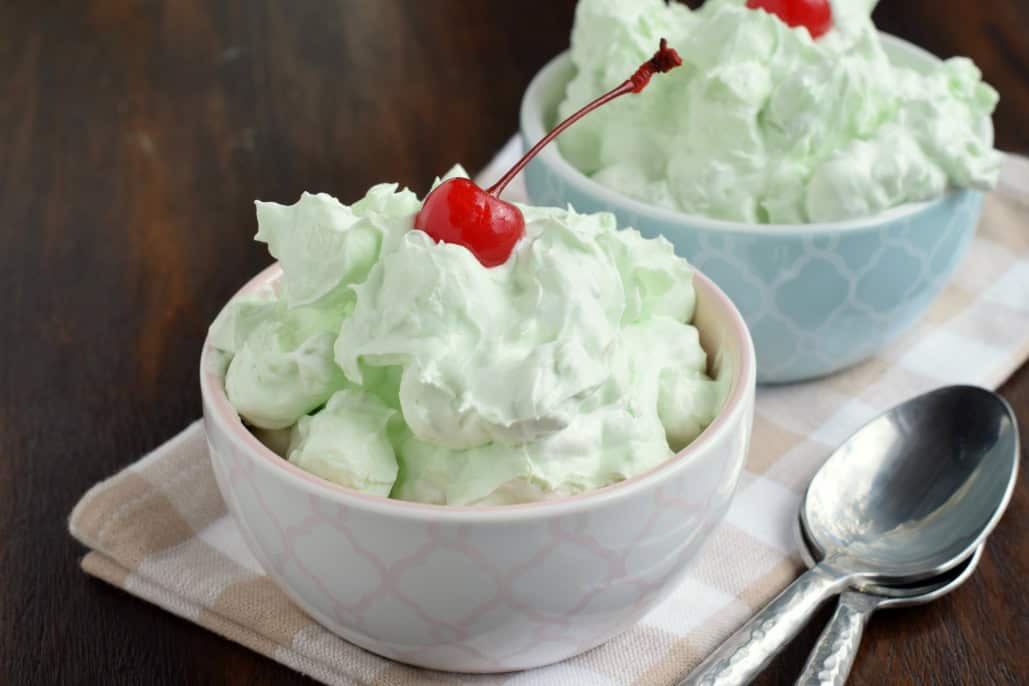
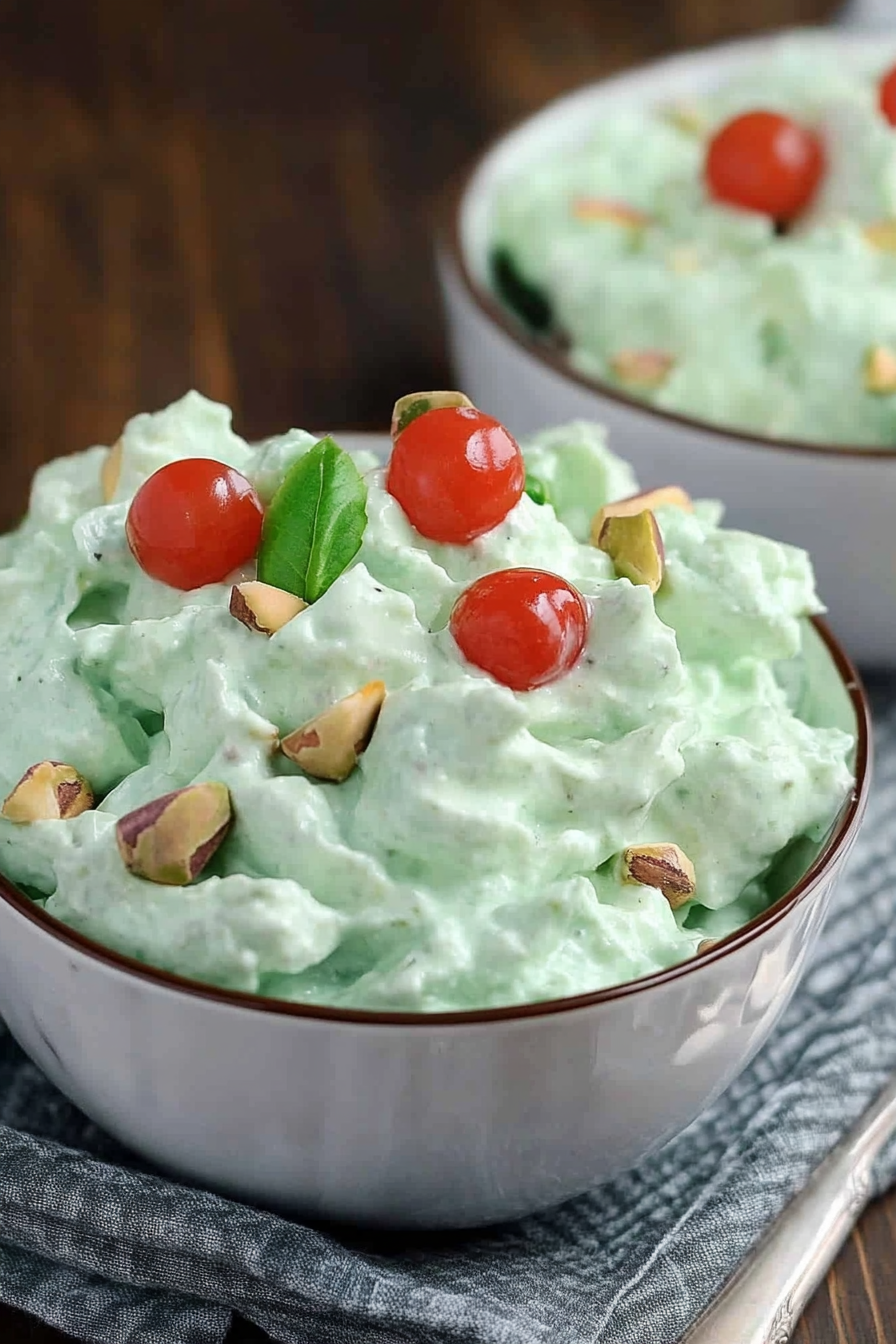
pistachio salad
Ingredients
Method
- In a large bowl, combine the pistachio pudding mix with crushed pineapple and mix thoroughly until blended.
- Add in Cool Whip and mini marshmallows. Mix well. Cover and refrigerate for at least 2 hours before serving.
- Garnish with maraschino cherries before serving. Enjoy!
I love how personal this story is—it reminds me of my own childhood sneaking treats from the kitchen too!
I love how personal and nostalgic this story is—it makes the recipe feel even more special!
I love this memory! It reminds me of my own grandma’s secret desserts—such a sweet and nostalgic feeling. Thanks for sharing!
I love this nostalgic story—it reminds me of my own childhood sneaking treats from my grandma’s pantry!
I love this story—it makes me want to try the recipe and maybe sneak a slice myself!