
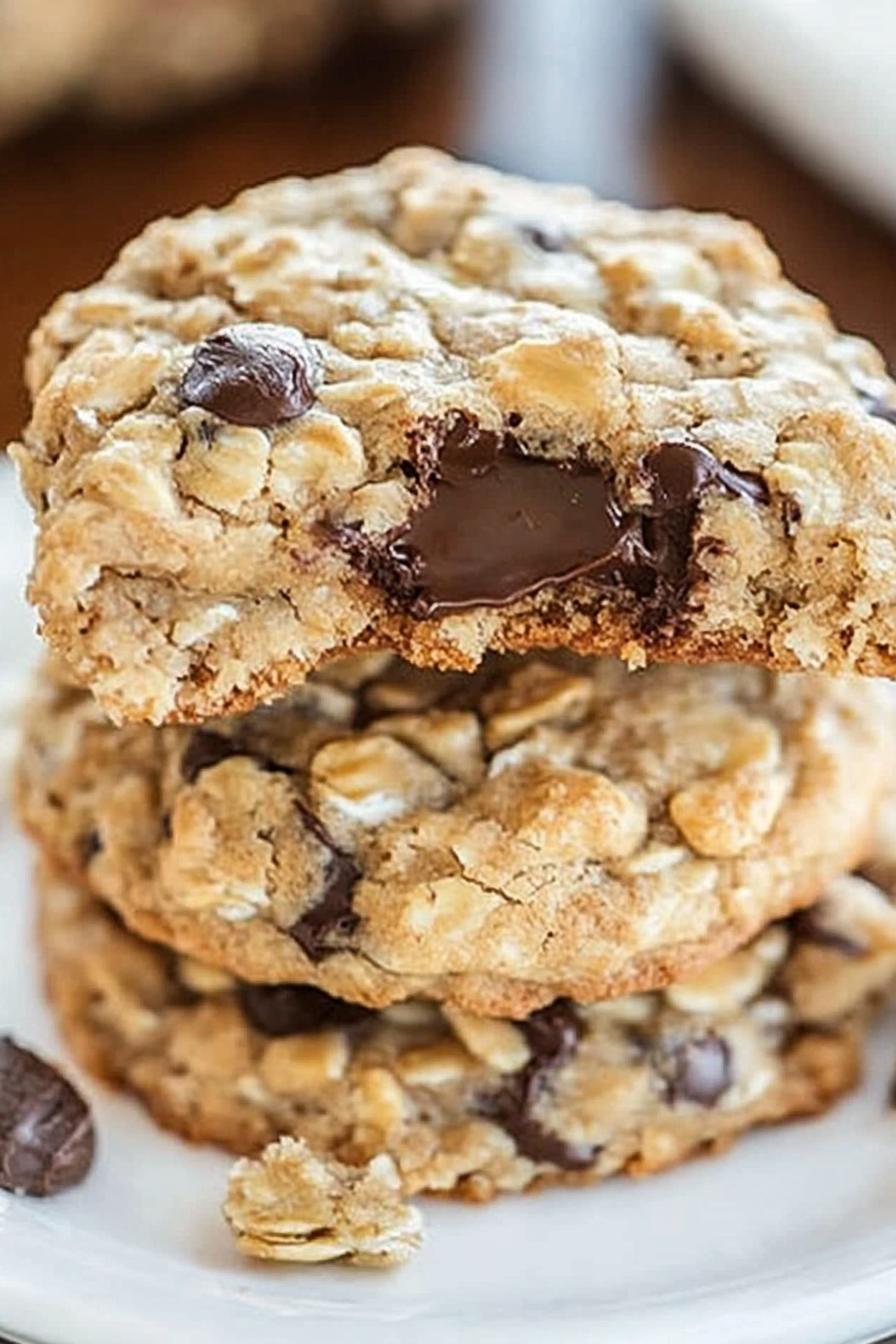
Loaded Oatmeal Cookies How to Make Them
There’s just something about baking with zucchini that makes me feel like I’m sneaking in a little healthy secret—like hiding veggies in your favorite comfort food. My mom used to make a simple zucchini bread, and I remember the smell of cinnamon and fresh zucchini filling our kitchen, making everything feel cozy and homey. This recipe? It’s like that, but elevated with a tender crumb, bright lemon glaze, and a beauty that makes it perfect for sharing on a Sunday afternoon. I always do this when I want something sweet but don’t want to feel guilty afterward—because hello, hidden veggies!—and honestly, it’s become a family favorite that disappears in minutes at my house. My kids ask for this all the time, and I’ve tested it with different types of milk, even almond milk, which actually made it even creamier. Trust me on this one: it’s the kind of cake that tastes indulgent but secretly sneaky—a little piece of sunshine with every bite. And the best part? It’s so easy to whip up, making it perfect for those busy mornings or last-minute get-togethers. I promise, once you try it, it’ll be a staple in your recipe box too!
What is Moist Vanilla Zucchini Bundt Cake?
Think of this as a happy marriage between a classic vanilla cake and a sneaky, nutritious twist—zucchini! It’s essentially a super moist, tender cake infused with vanilla bean and shredded zucchini, which keeps it remarkably soft and almost melts-in-your-mouth good. The name may sound fancy, but honestly, it’s one of those recipes where ingredients come together effortlessly and the magic happens in the oven. It’s kind of like a big, comforting hug—familiar flavors, but with an unexpected twist. The zucchini not only keeps the cake wonderfully moist but also adds a subtle green hue that’s surprisingly charming, especially topped with that zingy lemon glaze. I love calling it a “secret ingredient” because no one ever guesses zucchini was involved, which makes it fun to serve at family dinners or brunch. Plus, it’s versatile—you can serve it plain, dusted with powdered sugar, or dressed up with fresh berries. Whatever way, it’s all about that comforting, home-baked goodness wrapped in a pretty package!
Why you’ll love this recipe?
What I love most about this moist vanilla zucchini bundt cake is how it strikes such a perfect balance between indulgence and clever healthiness. The flavor? It’s this lovely, fragrant vanilla that’s just sweet enough, perfectly complemented by the bright, citrusy lemon glaze. The glaze is like the icing on the cake (literally) — it adds such a fresh pop of flavor with every bite. And let me tell you, this cake is so forgiving—I’ve made it countless times, tweaking the ingredients here and there, and it never fails to come out beautifully moist and flavorful. It’s also crazy easy to make—no fancy equipment or complicated layering—just a simple batter that comes together quickly. Cost-wise, it’s super wallet-friendly since most of the ingredients are pantry staples, and the zucchini is a great way to stretch a dollar. What’s really fun, though, is how versatile this cake is. My friends like it for brunch, my kids ask for it as an afternoon snack, and I even serve it for casual dinner parties when I want something impressive but effortless. This one’s a lifesaver on busy nights or when I want to give a thoughtful homemade gift. Honestly, once you get the hang of it, you’ll be reaching for this recipe over and over – it’s a keeper!
How do I make Moist Vanilla Zucchini Bundt Cake?
Quick Overview
This cake comes together just like making a big batch of muffin batter—easy and straightforward. You start by grating fresh zucchini (lots of moisture here, so don’t skip that step!), then whisking together your wet ingredients—like eggs, vanilla, and a splash of oil—before folding in the dry ingredients. The batter itself is so fragrant and smooth, I always do this part while pretending I’m in a cozy bakery. Pour half into your prepared bundt pan, add a layer of your secret filling—like a cinnamon-sugar mix or even a swirl of berry jam—and then top with the remaining batter. A quick swirl with a skewer or knife creates that beautiful marbled effect. Bake until it’s golden and a toothpick comes out clean, then let it cool a bit before drizzling with the lemon glaze. The whole process takes under an hour—perfect for when you’re short on time but craving something sweet and wholesome. The smell alone will have everyone asking what’s baking—be ready for a parade of smiles when they see it!
Ingredients
For the Main Batter:
- 2 cups all-purpose flour (I like unbleached for a richer flavor)
- 1 ½ teaspoons baking powder
- ½ teaspoon baking soda
- ½ teaspoon salt
- 1 tablespoon vanilla extract or vanilla bean paste
- ¾ cup sugar (or coconut sugar for a more caramel note)
- ¾ cup vegetable oil (or melted unsalted butter)
- 3 large eggs
- 1 cup grated zucchini (squeeze out some moisture, but not all)
For the Filling:
- ¼ cup brown sugar
- 1 teaspoon cinnamon (optional but recommended)
- A handful of chopped nuts or berries, if you like a little extra texture
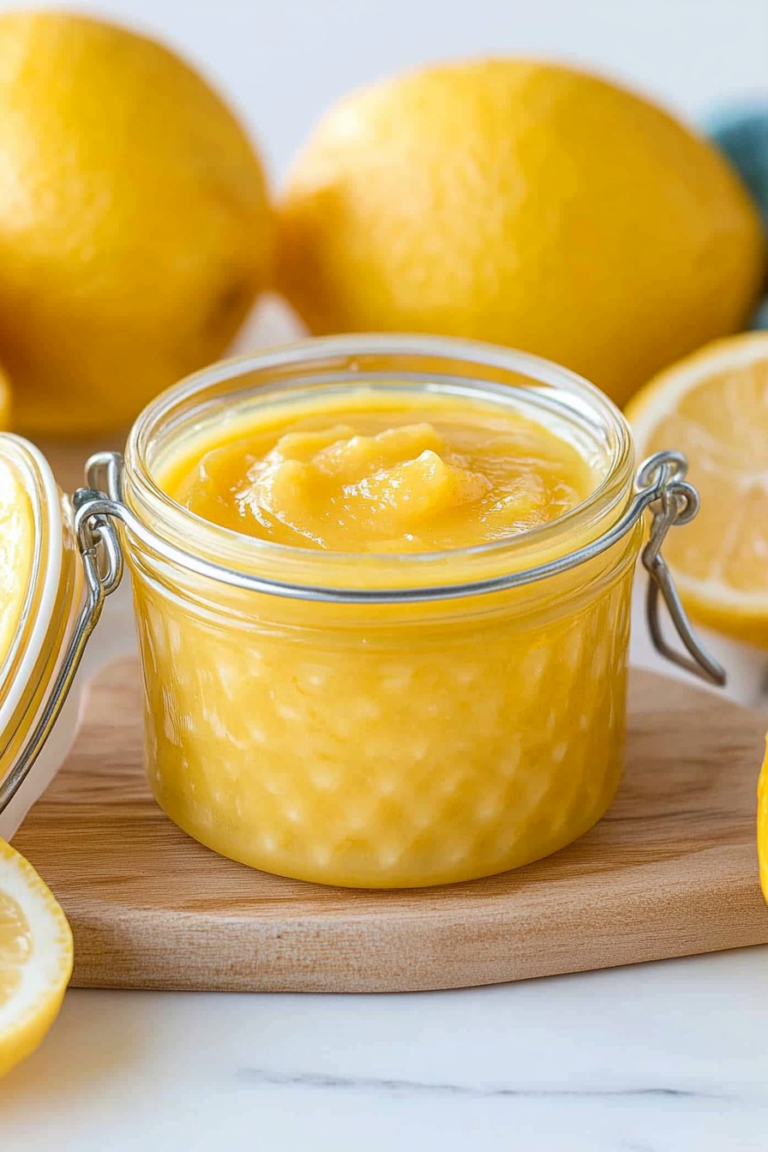
For the Glaze:
- 1 cup powdered sugar
- 2-3 tablespoons freshly squeezed lemon juice
- Zest of one lemon (for extra zing)
- Optional: a splash of milk or plant-based milk to loosen the consistency
Step-by-Step Instructions
Step 1: Preheat & Prep Pan
Set your oven to 350°F (175°C). Grease your bundt pan generously with butter or non-stick spray, making sure to get into all those tricky nooks. Dust with flour or cocoa powder if you want an extra non-stick layer—trust me, this cake releases beautifully when properly prepared. Let’s get the oven nice and hot so everything bakes evenly!
Step 2: Mix Dry Ingredients
In a large bowl, whisk together the flour, baking powder, baking soda, and salt. Doing this step first ensures even distribution—no clumps, no uneven pockets of baking powder. I always double-check that my baking soda isn’t lumpy by sifting everything together if I have a moment. It’s a small step that pays off big in fluffy texture.
Step 3: Mix Wet Ingredients
In another bowl, combine the sugar, eggs, vanilla, and oil. Whisk until smooth and fragrant—you’ll notice it gets a little foamy, which is exactly what you want. I like to do this on a low speed if I’m using an electric mixer. Add the grated zucchini last; fold it in gently so you don’t crush the moisture out. This part makes your batter look all speckled and pretty.
Step 4: Combine
Pour the wet mixture into the bowl of dry ingredients and gently fold together. Be careful not to overmix—stop as soon as you see no streaks of flour. Overmixing can make the cake dense, and I know that from experience! The batter should be thick but scoopable, just like muffin batter. That’s when you know it’s right.
Step 5: Prepare Filling
If you’re adding filling like cinnamon sugar or jam, now’s the time. Mix the cinnamon with the brown sugar for an aromatic burst, or keep it plain if you prefer. You can also toss in some chopped nuts or berries for extra flair—whatever makes you happy. Sprinkle or dollop your filling in the center of the batter when you layer it in the pan.
Step 6: Layer & Swirl
Pour half the batter into the bundt pan. Add your filling in the middle—let’s say a couple of spoonfuls of jam or a sprinkle of cinnamon sugar—and then top with the remaining batter. Using a butterknife or skewer, swirl gently to create pretty marbled effects—this makes each slice a little surprise of color and flavor!
Step 7: Bake
Pop it in the oven and bake for about 40-45 minutes. Check with a toothpick—that’s your test for doneness. If it comes out with few moist crumbs, you’re set! If it browns too quickly, loosely tent with foil after 30 minutes to prevent burning. Let it cool in the pan for about 15 minutes before turning out onto a wire rack. Ah, the smell—trust me, it’s one of those smells that instantly makes everyone in the house hungry!
Step 8: Cool & Glaze
Once cooled just enough so you’re not burning your fingers, drizzle that fresh lemon glaze all over. I love how the zing cuts through the sweetness and makes the whole thing feel a little more special. If the glaze is too thick, just stir in a tiny splash of milk. If it’s too thin, add a sprinkle of powdered sugar and whisk again.
Step 9: Slice & Serve
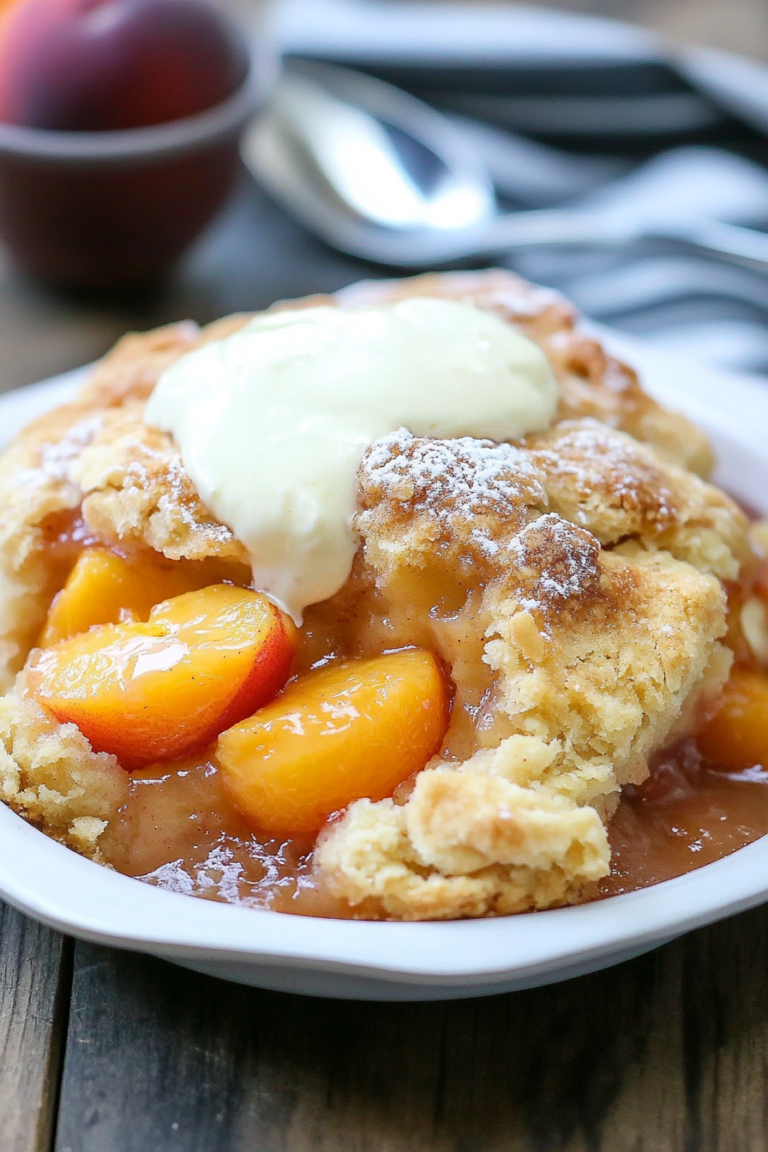
Let the glaze set for about 10 minutes, then slice with a sharp serrated knife. I always run my knife under hot water first—makes for cleaner slices. Serve with a cup of tea or coffee and enjoy the compliments that come flying your way. This cake tastes best slightly warm or at room temperature, and leftovers keep well stored in an airtight container.
What to Serve It With
This moist vanilla zucchini bundt cake is such a versatile creation. For breakfast, slice thin and serve with a dollop of yogurt and a drizzle of honey—trust me, it’s like a little morning sunshine. At brunch, pile it high on a pretty platter with fresh berries and a splash of cream or cappuccino. If you want to serve it as a dessert, I suggest dusting it with powdered sugar or adding some extra fruit on the side—blueberries, strawberries, or a handful of raspberries work beautifully. And honestly, my family adores it as a cozy afternoon snack—warm, comforting, and slightly indulgent. I often make a batch on weekends, wrap up slices, and send some home with friends—or keep a few for myself when I need a little extra love. It’s also fantastic for picnics or a quick gift—wrapped in parchment and tied with twine, it just feels like a warm hug to anyone who receives it.
Top Tips for Perfecting Your Moist Vanilla Zucchini Bundt Cake
After making this dozen times, I’ve learned a few tricks that make all the difference. First, when grating zucchini, I always do it on the fine side and then squeeze out as much moisture as I can—trust me, a wet zucchini can make your batter runny and cause the cake to stick. I’ve tested using almond milk instead of regular milk, and it actually made it even creamier—so don’t hesitate to experiment with plant-based options. When mixing, gentle folding is key—overmixing will turn your cake dense, and I’ve learned to resist the urge to beat too much. For the swirl, I like using a chopstick or skewer because it’s less aggressive than a knife, resulting in a pretty marbled effect. As for substitutions, I’ve swapped out half the flour for oat flour with good results—just add a tablespoon of extra liquid to compensate. Baking tips? Always check your oven temperature with an oven thermometer—baking can vary after all—and try to avoid opening the oven door too early, or you risk deflating that gorgeous rise. For glaze variations, add a splash of vanilla or switch up the citrus for more depth. Lemon is my favorite, but orange or lime could be fun if you’re feeling adventurous. The biggest lesson I’ve learned? Be patient—allow the cake to cool completely before glazing, or you risk melting your gorgeous lemon drizzle away. Small adjustments and a lot of love go into this recipe, and once you get the hang of it, it’s almost impossible to mess up!
Storing and Reheating Tips
This cake is pretty forgiving and keeps wonderfully. If you’re planning to eat it within a day or two, keep it covered loosely at room temperature—just don’t leave it out in the sun! For longer storage, I recommend wrapping it tightly with plastic wrap or storing it in an airtight container in the fridge. It’ll stay fresh for up to 3 days—though I usually hide a slice or two for later, because I can’t resist. If you need to freeze it, wrap the whole cake or individual slices tightly in plastic wrap, then foil. It’s good for up to 3 months. Thaw at room temperature or briefly warm a slice in the microwave with a damp paper towel—be gentle, so it stays moist. When it’s cold, you can even warm slices in the oven for a few minutes to get that freshly-baked feeling all over again. And if you made the glaze separately, it’s best to add it just before serving to keep everything looking pristine and tasting fresh. Honestly, this cake is so adaptable—you’ll find yourself baking it on repeat, just so you can savor that smell wafting through your house!
Frequently Asked Questions
Final Thoughts
Honestly, this moist vanilla zucchini bundt cake is one of those recipes I keep coming back to. It’s humble yet impressive, simple but utterly satisfying. The fact that it sneaks in zucchini, keeps well, and can be dressed up or down makes it such a versatile treat. I love how every slice has this tender crumb and that bright lemon glaze—I can’t get enough. Plus, my kids eagerly fight over the last piece, and I take that as a sign of a winning recipe. If you’re looking for a new way to get more veggies into your baking or just want a cake that feels like a warm hug, give this a try. And don’t forget to come back and tell me how yours turned out or share your own variations—I always love hearing from fellow bakers! Happy baking, and enjoy every crumb of this delightful cake—you’ve earned it!
oatmeal cookies
Ingredients
Method
- To the bowl of a stand mixer fitted with the paddle attachment, combine the egg, butter, sugars, vanilla and beat on medium-high speed until creamed, about 4 minutes.
- Stop, scrape down the sides of the bowl, and add the oats, flour, coconut, walnuts, baking soda, salt. Beat on low speed until just combined, about 1 minute.
- Stop, scrape down the sides of the bowl, and add the chocolate chips. Beat on low speed until just combined, about 30 seconds.
- Using a large cookie scoop, 1/4-cup measure, or your hands, form approximately 12 equal-sized mounds of dough. Roll into balls and flatten slightly. Place a few chocolate chips on top of each mound.
- Place mounds on a large plate or tray, cover with plastic wrap, and refrigerate for at least 2 hours.
- Preheat oven to 350F. Line a baking sheet with a Silpat or spray with cooking spray. Bake the cookies for about 11 to 13 minutes until edges are set and tops are just set.
- Allow the cookies to cool on the baking sheet for about 10 minutes before serving.
Love these cookies! They’re so cozy and I totally get the “healthy secret” vibe—zucchini adds moisture without overpowering the taste.
Love this—zucchini in cookies is such a clever hack! Reminds me of my grandma’s recipes too.