
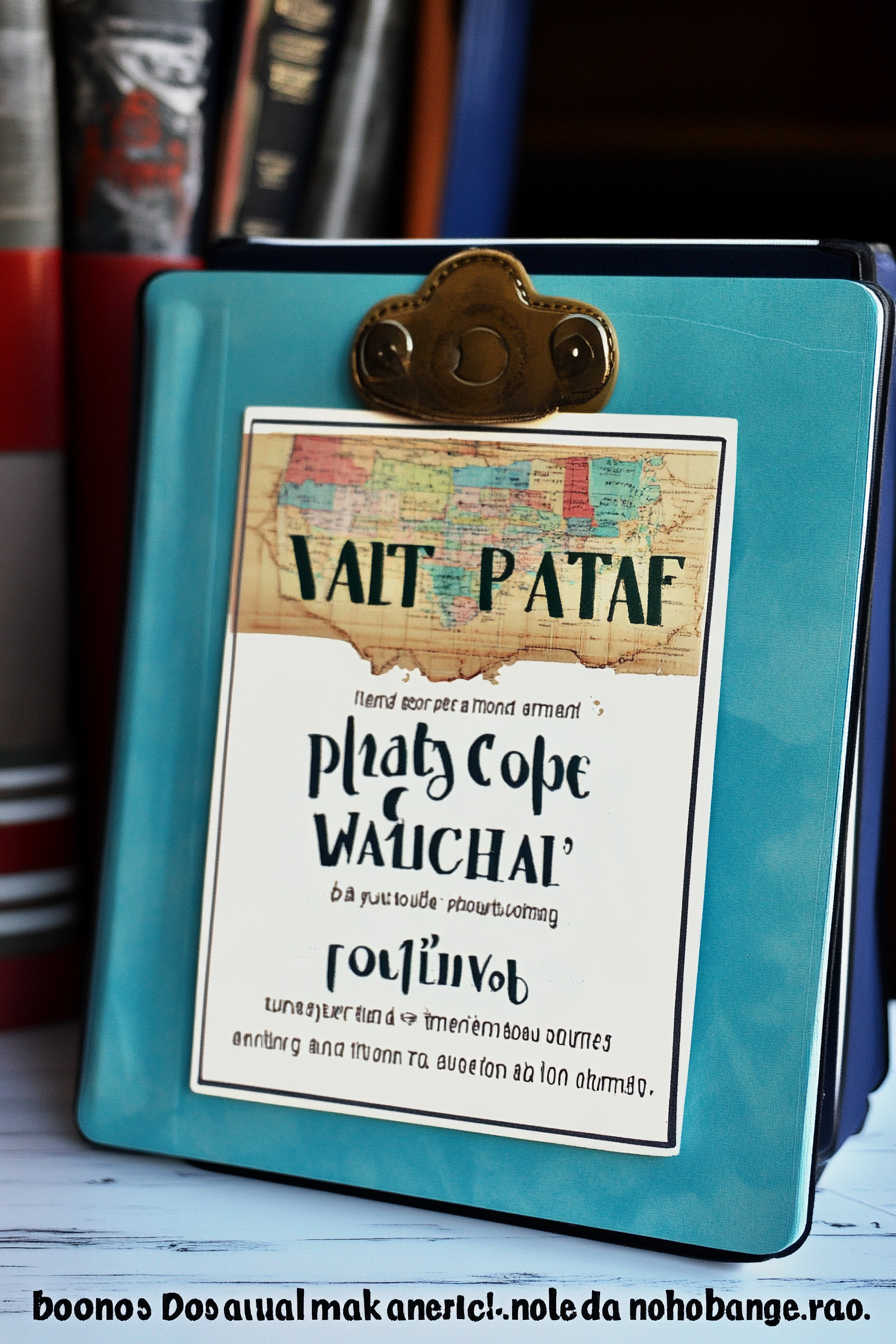
Easy Travel Binder for Babysitters
Oh, I remember the first time I made this zucchini coffee cake swirl — I was looking for something sweet, comforting, and a little different from the usual banana bread or classic muffins. My kids love it, and honestly, so do I! It’s like a cozy hug in every bite, with that perfect cinnamon-spiced swirl winding through moist, tender cake. The best part? It’s surprisingly easy to put together — no fancy equipment needed, just a few simple pantry staples. I always do this when I want something wholesome and indulgent at the same time, especially when those garden zucchinis are taking over my counter (you know how they grow!).
This one’s a lifesaver on busy nights, and honestly, it disappears in minutes at my house. It’s a bit like the “crack” brownies everyone raves about, but with a veggie twist! Plus, the smell alone in the oven makes everyone come running. I’ve tested this with almond milk, and it actually made it even creamier — trust me on that one. Whether it’s for breakfast, an afternoon treat, or dessert after dinner, this zucchini coffee cake swirl always wins. Plus, it’s super flexible—you can add walnuts or swap out half the sugar if you need to. You’re gonna love baking this as much as everyone loves eating it!
What is Zucchini Coffee Cake swirl?
This zucchini coffee cake swirl is basically a tender, slightly sweet cake with a cinnamon-spiced swirl marbled throughout. Think of it as a cross between a coffee cake and a quick bread, but the zucchini keeps everything moist and a little sneaky — nobody even notices it’s there! The name comes from the layered pattern of cinnamon sugar swirl, which looks pretty fancy but is super simple to do. It’s inspired by those classic coffee cakes—but with a veggie upgrade that actually makes it healthier (or at least feels that way!). This dish is all about comfort—soft crumb, warm spices, and that irresistible swirl that’s almost like a cinnamon knot inside. It’s essentially the kind of treat you’d have with coffee or tea, but honestly, it’s good enough to be served anytime you just need a little pick-me-up.
Why you’ll love this recipe?
First off, the flavor. It’s got that warm, cinnamon-spiced aroma that just fills the house. The cake itself is moist and tender, not dense or crumbly — it’s just right. Also, it’s a total win for busy mornings or when friends drop by unannounced; you make it in one bowl, and it baked in under an hour. What I love most about this is how versatile it is: you can add nuts, throw in a handful of blueberries, or even swap out the sugar for honey or maple syrup if you’re feeling fancy. Plus, it’s budget-friendly. Those zucchinis are usually dirt cheap and, when grated, go a long way. It’s incredibly forgiving—I’ve made it with overripe zucchinis, and it still turns out amazing. The swirl gives it a wow factor, making every slice look like a little work of art. And although it tastes indulgent, it’s actually pretty wholesome—more sneaky vegetable goodness! My kids ask for this all the time, and I love how I can sneak in some extra veggies without their noticing. It’s also perfect when you want to bake something that’s not too sweet but still satisfies that craving for a cozy treat. Honestly, I could go on — this is one of those recipes you make over and over for good reason.
How do I make Zucchini Coffee Swirl?
Quick Overview
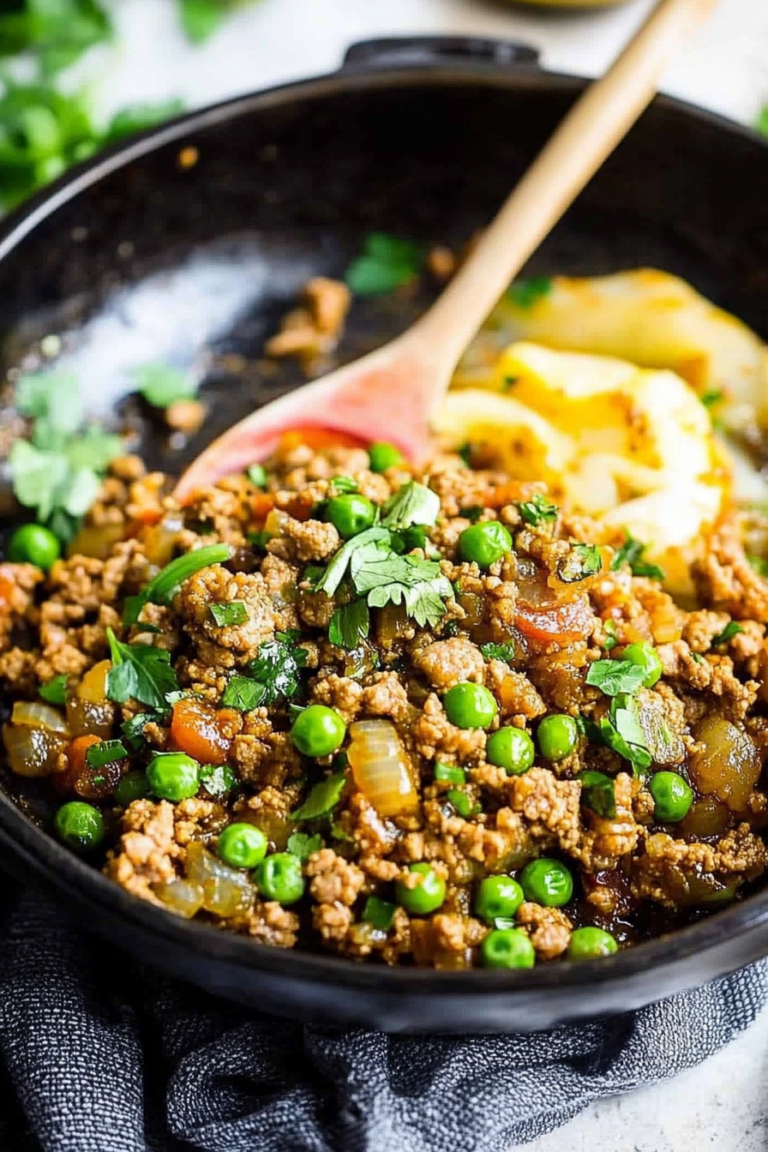
This recipe is all about simple, straightforward steps. You start by preparing your zucchini, then mix the wet and dry ingredients separately. The fun part is making the cinnamon sugar swirl—think of it as a marbled effect, kind of like those fancy cakes but way easier. You layer the batter and swirl in the cinnamon mixture, then bake until the top is golden and a toothpick comes out clean. It’s foolproof once you get the hang of it, and the smell—oh, the smell—is worth every minute of waiting. The best part? You don’t need any complicated equipment—just a mixing bowl, a spoon, and a loaf pan or baking dish.
Ingredients
For the Main Batter:
– 2 cups grated zucchini (about 2 small zucchinis, grated and excess moisture squeezed out)
– 1 ½ cups all-purpose flour (I like White Lily or King Arthur for the best rise)
– 1 cup granulated sugar (maple sugar works great for a deeper flavor)
– ½ teaspoon salt
– 1 teaspoon baking soda
– 1 teaspoon baking powder
– 1 teaspoon cinnamon
– 2 large eggs (or ¼ cup applesauce for a egg-free version)
– ½ cup vegetable oil (or melted coconut oil)
– 1 teaspoon vanilla extract
For the Filling:
– ¼ cup brown sugar
– 1 tablespoon cinnamon
– 2 tablespoons melted butter or coconut oil
– Optional: chopped nuts or chocolate chips for extra decadence
For the Glaze:
– ½ cup powdered sugar
– 1-2 teaspoons milk or cream
– A splash of vanilla (if you like it extra sweet and fragrant)
Step-by-Step Instructions
Step 1: Preheat & Prep Pan
Set your oven to 350°F (175°C). Grease a loaf pan or square baking dish. If you want the cleanest slices, line it with parchment paper — I always do this, and it saves so much hassle when serving. Prepare your zucchini first: grate it, then squeeze out all the excess moisture using a clean kitchen towel or cheesecloth. This step is crucial—moisture can turn your batter’s consistency watery and make the cake dense.
Step 2: Mix Dry Ingredients
In a large bowl, whisk together the flour, sugar, salt, baking soda, baking powder, and cinnamon. Sifting the dry ingredients helps give that light, fluffy crumb I love. I always do this first, so everything’s evenly distributed. A little trick I’ve learned — measure your flour properly by spooning it into your cup and leveling it off; this keeps the batter from being too heavy.
Step 3: Mix Wet Ingredients
In a separate bowl, beat the eggs, then add the oil and vanilla. Mix until smooth. If you’re vegan or avoiding eggs, the applesauce swap works beautifully here — just replace each egg with about ¼ cup of unsweetened applesauce. Stir in the grated zucchini — it should look bright and slightly moist but not watery.
Step 4: Combine
Add the wet ingredients to the dry ingredients and fold gently until just combined. Be careful not to overmix — that’s how you get a dense cake instead of a light one. A few lumps are okay! This is where I sometimes add a handful of chopped nuts or chocolate chips for surprise bites of flavor.
Step 5: Prepare Filling
Mix the brown sugar, cinnamon, and melted butter in a small bowl. This creates that irresistible cinnamon swirl. If you want to make it extra special, sprinkle chopped walnuts or chocolate chips on top of the batter before swirling.
Step 6: Layer & Swirl
Pour half of the batter into the prepared pan, then sprinkle evenly with the cinnamon mixture. Pour the remaining batter on top, and use a knife or skewer to swirl through the batter—try to make a figure-eight or zigzag pattern for full effect. Trust me, the more you swirl, the prettier the pattern!
Step 7: Bake
Bake at 350°F (175°C) for 40-50 minutes, or until a toothpick inserted in the center comes out clean. Ovens vary, so keep an eye on it around 40 minutes, especially if your oven runs hot. If you see the top browning too quickly, tent it with foil—I’ve learned this trick after a few over-baked edges.
Step 8: Cool & Glaze
Let it cool completely in the pan — this helps it set and keeps it from falling apart. Once cooled, drizzle your glaze over the top for that finishing touch. I usually do this while the cake is still slightly warm so the glaze melts into the cracks, making it extra gooey and delicious.
Step 9: Slice & Serve
Use a sharp serrated knife for clean slices. This cake tastes great warm or at room temperature. I love serving it with a cup of coffee or tea, and sometimes a dollop of whipped cream or a spoonful of yogurt if I’m feeling fancy. Honestly, it’s wonderful all on its own — the cinnamon swirl makes each piece special.
What to Serve It With
This zucchini coffee cake swirl is pretty flexible, which makes it perfect for almost any occasion. For breakfast, I love pairing it with a strong mug of coffee or latte, maybe sliced with a smear of butter and a drizzle of honey. It’s also fantastic for brunch — imagine serving slices alongside fresh fruit and a fruit compote or a veggie-filled frittata. When I bake this for dessert, I sometimes serve it with vanilla ice cream or mascarpone cheese — talk about indulgence! Plus, it’s nice anytime you need a cozy snack to have with a cup of tea on a lazy afternoon.
My family especially loves it warm with a glass of milk or a hot cup of cocoa — perfect for those chilly evenings or weekend mornings. I’ve also made little mini-muffins with the batter — just fill muffin tins and reduce baking time to about 20 minutes. Or, if you prefer, you could even use parchment-lined cupcake tins for bite-sized treats. Whatever way you choose, the flavors come through beautifully, and the smell alone will have everyone asking, “Can I have seconds?”
Top Tips for Perfecting Your Zucchini Coffee Cake Swirl
Here are some tips I’ve learned over the years to make sure your cake turns out just right:
- Zucchini Prep: Always squeeze out excess moisture. I’ve tried grated zucchini straight from the fridge — it’s too wet! Wrap it in a clean towel and give it a good squeeze. This makes a big difference in avoiding a watery batter.
- Mixing Advice: Be gentle when combining wet and dry ingredients. Overmixing is the fastest way to dense, heavy cake. Stop as soon as you see no more dry flour streaks. That’s the secret to a fluffy crumb!
- Swirl Customization: Don’t be shy with the cinnamon sugar mixture. Spread it evenly and swirl deeply—but not too aggressively—so the pattern shows nicely once baked. I like doing a few zigzags, but a big swirl works too.
- Ingredient Swaps: Using honey or maple syrup instead of sugar? Great! Just reduce the liquid slightly if your batter feels thick. Or, add a tiny splash more oil for moisture. I’ve tested this with coconut oil, and it turned out fantastic.
- Baking Tips: Keep an eye on the cake as it bakes. If the middle seems underdone but the edges are too brown, tent it with foil. I’ve learned that you can’t always rely solely on the timer—use a toothpick.
- Glaze Variations: Feel free to add a squeeze of lemon zest or a pinch of nutmeg to the glaze. Or skip it entirely for a more rustic look — either way, it’s good!
This recipe has been a staple in my kitchen because it’s so forgiving and satisfying. I’ve made it with slightly less sugar for the kids, with whole wheat flour, and even added blueberries when I had extra berries kicking around. Every tweak brought its own delicious twist. The key is to keep it simple, use good quality ingredients, and enjoy the process as much as the eating.
Storing and Reheating Tips
Once baked, this cake stays fresh for a couple of days — keep it in an airtight container at room temperature for up to two days. If you want to keep it longer, pop it in the fridge, but try to enjoy it within 5 days to keep that moist texture. To reheat, simply warm slices in the microwave for 15-20 seconds, or for a more decadent experience, heat it in the oven at 300°F (150°C) for about 10 minutes. The glaze might firm up in the fridge, but just warm it slightly for that gooey effect. If you’re making ahead, I recommend adding the glaze just before serving to keep it shiny and fresh-looking. Freezing works well, too — wrap slices individually in plastic wrap, then foil, and store for up to 3 months. When ready to eat, thaw at room temperature or warm slices gently in the microwave. Just remember, the smell alone will have everyone lining up for a slice!
Frequently Asked Questions
Final Thoughts
If you’re anything like me, baking isn’t just about the end result — it’s about creating cozy moments and sharing love through food. This zucchini coffee cake swirl has become a household favorite because it’s so forgiving, adaptable, and just downright delicious. Every time I make it, I feel a little nostalgic — maybe because it’s a riff on those quick breads my grandma used to bake, but with a modern twist and a veggie boost. It’s a recipe I can tweak endlessly—adding different spices, nuts, or fruits—and it still always turns out moist and flavorful. I hope you try it soon. Let your kitchen fill with that intoxicating cinnamon aroma, and enjoy the smiles when you take that first warm slice. Happy baking, and I’d love to hear how yours turns out—be sure to leave a comment or share your variations!
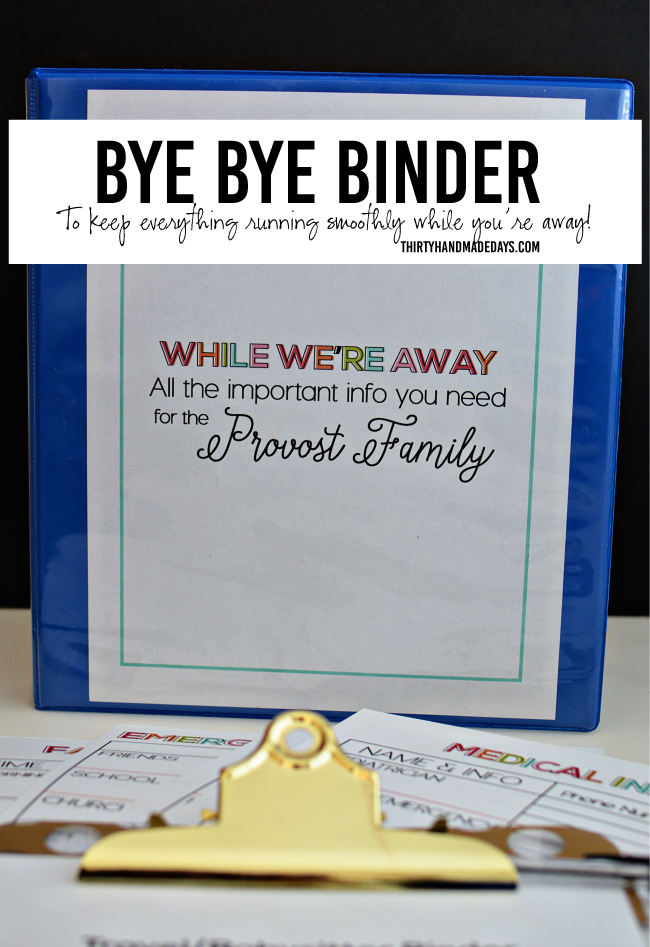
travel binder
Ingredients
Method
- Gather all necessary materials including the binder, dividers, pages, labels, and stickers.
- Insert pages into the binder and organize dividers by category such as reservations, itineraries, and emergency contacts.
- Label each divider appropriately and decorate as desired using stickers.
- Fill the binder with all relevant travel documents and information before your trip.


That recipe sounds amazing — I love how comforting and unique it turns out!
Love this idea! My kids’ sitters always appreciate having everything organized in one place. Great reminder to pack smart when traveling with little ones.
I love how simple and cozy this travel binder idea is! Makes me want to try that zucchini coffee cake swirl recipe too.