
Easy Peppermint Candy Recipe
There’s something almost magical about pulling out a loaf of this zucchini cinnamon swirl cake from the oven. It fills the kitchen with the warm, spicy aroma of cinnamon and the subtle earthiness of fresh zucchini—sounds strange, I know, but trust me, it works. I first stumbled upon this recipe during a summer when my garden was bursting with zucchinis, and I needed a way to turn all those green monsters into something delicious. It’s become a go-to for me, especially on busy mornings or when I want a slice of comfort that’s just a little healthier. My kids ask for this all the time, and honestly, I love how easy it is to whip up—no fancy ingredients, just simple pantry staples. That’s the thing with this recipe: it’s like a cozy hug in loaf form. Perfect to share with friends over coffee or even for a quick breakfast when I’m craving something sweet but don’t want to overdo it. This one’s a lifesaver on busy nights, too—trust me, you’re gonna love how versatile and forgiving it is!
What is a Zucchini cinnamon swirl cake?
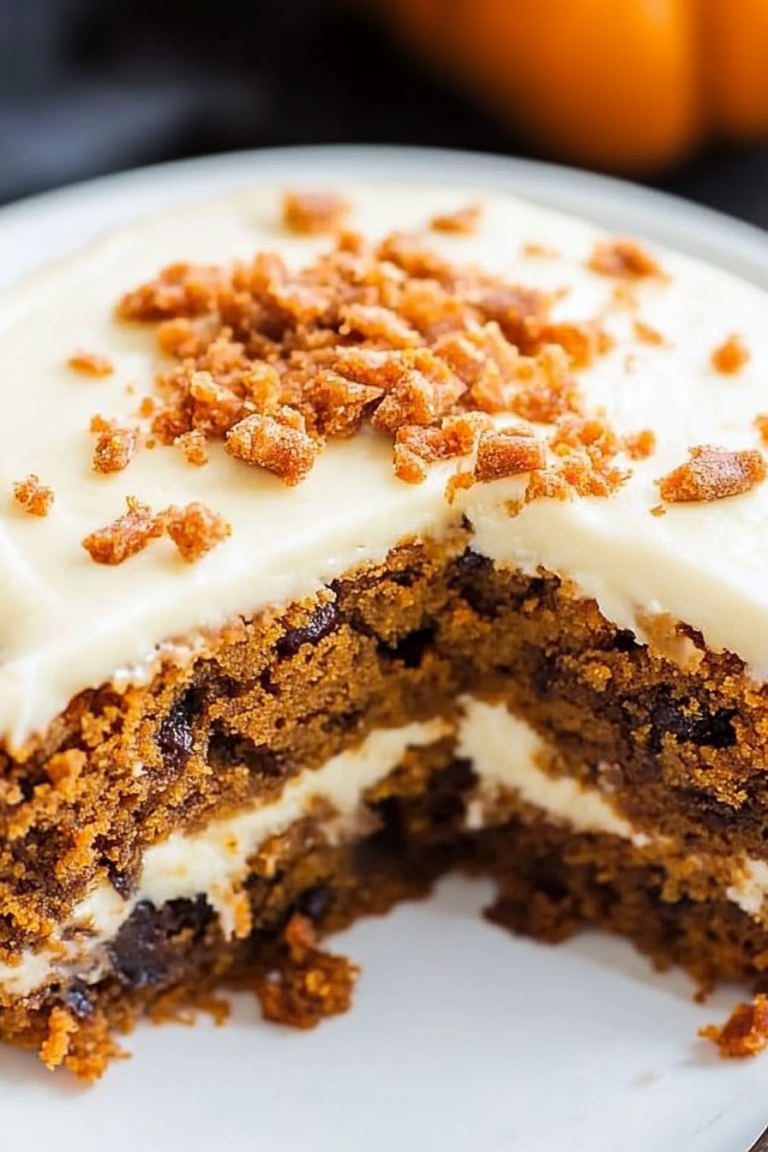
Think of this zucchini cinnamon swirl cake as a charming cross between a bread and a dessert—think moist, dense, with a beautiful ribbon of cinnamon-spiced goodness swirling through every bite. It’s essentially a way to use up an abundance of zucchinis without resorting to just plain baking—though, honestly, it’s so good, it doesn’t feel like a chore at all. The name might sound fancy, but it’s one of those recipes where you throw everything into a bowl and hope for the best, yet the results are always delightful. The cinnamon swirl creates these gorgeous marbled streaks that make the loaf look as inviting as it tastes. I love that it’s flavorful enough to serve as a snack, breakfast, or dessert—there’s a bit of magic in how versatile it is. Plus, it’s a fantastic way to sneak some veggies into the kids’ plates without a fuss. Think of it as a comforting, homemade treat that’s as good for your soul as it is for your taste buds.
Why you’ll love this recipe?
What I love most about this zucchini cinnamon swirl cake is how it manages to be both nourishing and indulgent at the same time. The zucchini keeps it incredibly moist—seriously, if you’ve ever had a dry banana bread, this is the opposite. It stays tender for days, which makes it perfect for batch baking on Sundays. The cinnamon swirl? Oh, that’s the star! It adds a warm, fragrant punch that totally elevates the ordinary loaf. Plus, it’s super budget-friendly—most ingredients are pantry staples like flour, sugar, and cinnamon, which I always keep on hand anyway. This cake is incredibly forgiving—you can add a handful of walnuts for crunch, swap out applesauce for some of the oil to make it even healthier, or cut back on the sugar if you’re watching your carbs. What I really love is how it’s all about the little personal touches—sometimes I sprinkle in a pinch of nutmeg or a splash of vanilla. It’s a recipe I’ve tested countless times, and it never fails to put a smile on everyone’s face. Whether I serve it warm with a pat of butter or toasted with a smear of cream cheese, it’s always met with happy faces.
How do I make Zucchini Swirl Cake?
Quick Overview
This cake is as straightforward as it gets. You grate the zucchini (no peeling needed!), mix up a moist batter, swirl in the cinnamon mixture, and bake. The magic is in how the zucchini keeps everything super moist, and the cinnamon swirl adds that beautiful marbled look and cozy flavor. It’s basically a one-bowl wonder—perfect for lazy Sunday mornings or a quick afternoon snack. The best part? No complicated techniques, just a few simple steps that come together in under an hour. I always do this when I want something sweet, but I don’t want to spend ages in the kitchen. The smell alone will draw everyone into the house!
Ingredients
For the Main Batter:
– 2 cups grated zucchini (about 2 medium zucchinis)
– 1 1/2 cups all-purpose flour (or half whole wheat for a healthier twist)
– 1 cup granulated sugar
– 1/2 cup vegetable oil (can substitute with melted coconut oil or applesauce)
– 3 large eggs
– 1 teaspoon vanilla extract
– 1 teaspoon baking soda
– 1 teaspoon baking powder
– 1/2 teaspoon salt
For the Filling:
– 1/4 cup brown sugar
– 2 teaspoons ground cinnamon
– 1 tablespoon melted butter or coconut oil
– Optional: 1/2 cup chopped nuts or chocolate chips for extra flavor
For the Glaze:
– 1/2 cup powdered sugar
– 2 tablespoons milk or cream
– 1/4 teaspoon vanilla (or almond extract for a twist)
– Pinch of cinnamon (if you like a little extra spice)
Step-by-Step Instructions
Step 1: Preheat & Prep Pan
Set your oven to 350°F (180°C). Grease a loaf pan or line it with parchment paper—trust me, this is the step where I goofed once and wished I had parchment ready! Ready your zucchini by giving it a good rinse, then grate it using the coarse side of your box grater. No peeling needed because most of the moisture stays in the skin—plus, that’s where the nutrients are. After grating, use a clean kitchen towel or paper towels to squeeze out some excess moisture. This step makes a huge difference in avoiding a soggy loaf. The less excess water, the better your cake will hold together and stay moist.
Step 2: Mix Dry Ingredients
In a large bowl, whisk together the flour, baking soda, baking powder, salt, and cinnamon (for the swirl). Mixing these first ensures even distribution—no clumps, no surprises. I’ve learned this the hard way after last-minute fixes with lumpy batter. Set this aside for now.
Step 3: Mix Wet Ingredients
In another bowl, whisk the eggs with sugar until pale and slightly frothy—that’s my little secret to extra fluffy cake. Add the oil and vanilla, mixing until everything looks shiny and well combined. I like to use a whisk for this step—it helps incorporate air and keeps the batter light. Then, fold in the grated zucchini gently; it might look a little shaggy at first, but that’s normal.
Step 4: Combine
Pour the wet mixture into the dry ingredients. Using a spatula or wooden spoon, fold until just combined—don’t overmix, or you’ll end up with tough bread instead of tender cake. If you see a few lumps here and there, that’s okay. Just don’t go overboard!
Step 5: Prepare Filling
In a small bowl, mix together the brown sugar, cinnamon, and melted butter. If you’re adding nuts or chocolate chips, fold them in now. This spicy-sweet mixture will swirl beautifully through the batter, creating those gorgeous marbled patterns. I usually set aside a couple of tablespoons for sprinkling on top, just for a little extra flair before baking.
Step 6: Layer & Swirl
Pour half the batter into your prepared loaf pan. Spoon dollops of the cinnamon mixture over the batter, then add the rest of the batter on top. Using a skewer or butter knife, gently swirl through the batter—don’t overmix, or you’ll lose the pretty marbled effect. I do gentle figure-eights and zigzags, making sure the cinnamon streaks are visible for that classic look. Trust me, this part’s a little art and a lot of fun!
Step 7: Bake
Pop the loaf into the oven and bake for about 50-60 minutes. You know it’s done when a toothpick inserted in the center comes out clean or with just a few moist crumbs. I’ve learned to check around the 50-minute mark, especially if I’ve made mini loaves or used different oven racks. Every oven is different, so don’t be shy to test—your patience will reward you with a perfectly moist, tender crumb.
Step 8: Cool & Glaze
Let the loaf cool in the pan for about 10 minutes—that makes it easier to handle—and then transfer it to a wire rack. Wait until it’s just warm to the touch before drizzling on the glaze. Mix powdered sugar with milk and vanilla until smooth. If the glaze feels too runny, add a touch more powdered sugar; if it’s too thick, a splash more milk. Drizzle generously over the loaf for a finishing touch that’s both pretty and delicious.
Step 9: Slice & Serve
Once cooled completely, slice it with a serrated knife to reveal those beautiful cinnamon streaks. Serve slightly warm or at room temperature, with a dollop of whipped cream or a glass of cold milk—whatever floats your boat. This cake is equally good the next day, once the flavors have mellowed. I like to microwave a slice for 10 seconds when I want a warm treat—trust me on this, it melts the cinnamon swirl and makes it even cozier.
What to Serve It With
This zucchini cinnamon swirl cake is quite versatile, so I usually adapt it based on the occasion. For a quick breakfast, I love pairing it with a steaming cup of coffee and some fresh fruit—think berries or sliced bananas. It’s also fantastic as a brunch centerpiece—serving slices with a smear of cream cheese or ricotta turns it into almost a dessert. My family often enjoys it after dinner, toasted and topped with vanilla yogurt or a drizzle of honey. On casual afternoons, it’s a cozy snack paired with tea or hot cocoa. This cake’s humble origins make it a real chameleon—sweet enough for dessert but wholesome enough for breakfast too. It’s part of my family traditions, especially on weekends when I want to treat everyone without hours of baking. And if you’re like me, you’ll find that everyone sneaks a second slice—this disappears in minutes at my house!
Top Tips for Perfecting Your Zucchini Cinnamon Swirl Cake
Over the years, I’ve picked up a few tricks that make all the difference when baking this cake. First, make sure to squeeze out as much moisture from the zucchini as you can—otherwise, your loaf might turn out a little too damp or dense. I’ve tested with both large and medium zucchinis, and smaller ones tend to have a better flavor-to-moisture ratio. When mixing the batter, resist the temptation to overmix—stir just until combined; overdoing it can lead to a tougher crumb, no matter how many times I forget this rule! For the swirl, I recommend dropping spoonfuls of cinnamon mixture randomly, then swirling gently in a zigzag pattern—this gives you the most natural, marbled look. If you want to tweak the sweetness, try reducing the sugar by a quarter—still tastes great, and it’s a little more mindful. You can even swap out some of the flour for almond or oat flour for a grainier, nuttier flavor. The baking time might vary if your loaf is thicker or thinner, so keep a close eye after 50 minutes. Finally, I love adding a sprinkle of flaky sea salt on top before baking—it balances the sweetness and enhances the cinnamon flavor. This recipe is forgiving, so don’t be afraid to make it your own with small tweaks and preferences.
Storing and Reheating Tips
This cake stays moist and tasty for several days if stored properly. Once it’s cooled completely, wrap it tightly in plastic wrap or place it in an airtight container. At room temperature, it’ll stay fresh for about two days—baked goods like this always taste better the next day anyway, when the flavors have melded together. If you need to keep it longer, pop it into the fridge for up to five days. Just make sure it’s wrapped well so it doesn’t dry out. To freeze, wrap the loaf tightly in plastic and foil, then store for up to three months—perfect for quick breakfasts or snacks. When ready to enjoy, thaw at room temperature or warm slices in the microwave for about 10 seconds. If using glaze, I recommend adding it fresh, but if it’s already on the cake, a quick microwave reheat can revive that cozy warmth. This way, you get almost freshly baked goodness without the fuss. The key is gentle reheating—overdoing it can dry out the cake or melt the glaze too much. I love seeing how this simple loaf maintains its moist texture even after days—proof that good baking is all about balance and patience.
Frequently Asked Questions
Final Thoughts
This zucchini cinnamon swirl cake is one of those recipes I keep coming back to because it’s just so darn comforting and adaptable. It’s simple enough to throw together on a weekday, but fancy enough to serve at brunch or even to gift to friends. Honestly, I love how it manages to be delicious, a little wholesome, and deeply satisfying—all in one loaf. Its gentle sweetness and aromatic cinnamon make it irresistible, especially when it’s still slightly warm and the glaze is glistening. Over the years, I’ve tweaked ingredients, added my own little twists, and tested various oven settings just to get it perfect for my family—and I can’t wait for you to try it, too. If you cook this, I’d love to hear how it turns out! Feel free to customize with your favorite nuts, topping flavors, or even a splash of orange zest for a citrusy twist. Happy baking, and may your kitchen always smell as cozy as mine does right now!

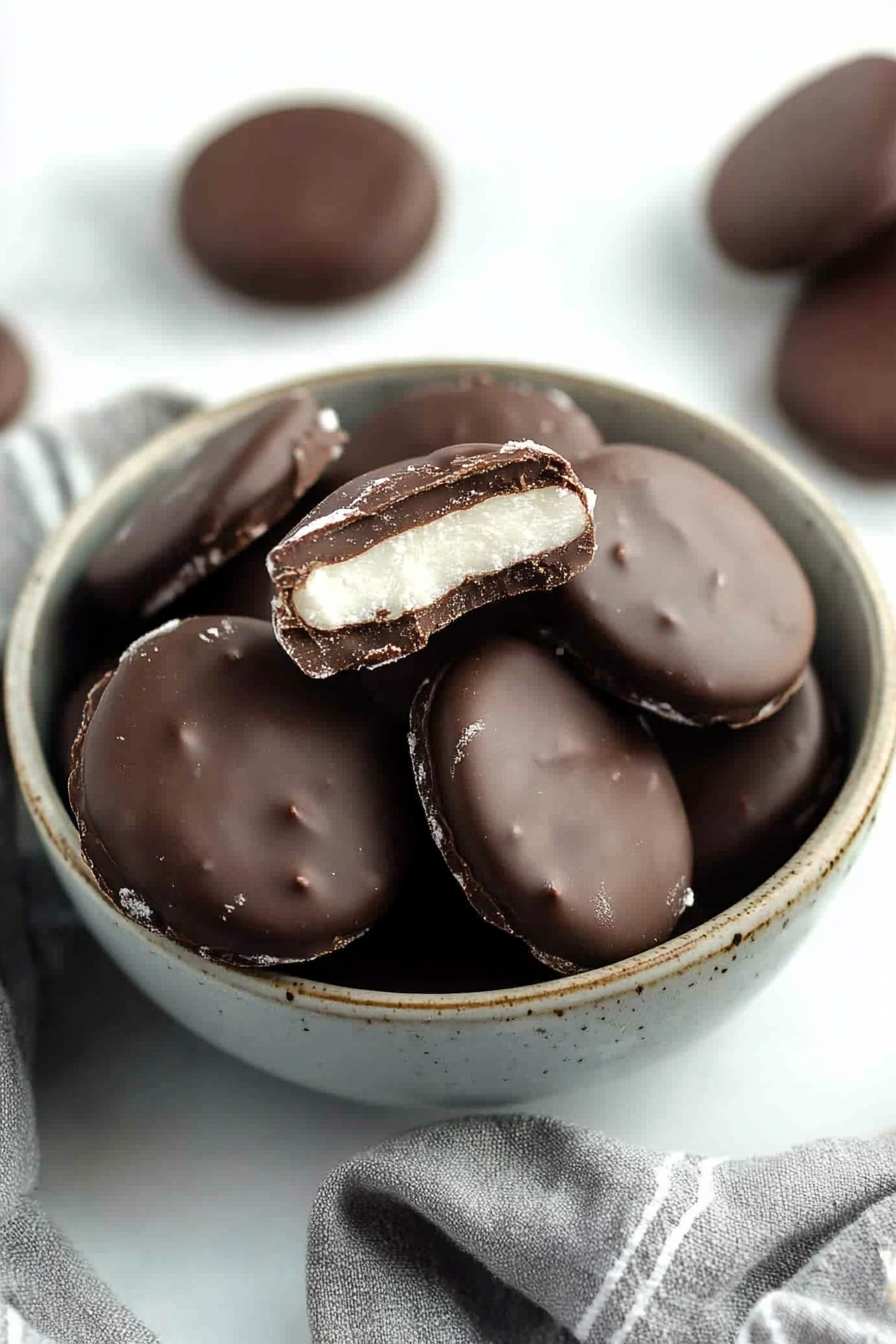
peppermint patties
Ingredients
Method
- In a large mixing bowl, beat marshmallow cream, butter, vanilla, and peppermint extracts until smooth. Mix in powdered sugar gradually until combined.
- Shape the mixture into small balls, about 1 tablespoon each, then flatten slightly or form into football shapes. Freeze for 2 hours.
- Melt dark chocolate wafers according to package instructions. Dip the chilled patties into the melted chocolate, tapping off excess, then place on parchment paper to set.
- Optionally, melt white chocolate and pipe laces onto chocolate-coated patties for football shape. Chill until set.
- Store in an airtight container at room temperature for up to a week.


Looks like your message got cut off—but I totally agree about that zucchini cinnamon swirl cake! The aroma alone makes it feel like a cozy hug.
I love how this recipe brings the cozy warmth of cinnamon and peppermint together—perfect for the holidays!