

Easy Peppermint Candy Recipe
There’s something undeniably cozy about pulling out a slice of cake that tastes like a warm hug. I remember every summer when my grandma would bake zucchini bread — it’s one of those smells that instantly transports me back to her kitchen, with its sweet, earthy aroma wafting through the house. Over time, I experimented with that same flavor magic but in cake form, and honestly, this zucchini banana cake has become a favorite in my family. It’s incredibly simple to make, stays moist for days, and has that perfect balance of sweetness and richness. Plus, it’s a sneaky way to get more veggies into your kids’ lives — mine ask for this all the time. It’s kind of like a cross between banana bread and classic sheet cake, but with the added surprise of tender zucchini. If you’re craving something homemade, comforting, and a little bit special, this might just be your new go-to.
What is a Zucchini Banana Cake?
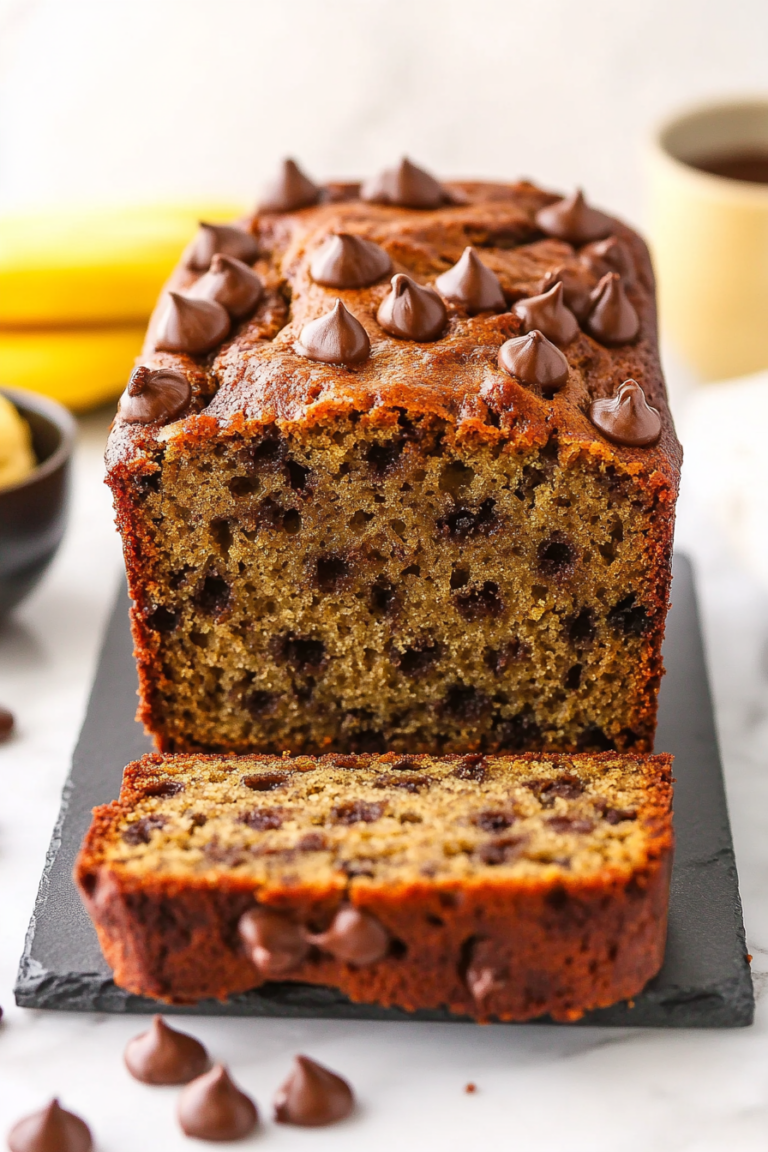
Think of zucchini banana cake as a moist, tender dessert that sneaks in healthy veggies — zucchini, in this case — and pairs them with the sweet, fruity flavor of ripe bananas. It’s essentially a mash-up of banana bread and a simple cake, but with the added bonus of a light, fluffy crumb. The name might sound a bit fancy, but I promise, it’s one of those miracles that’s wildly easy to throw together with ingredients you probably already have in your pantry. This cake is perfect when you want something sweet but don’t want to spend hours in the kitchen. It’s also really adaptable: you can add walnuts, chocolate chips, or even a dash of cinnamon if you’re feeling adventurous. Think of it as a “good for you, but still indulgent” kind of treat. It’s a crowd-pleaser at breakfast, brunch, or even as a cozy dessert after dinner.
Why you’ll love this recipe?
What I love most about this zucchini banana cake is how it checks *all* the boxes: flavor, simplicity, and versatility. First, the flavor profile is just what I crave: the bananas give it natural sweetness, while the zucchini keeps it moist and adds a subtle, vegetal undertone that’s not overwhelming. You get a hint of earthiness in every bite—kind of like a grown-up banana muffin but way more elegant.
It’s crazy easy to make, honestly. I always do this when I need a quick dessert or an afternoon snack. Just mix your ingredients, layer your fillings if you want, pop it in the oven, and you’re set. The best part? It’s budget-friendly. Zucchini and bananas are typically inexpensive, especially when they’re in season, and a single batch can serve a crowd or last a few days in the fridge.
And the fun part — this cake is super versatile. I’ve tested it with almond flour, and it actually made it even creamier! Sometimes, I add a handful of chopped chocolate chips or walnuts for a little crunch. Leftover? Perfect for breakfast or a quick coffee break. When I bring this to a potluck, everyone asks for seconds — I swear, it disappeared in minutes at my house! Honestly, what I love most about this is how forgiving it is. It’s one of those recipes that never fails, even if I’ve slacked on the prep or am winging it a bit.
How do I make Zucchini Banana Cake?
Quick Overview
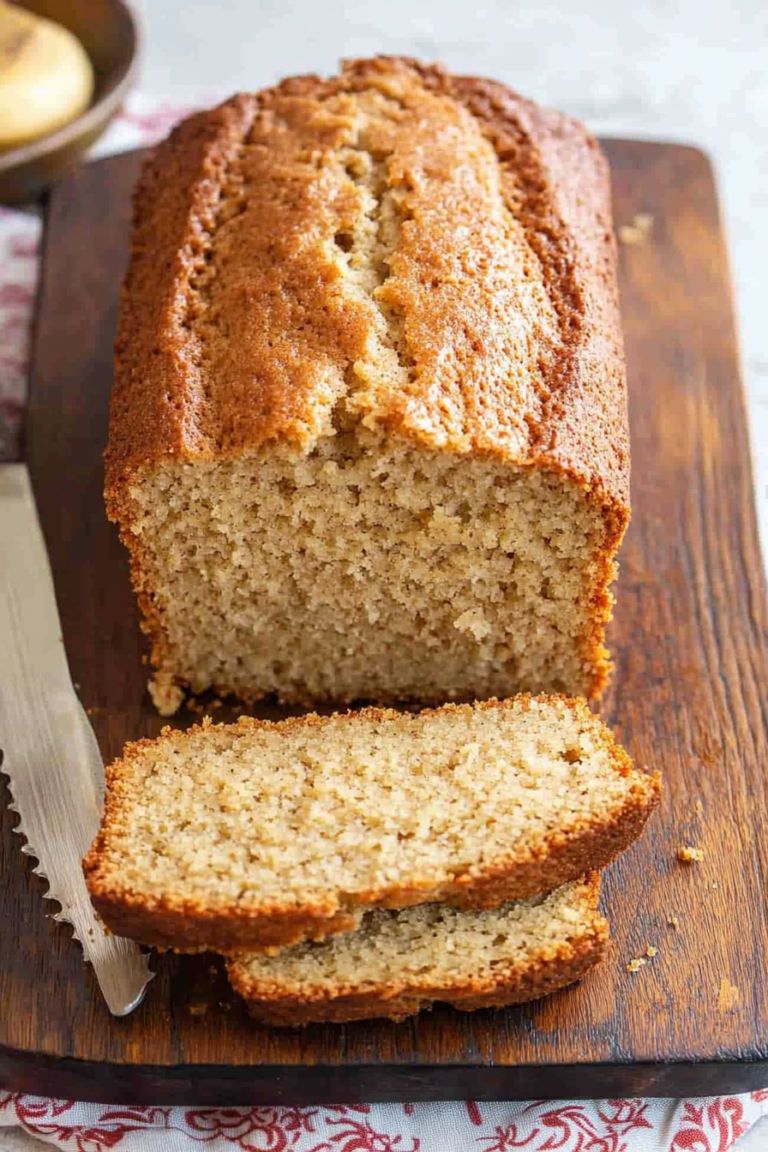
This cake comes together in about an hour, start to finish. The batter is straightforward, with mashed bananas and grated zucchini folded into a lightly sweetened base. You can add a swirl of cream cheese or chocolate filling if you want a rich center. The batter is poured into a loaf pan or square baking dish, topped with a simple glaze or dusting of powdered sugar, and baked until golden. It’s one of those recipes where the hardest part is waiting for it to cool — trust me, it’s worth it. Once baked, the aroma alone will make everyone come running. This cake is perfect for those days when you want something homemade but don’t have hours to spare.
Ingredients
For the Main Batter:
– 3 ripe bananas, mashed (the gap-toothed smile of your fruit bowl)
– 1 cup grated zucchini (squeeze out excess moisture)
– 2 eggs (for binding and richness)
– ½ cup unsalted butter or oil (I prefer butter for depth, but oil keeps it lighter)
– 1 cup granulated sugar (you can go a little less if you want it less sweet)
– 2 cups all-purpose flour (or a gluten-free blend if you prefer)
– 1 teaspoon baking soda
– 1 teaspoon vanilla extract
– Pinch of salt
For the Filling (Optional):
– Cream cheese, softened
– Chopped nuts or chocolate chips
– A dash of cinnamon or nutmeg for extra warmth
For the Glaze:
– ½ cup powdered sugar
– 1-2 teaspoons milk or lemon juice
– A splash of vanilla (optional)
Step-by-Step Instructions
Step 1: Preheat & Prep Pan
Set your oven to 350°F (175°C). Grease your baking dish — I love using parchment paper — and set aside. This little step saves me from fighting with sticking baked goods later.
Step 2: Mix Dry Ingredients
In a bowl, whisk together the flour, baking soda, salt, and any spices if you’re adding them. This ensures even distribution and helps the cake rise just right.
Step 3: Mix Wet Ingredients
In another large bowl, mash your bananas well — I like to use a fork until smooth, but a potato masher works, too. Then, stir in the eggs, melted butter, vanilla, and sugar. The mixture should be smooth and slightly frothy, like a thick batter.
Step 4: Combine
Gradually add the dry ingredients into the wet, folding gently just until combined. I avoid overmixing because this can make the cake dense. Gently stir in your grated zucchini — don’t squeeze out every drop of moisture at this point; a little dampness is fine.
Step 5: Prepare Filling
If you’re adding a filling, spread your softened cream cheese over the top of the batter now, or swirl it in before baking. Or toss in chocolate chips — I promise, you can’t go wrong here.
Step 6: Layer & Swirl
If layering with filling, pour half the batter into your pan, spread your filling, then top with the remaining batter. Use a toothpick or knife to gently swirl for that beautiful marbled effect.
Step 7: Bake
Pop it in the oven and bake for about 45-50 minutes. Check with a toothpick — if it comes out clean, you’re done. Oven temperatures vary, so start checking at 45 minutes. The top should be golden, and the house will fill with that sweet banana scent.
Step 8: Cool & Glaze
Let the cake cool in the pan for about 10-15 minutes. Then, transfer to a wire rack. For a beautiful finish, whisk together your powdered sugar and milk to make a glaze, and drizzle it over the cooled cake. I think a little glaze makes it feel extra special, but a dusting of powdered sugar works just as well.
Step 9: Slice & Serve
Once everything’s cooled and glazed, slice it up. I like serving this slightly warm or at room temperature — either way, it’s divine. A dollop of whipped cream or a scoop of vanilla ice cream nearby just seals the deal.
What to Serve It With
This cake is so adaptable — I’ve served it a million ways. For breakfast, it’s lovely with a hot cup of coffee or tea, maybe topped with a smear of butter or a swipe of honey. It’s also fabulous for brunch, accompanied by fresh berries or a dollop of yogurt. When I serve it as dessert, I love adding a scoop of vanilla ice cream or a drizzle of caramel sauce — trust me, the warmth melting into the creaminess takes it to another level.
In our family, we also enjoy leftover slices as a cozy snack with a cup of tea at 4 pm or even at midnight when the sweet tooth strikes. My kids actually ask for this all the time — I think the secret is how moist and flavorful it stays, even after days. Plus, the subtle zucchini flavor comes out more the next day, and the smell alone keeps everyone coming back for more.
Top Tips for Perfecting Your Zucchini Banana Cake
After making this dozens of times, I’ve picked up a few tricks I’ll share. First, squeeze out excess moisture from the zucchini, but don’t drain it entirely — a little moisture keeps the batter tender. I find using a fine grater gives the best texture, and a quick pat with a paper towel absorbs moisture that can make the bake a little dense.
When mixing, fold gently and stop just when everything is combined. Overmixing leads to a tough cake, and nobody wants that. For the swirl effect, I suggest dropping spoonfuls of filling randomly and using a toothpick or skewer to create gentle waves — it makes every slice look fancy.
Depending on your oven, you might need to adjust baking time slightly. An oven thermometer helps; mine tends to run a bit cool, so I usually add 5 minutes. When it’s done, the top should be golden and a skewer inserted into the center comes out clean — but not dry!
For the glaze, I like it runny enough to drip into every crevice but thick enough to stay put. Stir gradually, adding more sugar or milk as needed. A splash of lemon juice in the glaze brightens up the flavor and compliments the banana well.
One more thing—don’t skip the cooling stage. If you glaze it while still warm, the glaze melts into the cake and creates a luscious, shiny surface. But waiting until it’s just warm ensures the glaze sets perfectly without becoming runny.
This recipe is forgiving and flexible. Sometimes, I throw in a handful of chopped walnuts or chunks of dark chocolate — the kids love it, and it slightly elevates the cake’s richness. My biggest lesson? Trust your nose and gut—if it smells good, it’s probably done.
Storing and Reheating Tips
This cake keeps beautifully. If you’re not gobbling it all in one sitting, wrap leftovers in plastic or store in an airtight container. At room temperature, it’s good for about two days — keep it covered to prevent it from drying out. After that, pop it in the fridge; it stays moist and flavorful for up to 5 days. I actually love it cold straight from the fridge or gently warmed in the microwave for a few seconds before serving. It’s surprisingly forgiving, and the flavor only gets better with time.
If you want to freeze it, wrap slices tightly in plastic wrap, then store in a freezer bag for up to 3 months. Thaw at room temperature or warm it gently in the microwave. Just don’t forget to add the glaze after reheating if you want that shiny, sweet topping — it’s the finishing touch!
Really, this cake is about ease and enjoyment. It’s a keep-it-in-the-freezer, bake-it-on-a-whim kind of recipe. Trust me, those times when you’re craving something cozy and sweet, this cake will be your best friend.
Frequently Asked Questions
Final Thoughts
If you’re like me, you’re always on the lookout for a dessert that’s a little special but doesn’t require a ton of fuss. This zucchini banana cake hits the perfect sweet spot — it’s moist, flavorful, and surprisingly forgiving. I love how versatile it is: make it plain, swirl in some Nutella, or toss in your favorite nuts. Every time I bake this, it feels like sharing a piece of my childhood with my family all over again. It’s become a staple in my recipe arsenal, especially because of how forgiving and adaptable it is. Honestly, I can’t wait for you to try it and tell me what twists you added! Don’t forget to share your photos or variations in the comments — baking is always better when shared. Happy baking, and enjoy every bite of this cozy treat!

peppermint patties
Ingredients
Method
- In a large mixing bowl, beat marshmallow cream, softened butter, vanilla extract, and peppermint extract until fully combined. Add powdered sugar gradually and mix on medium speed until well blended.
- Line a baking sheet with parchment paper. Using about 1 tablespoon of filling, shape into a ball, then flatten for the traditional shape or pinch ends for footballs. Freeze for 2 hours or overnight.
- Melt dark chocolate wafers according to package directions. Dip frozen peppermint shapes into chocolate using a toothpick, letting excess drip off. Place on parchment paper to set.
- Store at room temperature in an airtight container.
- Optional: Melt white chocolate and pipe laces onto football-shaped candies. Let set.

This reminds me of my grandma too—those little candies always made the holidays feel extra special. Thanks for sharing such a sweet memory!
This sounds so comforting — I love how baking can feel like a warm hug! My grandma’s zucchini bread was the best.
This recipe sounds amazing—nothing beats that cozy, comforting flavor of peppermint! I can already imagine how perfect it would be with coffee.
This recipe sounds so comforting—just like grandma’s zucchini bread! I’d love to try it for the holidays.