
Creamy Samoa Cheesecake Recipe
There’s something about sneaking a veggie into a sweet treat that just feels sneaky in the best way, right? I remember as a kid, my mom would hide grated carrots in banana bread, and I’d never suspect a thing—just a burst of sweetness and moistness that made it impossible to stop at one slice. Now, as a grown-up, I’ve taken that same idea and turned it into my favorite zucchini swirl cake. It’s incredibly lush, beautifully marbled with a hint of cinnamon, and honestly, it’s the one dessert I whip up when I want something indulgent but also kind to my body. Plus, I swear my kids ask for this all the time—probably because it’s like a guilty pleasure without the guilt! This one’s a lifesaver on busy nights when I need a quick smile in cake form. The smell alone brings everyone to the kitchen, and I love how it feels like a special family secret. Ready to make your new favorite? Let’s dive in.
What is Zucchini Swirl Cake?
Think of zucchini swirl cake as the lovechild of a moist, tender cake and a pretty marbled swirl of cinnamon-laced batter. It’s essentially a layered delight where vibrant green zucchini is grated and folded into the batter, adding moisture and a sneaky veggie boost. The “swirl” part comes from gently spooning cinnamon-spiced batter over the plain layer and then swirling it with a knife—kind of like making a classic marble cake but with a healthy twist. The name might sound fancy, but really, it’s just a cozy, homey dessert that’s as at home on your breakfast table as it is after dinner. It’s inspired by those recipes where you get the best of both worlds—healthier ingredients and amazing flavor. Think of it as a cake that’s good enough for guests but easy enough for a weeknight treat. I’ll tell you all my tips and tricks, so your cake comes out perfect every time!
Why you’ll love this recipe?
What I love most about this zucchini swirl cake is how simple and forgiving it is. Despite looking fancy with all those beautiful marbled swirls, it comes together in about an hour with just mixing and layering. No complicated frosting or intricate decorating—just a spoon and a gentle swirl, and you’re set. The flavor? Oh, it’s a warm cinnamon hug with hints of vanilla, and the zucchini adds a slight earthy note that balances the sweetness perfectly. Plus, it’s super budget-friendly — I always have these ingredients in my pantry and fridge, and honestly, I’ve made this with whatever I had on hand, from almond milk to coconut oil, and it’s turned out amazing every time. And because it’s made with shredded zucchini, it’s incredibly moist and tender, making each bite melt in your mouth. This cake is also versatile—I’ve tried adding walnuts, swapping in honey for sugar, and even making mini muffins out of the batter (trust me, they disappear in minutes!). Honestly, what I love most about this is how it makes everyone feel good—like you’re nourishing your family with a little bit of secret healthy goodness in every slice.
How do I make Zucchini Swirl Cake?
Quick Overview
This zucchini swirl cake is super straightforward. You start by preparing your zucchini and mixing up a simple batter that’s moist and fluffy. You then pour most of the batter into a pan, add a cinnamon-spiced layer on top, and swirl it through to create pretty marbling. A quick bake, and you’re done! The trick is not overmixing so the cake stays tender, and swirling gentle enough to get those beautiful ribbons. It’s perfect for when you want a little bit of everything—comfort, health, and a touch of elegance—all in one slice. It’s a no-fuss recipe that’s reliable and sure to become a family favorite.
Ingredients
For the Main Batter:
– 2 cups shredded zucchini (about 2 medium zucchinis, grated and drained)
– 1 1/2 cups all-purpose flour (or whole wheat for a healthier twist)
– 1 cup granulated sugar (or coconut sugar)
– 1/2 cup vegetable oil or melted coconut oil
– 3 large eggs
– 1 teaspoon vanilla extract
– 1 teaspoon baking powder
– 1/2 teaspoon baking soda
– 1/4 teaspoon salt
For the Filling:
– 2 tablespoons cinnamon
– 2 tablespoons brown sugar
– 1 tablespoon melted butter (or coconut oil)
*(Optional: a handful of chopped walnuts or raisins for extra texture)*
For the Glaze:
– 1 cup powdered sugar
– 2-3 teaspoons milk (dairy or plant-based)
– 1/2 teaspoon vanilla
*(Add a splash of lemon juice or a sprinkle of cinnamon for variation)*
Step-by-Step Instructions
Step 1: Preheat & Prep Pan
Crank your oven to 350°F (175°C). Grease your loaf pan or square baking dish generously with butter or non-stick spray. Line it with parchment paper if you want to lift the cake out easily later. I always do this, especially when I plan to slice it pretty like a bakery cake. Set it aside while you get the batter ready.
Step 2: Mix Dry Ingredients
In a large bowl, whisk together the flour, baking powder, baking soda, salt, and cinnamon (if using the cinnamon for the swirl). This step ensures your leavening agents distribute evenly, so your cake rises evenly and stays tender. It’s a simple step that makes a big difference—trust me, don’t skip it!
Step 3: Mix Wet Ingredients
In another bowl, whisk together eggs, sugar, oil, and vanilla until smooth. I love using a sturdy whisk here—it helps break up the sugar and gets everything nice and emulsified. If your eggs are straight from the fridge, just give them a quick beat beforehand. I’ve tested this with almond milk instead of plain milk, and honestly, it made it even creamier and more luscious. Pour the wet mixture into the dry ingredients and stir gently until just combined. Overmixing makes the batter dense, so fold it just until you see no dry flour, but don’t go beyond that.
Step 4: Combine
Stir in the shredded zucchini — don’t squeeze out all the moisture; that moisture is what keeps the cake soooo moist. If your zucchini is especially watery, I sometimes give it a quick squeeze with paper towels to remove excess liquid, which helps prevent a soggy bottom. Then, pour about two-thirds of the batter into your prepared pan.
Step 5: Prepare Filling
Mix together cinnamon, brown sugar, and melted butter. This is where the magic happens—this layer will create those beautiful swirls and add warmth to the flavor. Feel free to toss in nuts or raisins here if you’re feeling fancy. Spread this cinnamon mixture carefully over the batter in the pan.
Step 6: Layer & Swirl
Drop spoonfuls of the remaining plain batter over the cinnamon layer. Then, use a skewer or butter knife to gently swirl through the batter, creating pretty ribbons. Don’t overdo it—just a few swirls for a marbled look. It’s a bit like painting with batter but with the added joy of surprise streaks within each slice.
Step 7: Bake
Slide your cake into the oven and bake for 40-45 minutes. Check doneness with a toothpick—if it comes out clean, you’re good. If not, give it another five minutes. Ovens vary, so I recommend starting to peek around 38 minutes—no one wants a dry cake!
Step 8: Cool & Glaze
Let the cake cool in the pan for about 15 minutes before transferring it to a wire rack. Once it’s cooled slightly, drizzle with your glaze. I love a simple powdered sugar glaze because it adds just a touch of sweetness and makes it look extra-special, but a dusting of powdered sugar works too if you’re in a hurry.
Step 9: Slice & Serve
Use a sharp serrated knife to get neat slices. Wait until completely cooled so it slices cleanly without crumbling. Serve as is or with a dollop of whipped cream. This cake is wonderful at room temperature but also reheats beautifully—just pop a slice in the microwave for 15-20 seconds until it’s warm and cozy.
What to Serve It With
This zucchini swirl cake is such a flexible dessert—perfect for so many occasions. For breakfast, a slice with your morning coffee or tea feels like a real treat—think of it as a slightly healthier coffee break. I often set a plate out when friends come over for brunch; a sprinkle of powdered sugar and a side of fresh berries make it look fancy but feel comforting. As a dessert, it pairs beautifully with a scoop of vanilla ice cream or some fresh whipped cream—my kids ask for extra on top. I’ve also served it as a casual snack after school with a glass of cold milk or herbal tea. The cinnamon swirl is a hit with everyone, and the moist crumb keeps everyone coming back for seconds. One thing I always do is keep a batch in the freezer—thaw at room temperature or warm up just a bit for that “just-baked” feeling. Trust me, it disappears fast in my house.
Top Tips for Perfecting Your Zucchini Swirl Cake
Over the years, I’ve learned a few tricks to make this cake truly perfect.
Zucchini Prep: Always grate the zucchini finely and squeeze out excess moisture. If it’s too watery, the cake can become dense or soggy. I keep a paper towel handy and give the grated zucchini a quick squeeze—like wringing out a sponge. This little step makes a big difference.
Mixing Advice: Resist the temptation to overmix once you add the dry ingredients. Just fold until everything is gently combined. Overmixing can develop gluten and make the cake tough, so I stop as soon as the batter looks uniform.
Swirl Decoration: A light hand is best here. Drop spoonfuls of the cinnamon mixture over the batter, then swirl gently with a skewer or butter knife. Don’t overdo it—just bing-bing-bing through the batter a few times. The result should be a pretty marbled pattern, not a muddy mess.
Ingredient Swaps: Want to make it healthier? Swap out half the flour for oats or almond flour. I’ve tested it, and while the texture adjusts a bit, it’s still fantastic. Like I said, I’ve even swapped almond milk for regular milk, and it added a richer depth. For sweetness, honey or maple syrup work perfectly—just reduce the liquid a tad if needed.
Baking Tips: Oven temperatures can vary. Always start checking a few minutes before the timer. Position your rack in the middle of the oven for even heat. Test with a toothpick—if it comes out moist, give it a few more minutes but don’t leave it too long or it’ll dry out.
Glaze Variations: For a citrusy zing, stir in a teaspoon of lemon juice or zest to the glaze. If you prefer to skip the glaze, dust with powdered sugar or serve with a scoop of vanilla yogurt. Play around and find your favorite combo!
Overall, I’ve made this so many times that I’ve learned what makes it fail (overmixing, underbaking, rushing the swirl) and what guarantees success—patience, gentle handling, and a love of the process. Trust me, the more you make it, the more it feels like a warm hug from your kitchen.
Storing and Reheating Tips
This cake keeps really well—probably better than you think. If you’re planning to enjoy it over a few days, store it in an airtight container at room temperature for about 2 days. After that, I toss it into the refrigerator—just make sure it’s well covered, or it’ll dry out. Reheat slices in the microwave for 15-20 seconds, or enjoy cold with a hot cup of tea. I often wrap individual slices in plastic wrap before freezing—perfect for a quick breakfast or a snack. Frozen slices defrost quickly at room temp or in the fridge, keeping that moist, tender crumb intact. I’ve tested freezing it with and without glaze—either way, it holds up, but I like to add the glaze after thawing for the freshest look and flavor. This cake is forgiving, so don’t stress if it’s not perfect the first time—practice makes perfect, and everyone will be happy with the result!
Frequently Asked Questions
Final Thoughts
If you’ve been craving a dessert that’s moist, tender, and impressively pretty without requiring hours in the kitchen, this zucchini swirl cake is your new best friend. I’ve shared it with friends, brought it to potlucks, and even made it on a whim when the kids asked for “something sweet.” Every time, it’s vanished fast, and I always get asked for the recipe. It’s secretly healthy, wonderfully comforting, and so versatile—plus, it makes your kitchen smell like cinnamon and goodness! I truly hope you try it and make it your own. Feel free to experiment with nuts, citrus, or even swapping out ingredients based on what’s in your pantry. Happy baking, and don’t forget to share your creations—I love hearing about your twists and turns in the kitchen. Now, go grab some zucchini and get started—your taste buds will thank you!
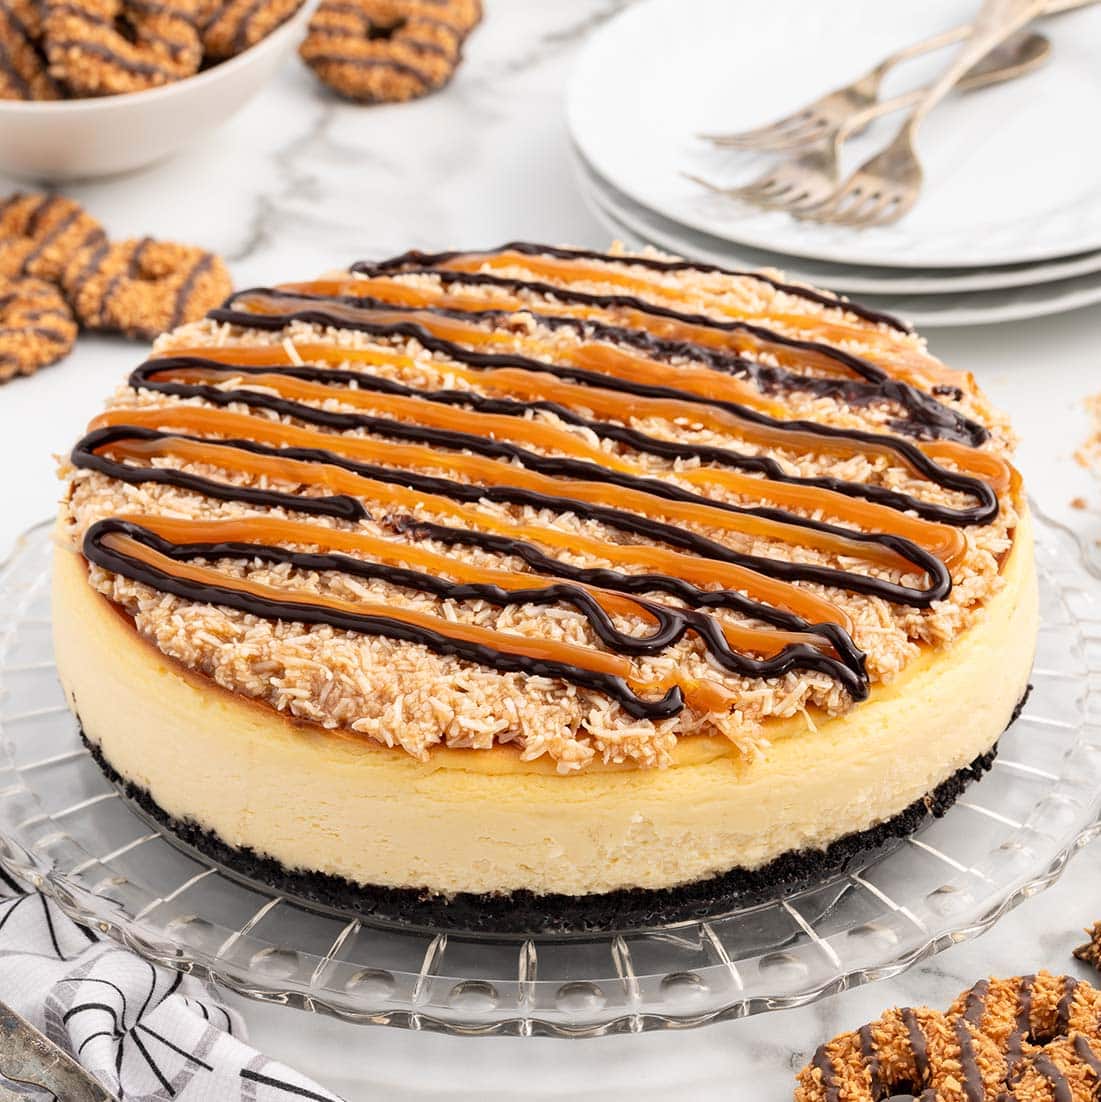
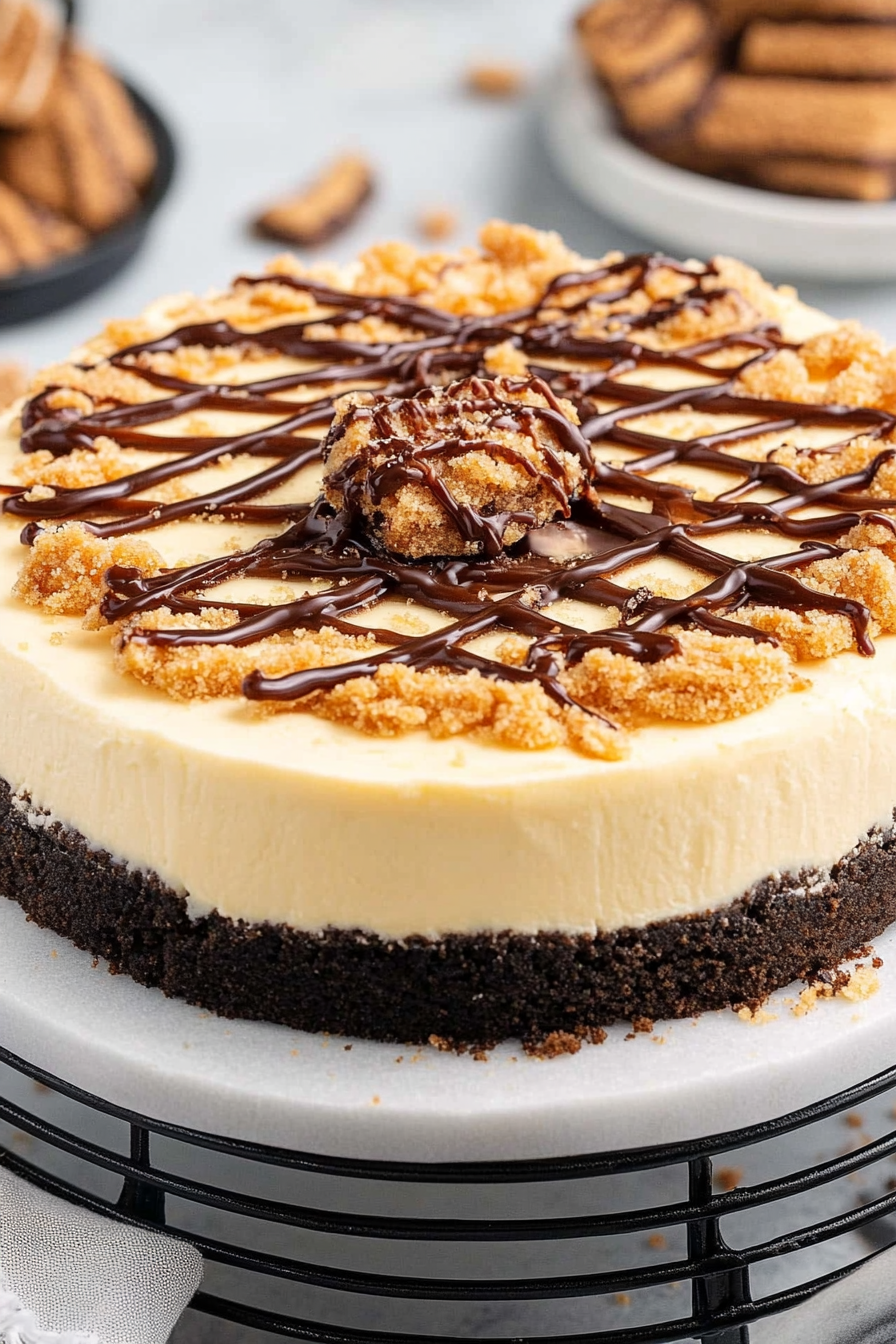
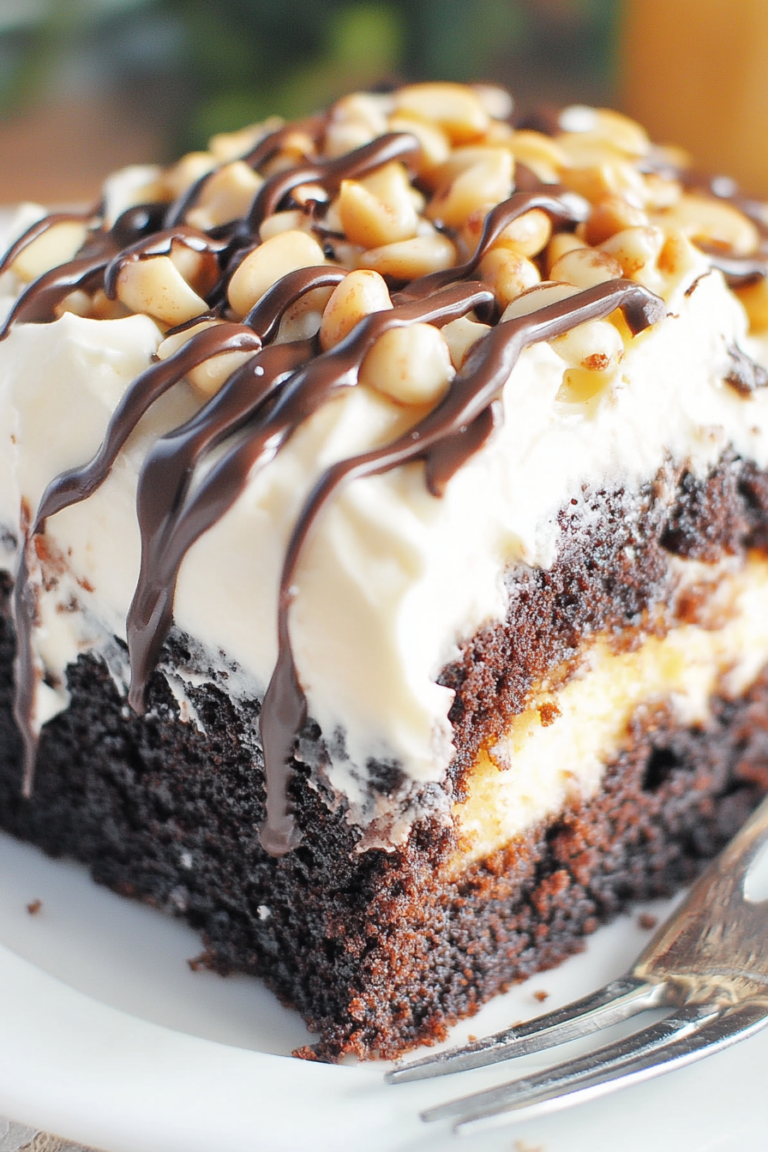
Samoa Cheesecake
Ingredients
Method
- Preheat oven to 350°F. Lightly spray a 9-inch springform pan with baker’s spray and line with parchment paper. Wrap the outside of the springform pan with two layers of heavy-duty aluminum foil.
- Combine chocolate cookie crumbs, melted butter, and salt in a medium bowl. Stir until mixture resembles wet sand. Press into the bottom of the prepared springform pan.
- Bake crust for 10 minutes, then remove and cool at room temperature.
- Reduce oven temperature to 325°F. Beat cream cheese and sugar until smooth. Add vanilla and eggs, one at a time, mixing well. Mix in sour cream and heavy cream until smooth.
- Pour batter into crust and place the springform pan into a large roasting pan. Pour boiling water to come halfway up the sides of the springform. Bake for 1 hour 40 minutes to 1 hour 45 minutes.
- Turn off oven, open door slightly, and let cheesecake cool slowly for 1 hour. Then chill in refrigerator for at least 8 hours or overnight.
- Toast shredded coconut in a skillet over medium heat until lightly browned. Cool slightly.
- Mix toasted coconut with salted caramel sauce until well combined.
- Spread dollops of coconut mixture over the chilled cheesecake. Drizzle with additional caramel and chocolate sauces. Garnish with cookies.
This looks absolutely delicious! I love the idea of sneaking in healthy ingredients—my kids actually eat them better that way.