
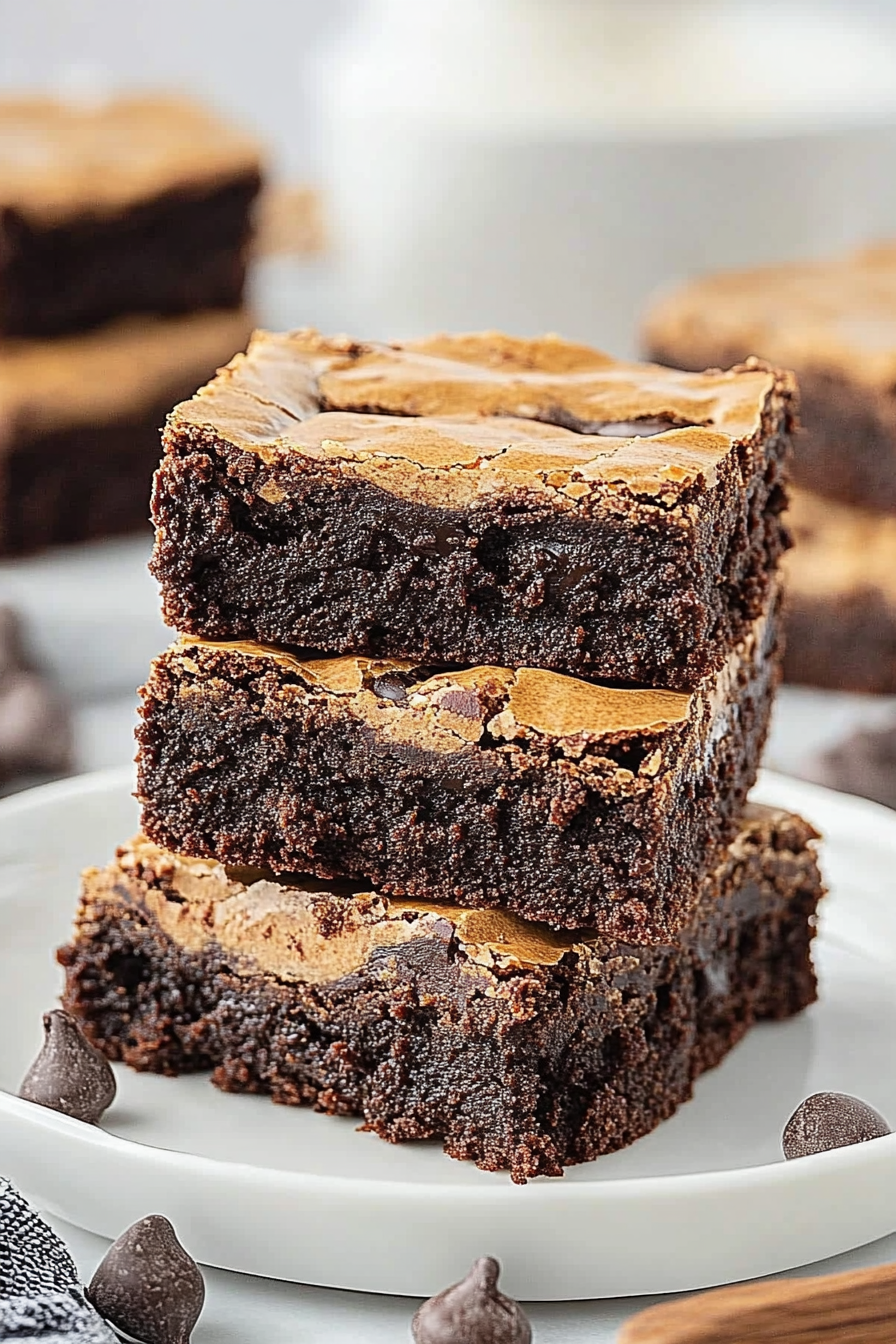
Easy Chocolate Peanut Butter Brownies
There’s just something about the way the smell of a fresh loaf fills up my kitchen—it’s warm, inviting, and instantly makes me think of Sunday mornings at my grandma’s place. I remember sneaking into her bread drawer, eyes wide with excitement, because she always kept a slice of her zucchini marble pound cake hidden behind other goodies. That sweet-fresh aroma, combined with the hint of chocolate swirl, is forever etched into my memory. When I first started tinkering with baking, I never imagined how versatile a humble zucchini could be in a dessert. This zucchini marble pound cake is a total family favorite now—moist, rich, and with that beautiful swirl of cocoa running through it, like a slice of edible art. It’s incredible how zucchini, especially when grated and excess moisture squeezed out, lends so much tenderness and moisture. Honestly, it’s the perfect way to sneak some veggies into a treat that everyone in my house asks for again and again. Believe me, this one’s a lifesaver on busy nights or when I want to impress friends with something that looks fancy but is actually super easy to pull off. My kids ask for this all the time—it’s become our little tradition to slice it warm with butter melting on top and a steaming cup of coffee—just like grandma used to do, but with a modern twist. Trust me on this one, once you try it, you’ll see—this cake is *the* keeper!
What is Zucchini Marble Pound Cake?
Think of this zucchini marble pound cake as a cozy marriage between classic comfort and a bit of artful flair. It’s essentially a rich, buttery cake—think dense but tender—made even more moist and flavorful with grated zucchini sports. Now, the “marble” part? That’s the fun twist: a swirl of cocoa or chocolate batter running through the light, almost vanilla-like base. It’s called a pound cake because traditionally, it’s baked in a loaf pan and has that dense, nostalgic quality—think of the kind grandma made for special occasions. But this variation takes it up a notch with the swirl, making it look like a marble sculpture once sliced. The idea is simple but charming: a beautifully marbled cake that’s perfect for breakfast, brunch, or even a quick dessert. Unlike many cakes that use a ton of fancy ingredients, this one’s made from pantry staples, which makes it feel accessible for home bakers of all levels. The name might sound fancy, but truly, it’s just a humble zucchini hiding under a gorgeous swirl of chocolate—kind of like a secret treasure. The best part? It’s a great way to sneak some veggies into your family’s diet without anyone noticing—until they take their first bite!
Why you’ll love this recipe?
What I love most about this zucchini marble pound cake is how it combines indulgence with a little bit of sneaky healthiness—perfect for those times when you crave something sweet but also want to feel a tiny bit virtuous. The flavor profile is incredible: tender, buttery cake with a rich, cocoa-marble twist that makes each slice look like a mini masterpiece. And honestly, it smells so good baking that I can’t help but stand by the oven, just inhaling that sweet vanilla and chocolate aroma—that’s how I know I’ve nailed it. This recipe is also deceptively simple. No fancy kitchen gadgets needed, just a good mixing bowl, a grater, and a loaf pan. I’ve tested this with different zucchinis—small, large, organic, store-bought—and it always turns out moist and flavorful. Plus, it’s budget-friendly! Since zucchini is in season almost all year round, I always keep a few in the fridge for last-minute baking sessions when the craving hits. What makes this stand out from other zucchini desserts is that gorgeous marble swirl—you get that wow factor with minimal effort. My kids ask for seconds (and thirds!), and I love serving it sliced warm with a pat of butter or a dusting of powdered sugar. If you want to impress without stress, this is your new go-to.
How do I make Zucchini Marble Pound Cake?
Quick Overview
This cake comes together surprisingly quickly, especially once you get into the rhythm of grating zucchini and mixing batter. The secret? Be sure to squeeze out as much moisture from the zucchini as you can—that’s what keeps the cake from becoming soggy. The batter itself is straightforward: cream together butter and sugar, add eggs and vanilla, then gently fold in the dry ingredients combined with grated zucchini. For the marbling, I always make a simple cocoa batter on the side, then layer both batters into my loaf pan, swirling them with a skewer or knife. The baking is standard, about an hour at 350°F, but don’t rely on the timer alone—look for a golden crust and a toothpick come out clean. Once cooled, I like to add a simple glaze or dusting, but honestly, it’s delightful even plain. This cake is a testament to simplicity—yet it looks astonishing, especially sliced and layered on a festive plate or nestled in a coffee table tray. It’s perfect when you want something homemade that feels special but takes very little effort. Trust me, once you try it, it’ll become a staple in your baking rotation.
Ingredients
For the Main Batter:
– 2 cups all-purpose flour (I like to use unbleached if I have it, for a richer flavor)
– 1 teaspoon baking powder
– 1/2 teaspoon baking soda
– 1/4 teaspoon salt
– 1 cup unsalted butter, softened (or good quality butter from the fridge—soft but not melted)
– 1 1/2 cups granulated sugar (feel free to swap half for brown sugar for a caramel note)
– 3 large eggs
– 1 teaspoon vanilla extract
– 1 cup grated zucchini (see tips below for prep)
For the Filling:
– 1/4 cup unsweetened cocoa powder
– 1/4 cup hot water or milk
– 1/4 cup sugar (adjust based on sweetness preference)
For the Glaze (optional):
– 1 cup powdered sugar
– 1-2 tablespoons milk or lemon juice
– A splash of vanilla or almond extract for extra flavor
Step-by-Step Instructions
Step 1: Preheat & Prep Pan
I always start by preheating my oven to 350°F (175°C). Grease my loaf pan generously with butter and dust with flour—or use parchment paper for an easier release. Making sure the pan is ready before I start mixing means nothing sticks or overbakes while I get everything else together.
Step 2: Mix Dry Ingredients
Mix the flour, baking powder, baking soda, and salt in a bowl. I sift them a bit just to ensure everything’s evenly distributed—trust me, it makes a difference, especially with the baking soda and powder. Set this aside while I prep the wet ingredients.
Step 3: Mix Wet Ingredients
In my biggest mixing bowl, I beat the softened butter and sugar until they’re fluffy—this takes about 3-4 minutes on medium speed. I love how almost creamy it gets, and the smell alone makes me happy. Then, I add eggs one at a time, beating well after each. Vanilla goes in last, and I make sure everything’s smooth and well combined. It’s important that the eggs are at room temperature—they incorporate better that way.
Step 4: Combine
Now, I gently fold in the dry ingredients in parts—about a third at a time—using a spatula, not a mixer. Overmixing can make the cake dense, and that’s not the vibe I want. Fold in the grated zucchini last; I squeeze out most of the moisture beforehand (about 1 1/2 cups grated zucchini usually gives me 3-4 tablespoons of moisture to discard). The zucchini melts into the batter, making it super moist but still dense and tender.
Step 5: Prepare Filling
For the chocolate swirl, I whisk the cocoa powder and hot water (or milk) until smooth. I then add a little sugar—not too much, just enough to balance the bitterness of cocoa. This batter will be the darker swirl in your cake. If you like, you can add a splash of espresso or vanilla extract here for depth.
Step 6: Layer & Swirl
Pour half of the plain batter into your prepared loaf pan. Then, carefully dollop half of the cocoa batter on top. With a knife or skewer, gently swirl the two batters together—don’t overmix, just create a marbled effect. Repeat with remaining batter, swirling again. This part is fun and makes the cake look so pretty sliced!
Step 7: Bake
Bake for about 55-65 minutes, but start checking around the 55-minute mark. Insert a toothpick in the center, and if it comes out clean, it’s ready. Your kitchen will smell like warm chocolate and vanilla—trust me, it’s magical. If the top begins to brown too quickly, cover loosely with foil and continue baking. Every oven is slightly different, so keep an eye on it!
Step 8: Cool & Glaze
Once out of the oven, let the cake cool in the pan for 15 minutes, then transfer to a wire rack. I wait until it’s just warm to add a simple glaze, which I make mixing powdered sugar with a splash of milk and vanilla. Drizzle it over the cooled cake for a glossy finish. If you prefer a dusting, powdered sugar over the top works beautifully, especially after it’s cooled completely.
Step 9: Slice & Serve
Use a serrated knife to cut slices carefully—this cake is tender but dense, so slicing gently is key. I love serving it warm with a pat of butter melting on top or a scoop of vanilla ice cream on the side. It’s just perfect with a cup of coffee or tea, and honestly, it’s so good that leftovers never last long!
What to Serve It With
This zucchini marble pound cake is so versatile, I can’t help but have a little fun with how I serve it. For breakfast, it’s lovely with a hot cup of coffee, maybe a smear of mascarpone or a dollop of yogurt to give it a creamy tang. My family loves it for brunch—paired with fresh berries and a drizzle of honey—it’s fancy enough to impress but still cozy enough to feel like home. As a dessert, it’s just sublime—warm or cold—especially with a scoop of vanilla ice cream or a dusting of cocoa powder. I also love slicing it into thick pieces and enjoying it as a quick, comforting snack during the week—sometimes I even toast a slice for a little crunch. Honestly, I find that every time I bake this, it becomes a moment of joy, bringing everyone together around the kitchen table. Plus, it’s a sneaky way to get my kids eating vegetables—they never suspect how much zucchini is hiding inside until I cut a slice. This cake has definitely become part of our family’s story, and I think it’ll find a place in yours too.
Top Tips for Perfecting Your Zucchini Marble Pound Cake
After making this countless times, I’ve learned a few tricks that truly make a difference. First, the zucchini—always grate it finely and squeeze out as much moisture as possible. I keep a clean kitchen towel handy for this, and I’ve tested with both fresh from the garden and store-bought zucchini. The drier, the better, or else the cake might turn out a little too wet and dense. Second, don’t overmix the batter once you add the flour and zucchini—stir just until everything is combined. Overmixing can lead to a tougher crumb, and I prefer mine soft and tender. When swirling in the cocoa, use a gentle touch—swirl just enough to create a marbled look without blending the colors completely. Personal tip: I sometimes add a handful of mini chocolate chips into the cocoa batter for an extra chocolate punch—it disappears in minutes at my house! Also, I’ve found that oven temperature matters—if your oven runs hot, try lowering to 340°F for more even baking. For the glaze, I like it just thick enough to hold shape but runny enough to drizzle—adding a splash of lemon juice instead of milk gives a nice zing that balances the sweetness. Trust me, little tweaks like these elevate this cake from good to perfection. It’s become my go-to comfort bake, and I love how it allows me to be creative while still keeping things simple. Don’t be afraid to experiment with additions like nuts or spices—this batter is forgiving and adaptable!
Storing and Reheating Tips
This cake keeps beautifully if you store it properly. If you’re not serving it immediately, let it cool completely before wrapping it tightly in plastic wrap or placing it in an airtight container. At room temperature, it stays fresh for about 2 days—just be sure it’s covered well to prevent drying out. For longer storage, I prefer refrigerating it—the cake should be wrapped well in plastic or stored in a sealed container, and it’ll keep for up to 5 days. The fridge helps it stay moist, and I’ve even reheated slices in the microwave for about 15 seconds—they come out just as tender. Freezing is also a good option if you want to make it ahead; wrap it in plastic, then foil, and it’ll last up to 3 months. When ready to enjoy, thaw overnight in the fridge or at room temperature for a quick treat. A tip for the glaze—if you’re storing the cake, add a fresh drizzle of glaze just before serving to keep the shiny, luscious look nice. Honestly, this cake is pretty flexible and forgiving—it tastes great even a day or two later, and it often gets better as the flavors meld. A little patience in storing means you can enjoy this delicious treat whenever the mood strikes.
Frequently Asked Questions
Final Thoughts
This zucchini marble pound cake holds a special place in my heart. Not only because it’s so delicious and moist, but also because it’s one of those recipes that gets better with a little love and practice. I adore how versatile it is—perfect for breakfast, a casual snack, or a fancy dessert with just a splash of whipped cream. Every time I bake it, I think about the first time my kids exclaimed, “Mom, this is soooo good!” It’s comforting, nostalgic, and surprisingly easy to make. Plus, it’s a sneaky way to get my family eating veggies without any fuss. I encourage you to experiment with additions—maybe a handful of walnuts or a touch of cinnamon? Don’t shy away from making it your own. Happy baking, friends—let your kitchen be full of warm smells and happy chatter. And I can’t wait to hear how yours turns out! Be sure to leave a comment, share your twists, or drop a photo—I love seeing our kitchen stories grow. Remember, the best recipes are the ones shared with love—and that’s exactly what this cake is all about. Enjoy every slice!

Brownies
Ingredients
Method
- Preheat the oven to 350°F. Line a 9x9 inch baking dish with parchment paper, and lightly spray with nonstick spray.
- In a small bowl, whisk together the flour, cocoa powder, baking powder, and chocolate chips.
- In a medium bowl, add melted and cooled butter.
- Add granulated sugar, light brown sugar, eggs, vanilla, and salt. Stir until combined.
- Stir in the flour mixture and chocolate chips just until combined, avoiding overmixing.
- Spread half of the batter into the prepared pan.
- Dollop teaspoons of ⅔ cup peanut butter over the batter.
- Spread remaining batter over the peanut butter dollops.
- Warm remaining ⅓ cup peanut butter for about 10 seconds in microwave and stir.
- Drizzle the warmed peanut butter over the batter and create a swirl pattern.
- Bake for 30 minutes, until a toothpick inserted comes out with moist crumbs.
- Cool completely for 2 hours before cutting into slices and serving.


Love this recipe—peanut butter and chocolate is such a winning combo! Reminds me of baking with my mom too.
I love this—chocolate and peanut butter is such a winning combo! That kitchen smell takes me back to childhood too.
I totally get that feeling—there’s something so comforting about the smell of baking chocolate brownies! It really does feel like home.
I love that feeling too—there’s nothing quite like the aroma of freshly baked brownies filling the kitchen! This recipe sounds perfect.
I love this recipe! Nothing beats that cozy kitchen smell—it feels like a warm hug.