
Easy Chocolate Cupcakes A Sweet Treat
There’s something about the smell of baked goodies wafting through the house that instantly makes me feel cozy and grounded. I remember my grandma’s kitchen, where she’d pull out her big wooden spoon and sprinkle cinnamon over everything. This zucchini coffee cake is one of those recipes that makes your home smell like a hug. It’s got that perfect balance of moist, tender crumb with a touch of sweetness, and don’t even get me started on that creamy swirl of tangy cream cheese — it’s pure comfort on a plate. Honestly, I’ve made this countless times, and every single loaf disappears in minutes at my house. My kids ask for this all the time, especially on lazy weekend mornings when they want something sweet but don’t want to wait hours for a complicated dessert. Best part? It’s surprisingly easy to whip up, even when I’m rushing out the door. Trust me on this one — once you try it, it’s going to become a family favorite, too. It’s great with coffee, tea, or just as a sweet snack in the afternoon. And honestly, it’s such a clever way to sneak extra veggies into my kids’ diet — they finish their slice and ask for seconds! It’s a win-win all around.
What is Zucchini Coffee Cake?
Think of this zucchini coffee cake as a lovely, moist layered cake, but with a cozy twist. It’s essentially a sweet, buttery bread infused with shredded zucchini, which keeps it incredibly moist and tender. The name might throw you off — why would you put zucchini in a coffee cake? But honestly, the zucchini acts like a natural moisture booster, making every bite soft and luscious without adding any taste of the veggie itself. Instead, it just boosts the flavor and texture, kind of like how carrots add richness in carrot cake. The star of this recipe, though, is the swirl of rich cream cheese that runs through the middle, giving a slight tangy contrast to the sweetness. It’s a delightful surprise, and I always do this when I want to make something special but quick. The best part? It’s versatile. You can enjoy it warm with a drizzle of glaze or plain with a cup of coffee — both ways are delicious. I’ve even tested this with some almond milk, and it actually made it even creamier, if you can believe that. This zucchini coffee cake is your go-to for mornings, brunches, or just when you’re craving something sweet without the fuss.
Why you’ll love this recipe?
Oh, where do I start? This zucchini coffee cake is all about comfort and ease wrapped into one beautiful package. What I love most about this is how effortlessly it comes together — I’ve made this on busy mornings when I only have ten minutes before school drop-off, and it still turns out perfect every time. The smell alone is enough to make everyone stop what they’re doing and gather around the kitchen. The flavor is just right — balanced sweetness with a whisper of vanilla and cinnamon that makes it feel cozy and indulgent. The zucchini adds moisture without turning the cake into a dense, heavy mess, which I’ve learned after messing up a few times early on in my baking adventures! It’s budget-friendly, with pantry staples like flour, sugar, and a little butter, plus a zucchini from my garden or the store — no fancy ingredients needed. Plus, this recipe is super versatile — I’ve added chopped nuts, swapped the cream cheese for mascarpone, or even dusted the top with powdered sugar instead of glaze. What truly makes this special is how adaptable it is. It’s perfect for brunch (you can serve it with yogurt or fresh fruit), as a quick snack, or even a lovely dessert — especially when topped with a scoop of vanilla ice cream. Honestly, it’s become a staple in my house, and I know it will be in yours, too.
How do I make Zucchini Coffee Cake?
Quick Overview
This zucchini coffee cake starts with a simple batter made from basic ingredients — flour, sugar, eggs, and butter. While that’s coming together, you mix up a creamy, tangy layer of cream cheese, sugar, and vanilla — swirled through the middle of the batter before baking. The whole process is straightforward, with some layering and swirling to get that beautiful marbled pattern. The real magic is how moist and tender the finished cake is — thanks to the shredded zucchini and a gentle mixing method that keeps everything fluffy. Once baked to golden perfection, I like to cool it a little, then drizzle with a simple glaze or dust with powdered sugar. It’s a foolproof process that I’ve refined over the years, and I promise, it’s easier than it looks!
Ingredients
For the Main Batter:
– 2 cups all-purpose flour (I like unbleached for a richer flavor)
– 1 cup granulated sugar (or a mix of brown and white sugar for deeper flavor)
– 1 teaspoon baking powder
– 1/2 teaspoon baking soda
– 1/2 teaspoon salt
– 1 teaspoon cinnamon (because everything’s better with cinnamon)
– 1/2 cup unsalted butter, melted (but you can swap this for coconut oil if you prefer)
– 2 large eggs
– 1 teaspoon vanilla extract
– 1 cup shredded zucchini (don’t forget to squeeze out excess moisture!)
For the Filling:
– 4 oz cream cheese, softened
– 1/4 cup powdered sugar (or more if you like it sweeter)
– 1 teaspoon vanilla extract
For the Glaze:
– 1/2 cup powdered sugar
– 2-3 teaspoons milk or lemon juice (adjust for right drizzly consistency)
– A splash of vanilla (optional, but highly recommended for that extra flavor boost)
Step-by-Step Instructions
Step 1: Preheat & Prep Pan
I always start by preheating my oven to 350°F (175°C). Grease a 9-inch square pan or line it with parchment paper — makes cleanup a breeze. And don’t forget to set your rack in the middle — you want even heat for perfectly baked cake.
Step 2: Mix Dry Ingredients
In a big bowl, whisk together the flour, sugar, baking powder, baking soda, salt, and cinnamon. This step is essential because it evenly distributes the leavening agents, so your cake rises just right. Plus, it gets rid of any lumps.
Step 3: Mix Wet Ingredients
In a separate bowl, combine the melted butter, eggs, and vanilla. I always beat the eggs lightly first so they blend smoothly. Once combined, stir in the shredded zucchini — I like to use a box grater for quick work. Make sure to squeeze out some of the extra moisture — this keeps your cake from being soggy.
Step 4: Combine
Add the wet mixture to the dry ingredients gently. Fold everything together just until combined — overmixing will make the cake dense. It should look a bit thick but pourable. If it seems too stiff, a splash of milk never hurt.
Step 5: Prepare Filling
In a small bowl, beat the softened cream cheese, powdered sugar, and vanilla until smooth. This creamy layer is what makes the cake decadently irresistible. I’ve tested it with mascarpone, and it’s divine, but plain cream cheese works beautifully.
Step 6: Layer & Swirl
Pour half of the batter into your prepared pan, then spread the cream cheese mixture evenly over the top. Cover with the remaining batter gently poured on top. Use a butter knife to swirl through the batter, creating beautiful marbled patterns. Don’t overdo it — just a few gentle swirls to distribute the cream cheese.
Step 7: Bake
Pop it in the oven for about 40-45 minutes. Check for doneness with a toothpick inserted into the center — it should come out clean, maybe with some moist crumbs. If your edges brown too quickly, tent with foil. Every oven is different, so keep an eye on it!
Step 8: Cool & Glaze
Let the cake cool in the pan for at least 15 minutes before transferring to a wire rack. This helps it set up and reduces crumbling. Meanwhile, whisk together your glaze ingredients. Once the cake is just warm (not hot), drizzle the glaze over the top and let it set for about 15 minutes.
Step 9: Slice & Serve
Use a sharp serrated knife to cut neat squares. I like to serve it slightly warm with a cup of coffee or a glass of milk. The flavors intensify a bit as it cools, so I say enjoy it at both temperatures!
What to Serve It With
This zucchini coffee cake is so versatile — I’ve served it in dozens of ways over the years. For breakfast, a hot cup of black coffee or a frothy latte pairs perfectly. My kids love it with a dollop of Greek yogurt on the side, especially if I sprinkle a little cinnamon on top. For brunch, I decorate the plate with fresh berries or a dusting of powdered sugar, and a mild mimosa makes an elegant touch. When serving as dessert, I like to add a scoop of vanilla ice cream or whipped cream. It’s also fantastic on its own, especially when you want a cozy, no-fuss treat that satisfies your sweet tooth without going overboard. I often pack leftovers for lunchboxes, and honestly, it’s always a hit. Every family member claims this is their favorite, so I make it at least once a month. I’ve even taken it to potlucks, and it’s always gone in seconds. Truly, this recipe is a keeper, no matter the occasion.
Top Tips for Perfecting Your Zucchini Coffee Cake
After making this a dozen times, I’ve picked up a few tricks that make all the difference. First, when shredding zucchini, don’t forget to squeeze out as much moisture as you can — soggy batter is a no-go. I learned this the hard way after a few runny cakes. Overmixing the batter is another common mistake; I always fold gently and stop as soon as everything’s just combined — fluffy, not tough. For the swirl, I find that using a toothpick to make gentle figure-eights creates a more beautiful marbled effect, but don’t overdo it — the swirl should be subtle. If you want to switch things up, try swapping in brown sugar for part of the white sugar for a richer flavor, or add chopped nuts into the batter or sprinkled on top before baking. I’ve tested using whole wheat flour, and it still comes out moist and delicious, but the texture is a bit denser. For baking, positioning the rack in the middle ensures even heat, and I always check five minutes before the timer goes off to avoid overbaking. The glaze is optional, but it adds a lovely sweetness — I like to keep it simple, but a splash of lemon juice in the glaze brightens it up. Over the years, I’ve learned that patience in cooling is key — rushing this step can lead to cracks or messes. Trust me, a slightly warm cake with glaze makes every bite worth the wait!
Storing and Reheating Tips
This cake keeps surprisingly well. I usually store leftovers in an airtight container at room temperature for up to two days — just keep it covered. If you want it to stay moist longer or last for a week, pop it in the refrigerator. Just be sure to bring it to room temperature before slicing; it makes a huge difference. For freezing, I wrap slices individually in plastic wrap and store in a sealed container or freezer bag. It keeps well for up to three months. To reheat, microwave for about 20-30 seconds or warm in a low oven — I find it regains its softness best this way. If the cake has been refrigerated, I usually add a light drizzle of glaze or a sprinkle of powdered sugar after reheating to bring back that fresh-baked feel. If you’re saving the glaze for later, just re-whisk it a little before drizzling. The frosting or glaze firms up once chilled, so bringing it to room temp allows the flavors to meld beautifully again. Leaving it out for a bit before serving enhances freshness too. This cake is nearly as good on day three as day one, especially when reheated gently!
Frequently Asked Questions
Final Thoughts
This zucchini coffee cake has truly become one of my most-loved recipes — it’s simple, adaptable, and most importantly, delicious. Every bite reminds me of lazy Sunday mornings, cozy kitchens, and the joy of sharing good food with loved ones. I love how a humble zucchini transforms into moist, tender magic, and that swirl of cream cheese just takes it to a whole new level of indulgence. Honestly, I’ve tested it with various tweaks, and every version has been a hit. Whether it’s for breakfast, brunch, or dessert, it always feels special without any fuss. I encourage you to give it a try — trust me, your family will thank you! And if you’re feeling creative, experiment with different add-ins or toppings. I can’t wait to see how yours turns out. Happy baking!
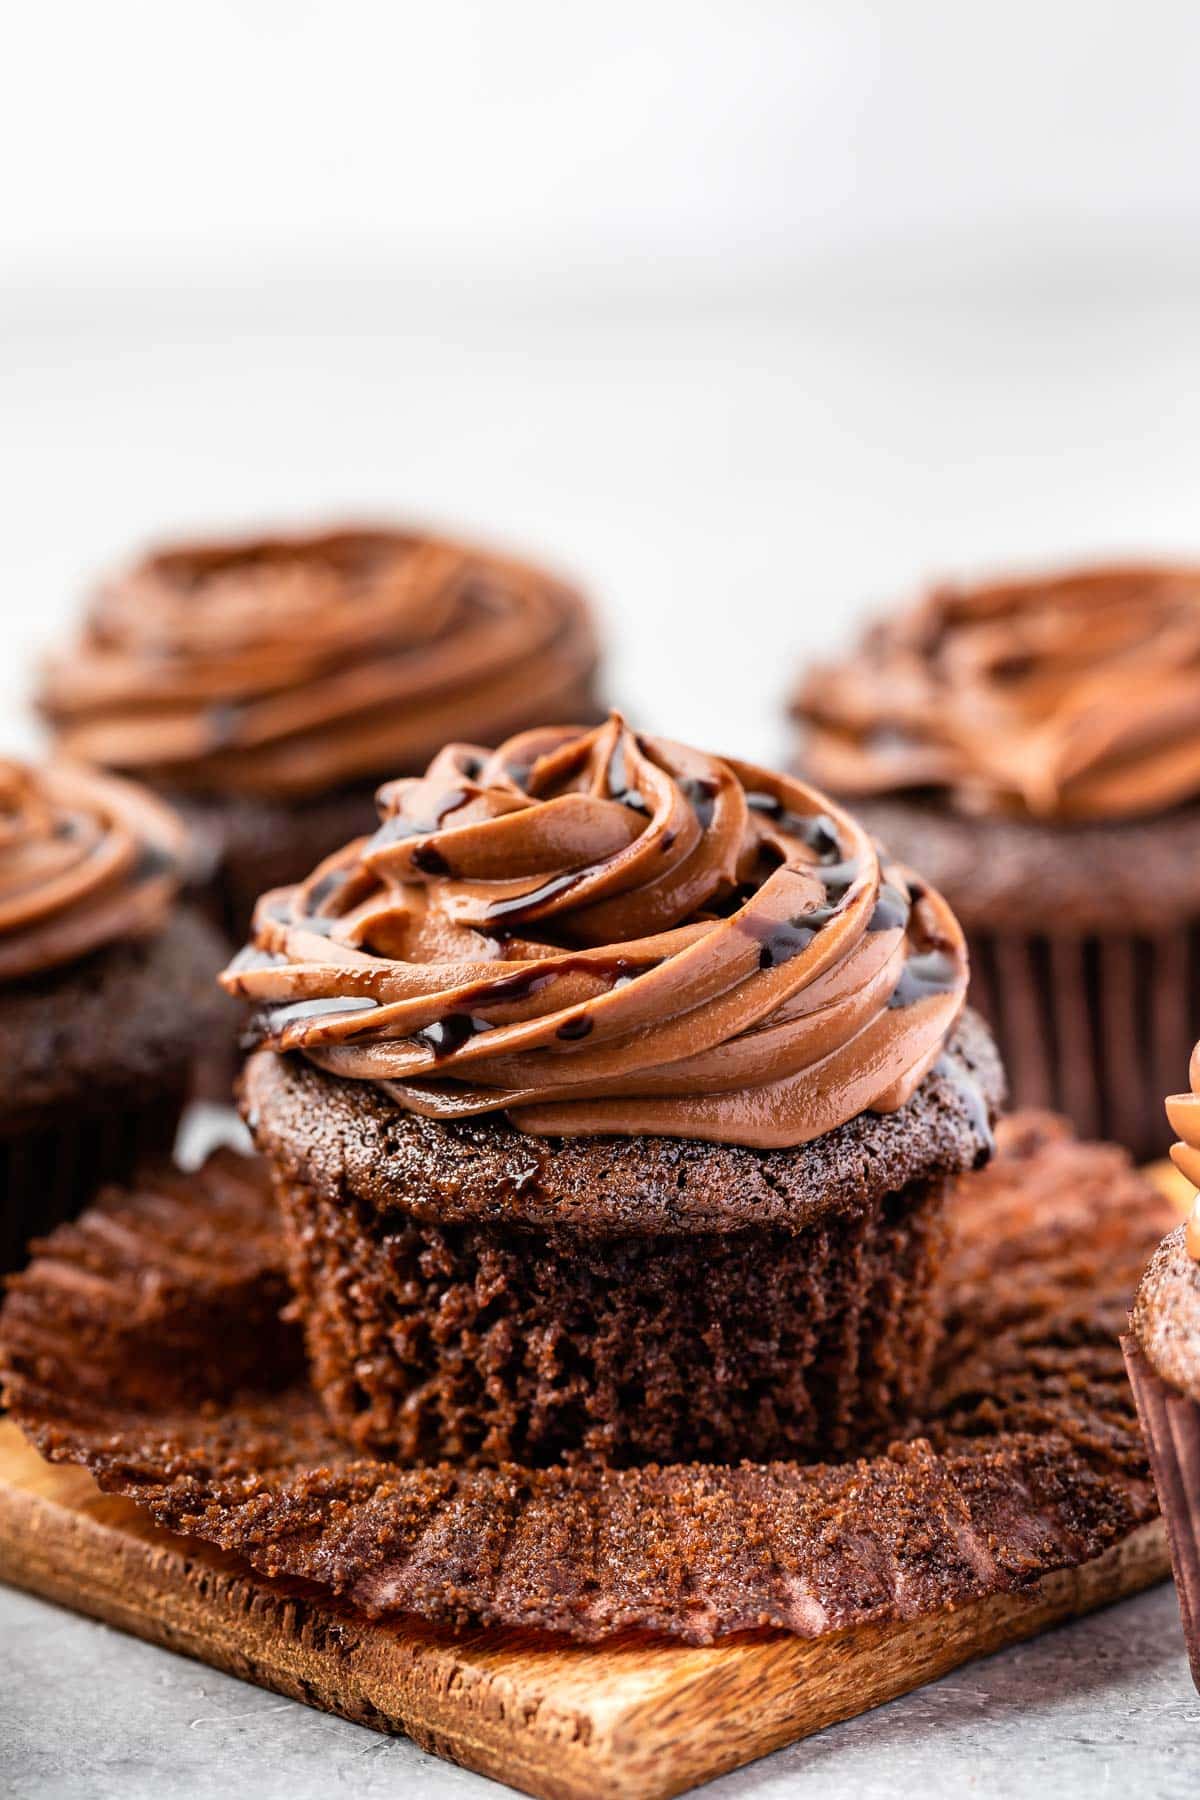
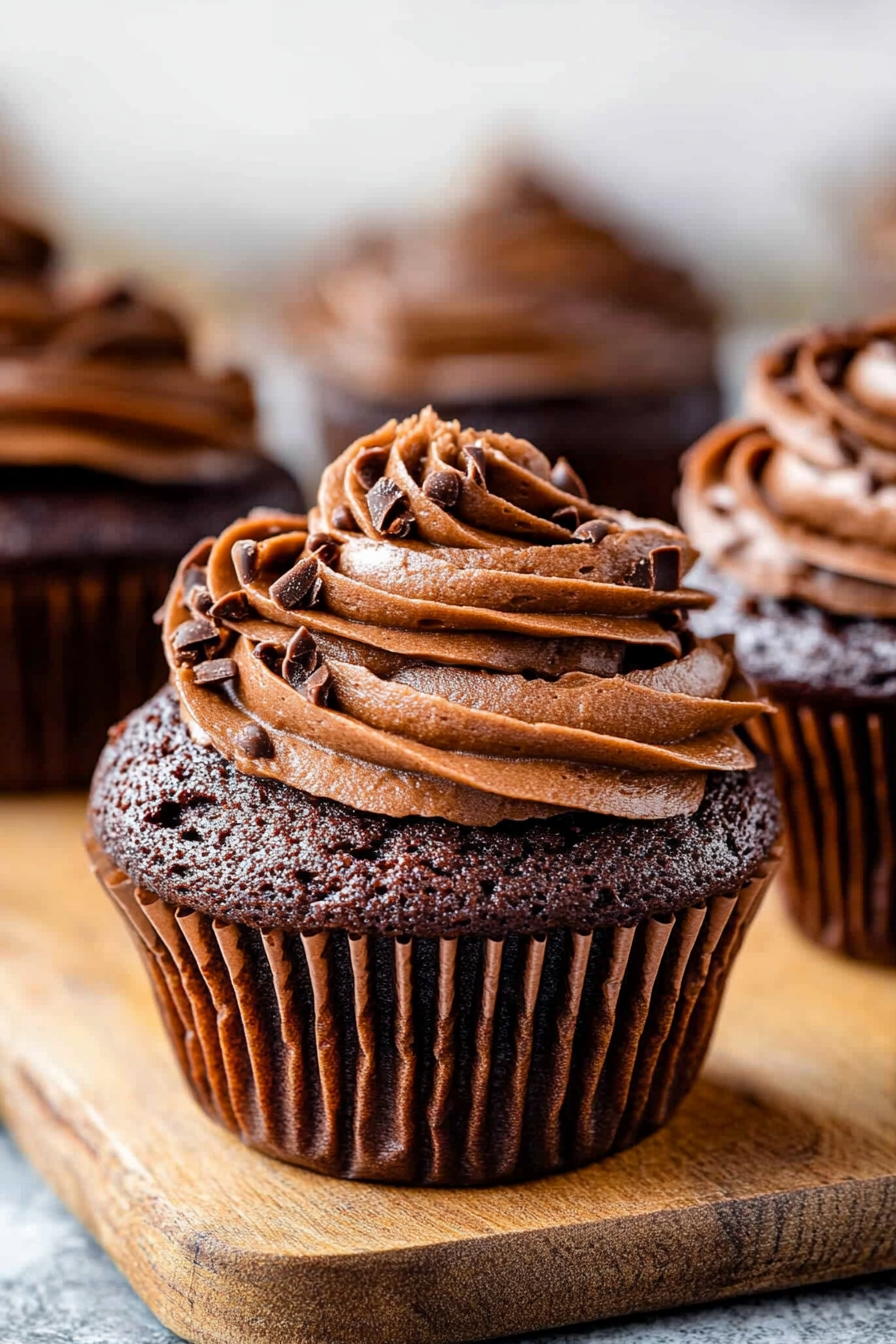
chocolate cupcakes
Ingredients
Method
- Preheat oven to 350°F. Line a 6-cup muffin tin with cupcake liners.
- Whisk together flour, cocoa powder, baking soda, and salt. Set aside.
- Melt chocolate and butter in microwave in 30-second intervals, stirring in between. Stir in sugar.
- Add egg, vanilla, sour cream, and whisk until combined.
- Add dry ingredients and whisk until just incorporated. Mix hot water and espresso powder, then add to batter.
- Divide batter into liners, about 4 tbsp each. Bake for 18-20 minutes. Cool completely before frosting.
- Prepare frosting: Melt chocolate, beat butter until creamy, add sugar, vanilla, milk, and beat on medium-high until fluffy.
- Frost cooled cupcakes and drizzle with chocolate syrup if desired.
Love how baking brings back such warm memories! This recipe sounds perfect for making your own cozy moments.
I love how baking fills the house with such a comforting aroma—this recipe looks perfect for making those cozy memories at home!
Love this! Nothing beats the cozy feeling of baking—my grandma used to do the same, and these cupcakes look absolutely delicious.
I love how baking brings back such warm memories! Grandma’s kitchen was the best — that chocolate smell always meant something special.
I love that memory—the smell of chocolate cupcakes always brings back such warm feelings. Your grandma sounds amazing!