
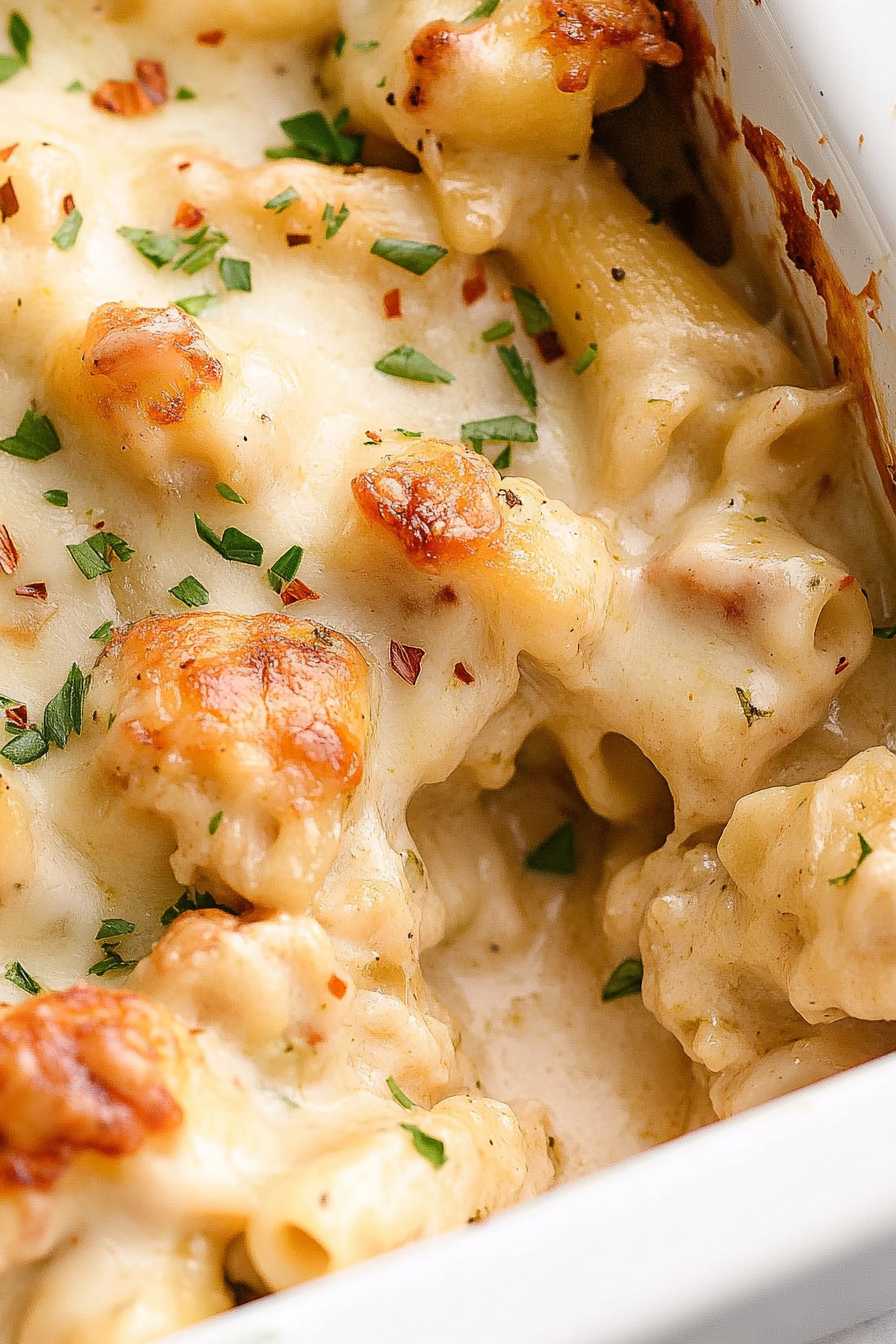
Creamy Chicken Bacon Ranch Delight
If you ask me, there’s nothing quite like the smell of coffee cake wafting through the kitchen on a lazy weekend morning. My grandma’s recipe was always the first to come to mind when I wanted something warm, sweet, and just a little bit nostalgic. But I recently discovered a twist that totally flipped the script—Zucchini Swirl Coffee Cake. Yes, you read that right. Zucchini. It adds this moist, tender surprise that makes the cake feel almost like a hug. I always do this when I want a treat that’s homey but also sneaky healthy—my kids ask for seconds, and my friends can’t believe how juicy and flavorful it is. Honestly, I think this is my new go-to whenever I crave something comforting but quick. Good news: it’s so easy to make, you probably already have what you need in your pantry. Plus, it’s one of those recipes that tastes even better the next day—perfect for breakfast, brunch, or a late-night craving. Trust me on this one—your kitchen will smell amazing, and your tastebuds will thank you!
What is Zucchini Swirl Coffee Cake?
This recipe is sort of a modern, veggie-packed twist on classic coffee cake, with a generous swirl of cinnamon-spiced zucchini running through moist, buttery batter. Think of it as a delightful breakfast cake that works equally well as dessert—think cozy, layers of bliss with a subtle health boost. The name “swirl coffee cake” is pretty straightforward; it’s cake layered with a marbled effect from the zucchini and cinnamon mixture, which creates beautiful ripples when sliced. It’s essentially a cake that feels fancy but is totally fuss-free—all you need is a mixing bowl, a spoon, and an oven. The zucchini keeps everything super tender and means this cake stays moist for days. Plus, I love how versatile it is—you can serve it with coffee in the morning, as a sweet snack with tea, or even smothered in cream cheese frosting for a special occasion. Believe me, once you try it, you’ll wonder why you didn’t sneak zucchini into more baked goods!
Why you’ll love this recipe?
What I love most about this zucchini swirl coffee cake is how surprisingly simple it is to whip up, even if you’re not a full-time baker. The batter comes together in minutes—no complicated techniques here, just basic mixing. Plus, it’s budget-friendly; most of the ingredients are staples you probably already have in your kitchen—flour, sugar, eggs, and of course, zucchini. The thing that makes this special is that gorgeous swirl—each slice looks like a work of art, with these beautiful cinnamon-y ripples that give it that “wow” factor. It’s also incredibly versatile; I’ve tested this with different types of zucchini, and it always turns out perfect. My kids ask for this all the time because it’s not too sweet, just the right balance of tender crumb and cinnamon spice. What’s more, it’s such a great way to sneak some veggies into dessert—it’s like a win-win for everyone. And if you love making things ahead, this cake actually tastes better the next day, the flavors melding together beautifully. I promise, once you make this, it’ll become a regular on your baking list.
How do I make Zucchini Swirl Coffee Cake?
Quick Overview
This cake is all about layers—whisk together a simple batter, prepare a cinnamon-zucchini mixture, and then swirl it all together in your pan. The magic happens in the oven, where these layers melt into one another, creating a moist, flavorful cake with a beautiful marbled effect. What makes this extra special is that you don’t need any fancy equipment—just a mixing bowl, a spoon, and you’re good to go. The batter is light, thanks to the Greek yogurt I like to add, which makes it even creamier. The zucchini keeps everything so moist and tender, and the cinnamon swirl adds a spicy warmth that’s just irresistible. Perfect for lazy weekend mornings or when you want to impress someone with very little effort. I always do this when I need a quick dessert that feels special but is honestly made in one bowl. The smell alone is enough to make everyone come running—trust me!
Ingredients
For the Main Batter:
– 2 cups all-purpose flour (I like to use a little whole wheat for added nutrition)
– 1 cup granulated sugar
– 1 teaspoon baking powder
– ½ teaspoon baking soda
– ½ teaspoon salt
– 1 teaspoon vanilla extract
– 1 cup plain Greek yogurt (or full-fat sour cream if you want extra richness)
– 2 large eggs
– ½ cup melted unsalted butter or olive oil
– 1 cup grated zucchini, excess moisture squeezed out (this is super important!)
For the Filling:
– 1 teaspoon ground cinnamon
– ¼ cup brown sugar
– 1 cup grated zucchini (more moisture removal here helps with the swirl)
For the Glaze (optional but addictive):
– ½ cup powdered sugar
– 1-2 teaspoons milk
– A splash of vanilla or lemon zest for flavor
Step-by-Step Instructions
Step 1: Preheat & Prep Pan
Set your oven to 350°F (175°C) and grease a 9-inch round or square baking pan. I like to line it with parchment paper for easy removal, but a little butter or spray works too. This cake cooks evenly, and I find that parchment makes cleanup a breeze. Don’t forget to remove excess moisture from the zucchini—I always squeeze out as much water as I can before adding it to the batter; otherwise, the cake gets a little too dense or soggy. Trust me, this one step makes all the difference!
Step 2: Mix Dry Ingredients
In a large mixing bowl, whisk together the flour, baking powder, baking soda, salt, and cinnamon (if you’re using it in the batter). This ensures everything is evenly distributed and prevents clumps. I do this first to keep things tidy—you’ll thank me when you don’t end up with weird pockets of baking soda.
Step 3: Mix Wet Ingredients
In a separate bowl, beat the eggs, then add the sugar, vanilla, Greek yogurt, and melted butter. Mix until smooth—this mixture should be lovely and creamy. Sometimes I use a whisk, sometimes a spoon, whatever’s handy. If the eggs are straight from the fridge, give them a little extra whisking so everything combines nicely. I’ve tested this with almond milk, and honestly? It makes the batter even creamier!
Step 4: Combine
Pour the wet mixture into the dry ingredients and fold gently until just combined. Be careful not to overmix; a few lumps are okay—overmixing can make the cake dense. The batter will be thick but pourable. Now, fold in your grated zucchini, making sure it’s evenly distributed throughout.
Step 5: Prepare Filling
In a small bowl, combine cinnamon and brown sugar. Add the extra zucchini here if you want an extra moist swirl, or keep it simple. I like to reserve some zucchini for layering and swirl it into the batter with a toothpick or skewer for that beautiful marbled effect. It’s almost like painting in the kitchen!
Step 6: Layer & Swirl
Pour half the batter into your prepared pan, then sprinkle or dollop with the zucchini-cinnamon mixture. Add the rest of the batter on top, and then use a skewer or knife to swirl it gently through the batter—don’t overdo it, or you’ll lose the marbled look. Aim for a few swirling motions to create those gorgeous ripples that make this cake so special.
Step 7: Bake
Pop it in the oven and bake for 40-45 minutes. Start checking around 38 minutes by inserting a toothpick in the center—if it comes out clean, you’re good! Sometimes I cover the top loosely with foil if I see it browning too fast, so it stays moist inside. Ovens vary, so keep an eye on it. The house will smell incredible, and your patience will be rewarded!
Step 8: Cool & Glaze
Let the cake cool in the pan for about 15 minutes, then transfer to a wire rack. I prefer it slightly warm, especially if I’m glazing—slightly melted glaze just seeps into the cake layers beautifully. Mix powdered sugar with milk and vanilla, then drizzle generously. If you’re feeling fancy, sprinkle a little extra cinnamon or lemon zest on top.
Step 9: Slice & Serve
This cake cuts best when slightly cooled but still soft—the slices are tender and look stunning with those cinnamon swirl ribbons. Serve with a dollop of whipped cream or a cup of strong coffee, and get ready for compliments. It disappears faster than you’d expect!
What to Serve It With
This zucchini swirl coffee cake is as versatile as it is delicious. When I serve it for breakfast, I love pairing it with a hearty black coffee or a milky latte—something to balance all that sweet cinnamon. It makes a cozy start to the day, especially on chilly mornings when everyone’s still in pajamas. for brunch, I toss on a handful of berries or a few sprigs of fresh mint—looks pretty and tastes even better. As a dessert, it’s perfect with a scoop of vanilla ice cream or a drizzle of honey—you know I love a little extra sweetness! And for casual snacking, I wrap slices in parchment and stash ’em in the fridge. My family actually asks for this all the time—sometimes I make a double batch. It’s so good, you’ll find yourself sneaking a piece when no one’s looking. Plus, it’s a great way to get the kids to eat zucchini without a fight. Just wait till they see the swirl—you’ll see their eyes light up!
Top Tips for Perfecting Your Zucchini Swirl Coffee Cake
Over the years I’ve made this dish, a few tricks have helped me get it just right every time. First off, squeezing out excess moisture from the zucchini is key—if there’s too much water, the cake gets heavy and dense. I always do this after grating; it’s kind of therapeutic, and it makes all the difference. When mixing the batter, don’t overdo it. Mix until just combined—you want a light, airy crumb. I’ve tested different swirl techniques, and honestly, a gentle zigzag pattern with a skewer yields those beautiful ripples without mixing the layers too much. Bananas or applesauce can sometimes substitute part of the butter if you’re looking to cut fat, but I found the zucchini’s moisture works so well on its own. Make sure to check your oven’s calibration—my oven runs a little hot, so I lower the temperature by 10 degrees and bake a tad longer. If you want extra cinnamon flavor, sprinkle a little more on top right before baking. And don’t skip the glaze—once everything’s cooled, it really makes this cake shine. I learned that a thicker glaze sets better and gives a lovely shine. Play around with flavor additions like lemon zest, nutmeg, or even chopped nuts in the swirl—I guarantee you’ll find your perfect version after a few tries!
Storing and Reheating Tips
If you’re like me, baking a big batch doesn’t mean eating it all in one sitting. Luckily, this cake keeps beautifully. Keep it covered loosely with foil or a cake dome at room temperature for up to two days. Beyond that, I wrap slices tightly in plastic wrap and fridge them—this keeps it fresh without drying out. If you want to keep it longer, the freezer is perfect. Wrap slices individually in plastic and pop them in an airtight container. To reheat, just microwave for 15-20 seconds or warm slices gently in the oven at 350°F until just warmed through. I recommend adding the glaze after reheating for maximum flavor. An added tip: if you plan to freeze it, underbake by about 5 minutes—this prevents overbaking during reheating. Trust me, knowing how to store this keeps your mornings stress-free! It’s also worth mentioning that the flavor deepens after a day or two—so if you’re planning ahead, bake it a day early and enjoy that extra little bit of richness.
Frequently Asked Questions
Final Thoughts
This zucchini swirl coffee cake has become a beloved staple in my home—it’s the kind of dessert that makes people wonder, “Is there zucchini in that?” with wide eyes. The moistness, the cinnamon ripple, and that subtle vegetable goodness make it feel nourishing without sacrificing flavor. I love how adaptable it is—you can switch up the flavors, add nuts, or even swap the glaze for icing. The best part? It’s so easy to throw together, and it never fails to impress. Whether you’re baking for family, friends, or just yourself on a lazy Sunday, this cake’s warm, inviting aroma will make your home feel extra cozy. I really hope you give it a try—trust me, your taste buds and your kitchen will thank you. I’d love to hear how it turns out, so drop a comment or share your variations. Happy baking, my friend!
chicken ranch
Ingredients
Method
- Preheat oven to 350°F. Grease a 9x13 inch baking dish.
- In a medium bowl, season chicken with salt, pepper, and 1.5 tablespoons Ranch dressing mix.
- Cook bacon until crispy and chop. Cook pasta and set aside.
- In a large skillet, melt 4 tablespoons butter and 1 tablespoon olive oil over medium-high heat. Cook chicken until done, then set aside.
- Saute onion in pan drippings until translucent. Add garlic and cook for 1 minute.
- Add remaining 4 tablespoons butter to the same pan, melt, then stir in flour, Italian seasoning, basil, and remaining Ranch mix. Cook for 1-2 minutes.
- Gradually whisk in chicken broth, then add heavy cream and cream of chicken soup. Cook until bubbling. Stir in parmesan cheese until melted.
- Add cooked bacon, sun-dried tomatoes, cooked chicken, and pasta to the sauce. Mix well.
- Pour mixture into the prepared baking dish. Top with Italian cheese, chopped parsley, and additional bacon if desired.
- Bake uncovered for 30 minutes until bubbly and cheese is golden.


That sounds amazing—I love how comforting grandma’s recipes can be. The smell of coffee cake in the morning is pure joy!
I love the idea of a cozy weekend morning with coffee and grandma’s recipe—sounds like pure comfort!
I love how comforting this sounds—my grandma used to make something similar every Sunday. Do you have any tips for getting the perfect creamy texture?
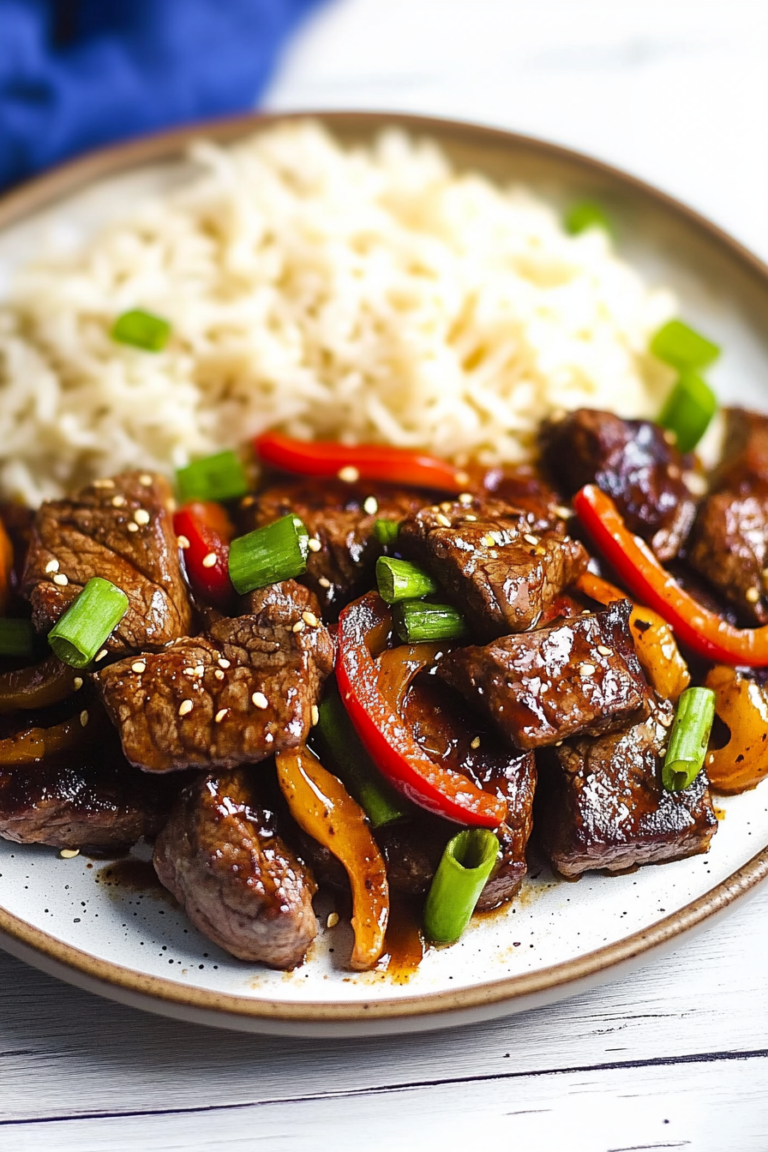
I love that smell too! This chicken dish sounds amazing—perfect for a cozy family dinner.
I love the idea of waking up to coffee cake on weekends—so cozy and comforting!