
Zesty Black Bean Burgers A Simple Delight
If you sprinkle a little extra love into your baking, it’s bound to turn out better, right? I remember the first time I made this zucchini coffee cake, I was just looking for something sweet and comforting after a long day. The moment I pulled it out of the oven and took that first sniff, I knew I’d stumbled upon a little homey miracle. Moist, tender zucchini nestled in a cinnamon-spiced batter, swirling perfectly into a beautiful marbled pattern—this cake manages to be cozy and elegant all at once. Plus, it’s incredibly forgiving, which makes it my go-to quick bake when I want to impress without stressing. My kids actually ask for this all the time, and honestly, it’s great for breakfast, brunch, or just a sweet evening treat when I don’t wanna turn on the oven for hours. Trust me on this—once you master the swirl technique, you’ll be hooked. And hey, I’ve tested this with almond milk, and it actually made it even creamier—so, loads of room for tweaks! Let’s get into how you can make this delightful, homey cake your new family favorite.
What is Zucchini Coffee Cake?
Think of it as a cozy take on your classic coffee cake—only with a secret veggie twist. It’s essentially a moist, tender cake infused with shredded zucchini, which keeps it irresistibly soft and light. The name might throw you a little—“coffee cake” doesn’t mean it actually pairs only with coffee, but rather that it’s the type of treat you’d enjoy alongside your morning brew or afternoon tea. This cake is all about balancing sweet and spice; cinnamon, vanilla, and a touch of brown sugar come together in a perfect harmony. The fun part is swirling cinnamon-spiced batter into the zucchini mixture before baking, creating gorgeous marbled swirls that are almost too pretty to cut. It’s a recipe I’ve been making for years—an old family favorite that’s evolved over time but stayed true to its comforting roots. Since zucchini is so mild and moist, it gives the cake a subtle, fresh flavor that’s not overly vegetable-y, I promise. It’s a slice of home, made simple and special.
Why you’ll love this recipe?
There’s so much I love about this zucchini coffee cake, it’s hard to know where to start. First, the flavor. It’s genuinely delicious—warm cinnamon, vanilla, and that gentle sweetness that makes every bite feel like a hug. The zucchini adds a subtle moisture that keeps the cake far from dry, even days later. And speaking of easy, this is a *really* straightforward recipe. You just mix, swirl, and bake—no complicated steps or fancy equipment needed, which is why it’s perfect for busy mornings or last-minute get-togethers. Plus, it’s budget-friendly; zucchini is usually very affordable and readily available in most markets. What I love most about this is how versatile it is. You can add nuts, raisins, or even swap out the glaze for cream cheese frosting if you’re feeling fancy. It’s great for brunch potlucks, a family dessert, or a sneaky way to get more veggies into the kids without them noticing. Honestly, once I discovered how moist and tender it turned out, I started making it every other week. It’s one of those recipes that just makes your house smell like comfort and home, and everyone leaves the table with that satisfied glow.
How do I make Zucchini Coffee Cake?
Quick Overview
Imagine mixing up a simple batter, preparing a cinnamon swirl filling, and layering everything in your pan. Then, it’s just a matter of swirling, baking, and glazing. The key here is not overmixing—just enough to combine ingredients smoothly. The swirl pattern is what makes this cake special, so take your time to spread and marble it a little. Once it’s in the oven, the magic happens—your kitchen will fill with that warm, cinnamony scent that always makes everyone drool. A quick cool down, a drizzle of sweet glaze, and voila—you’ve got a gorgeous, flavorful zucchini coffee cake that tastes like it’s straight from a bakery, but you made it right at home. This recipe is forgiving, adaptable, and downright addictive. I promise once you get the hang of swirling and shifting that batter, you’ll want to make it all the time. It’s perfect for when you crave something sweet but don’t want to spend hours baking or cleaning up a mess.
Ingredients
For the Main Batter:
– 2 cups all-purpose flour (I like unbleached for a richer flavor)
– 1 teaspoon baking powder
– ½ teaspoon baking soda
– ½ teaspoon salt
– 1 teaspoon ground cinnamon (because cinnamon makes everything better!)
– 1 cup granulated sugar
– ½ cup light brown sugar
– ½ cup vegetable oil or melted unsalted butter
– 3 large eggs
– 1 teaspoon vanilla extract
– 1 cup grated zucchini (roughly 1 medium zucchini, I always do this with a box grater)
– ¼ cup milk (I’ve tested with almond milk, and it’s deliciously creamy!)
For the Filling:
– ¼ cup light brown sugar
– 2 teaspoons ground cinnamon
– 2 tablespoons softened butter or coconut oil (for easy spreading)
– ½ cup chopped nuts or raisins (optional, but highly recommended)
For the Glaze:
– ½ cup powdered sugar
– 1-2 tablespoons milk or cream
– ½ teaspoon vanilla (or a splash of almond extract for extra flavor)
– A dash of cinnamon for an extra punch
Step-by-Step Instructions
Step 1: Preheat & Prep Pan
Set your oven to 350°F (180°C). Grease a 9-inch round or square baking pan, or line it with parchment paper—whatever you’ve got. I always do this first because by the time I mix the ingredients, I don’t want to forget. You want the pan ready so the batter can go straight in and bake evenly.
Step 2: Mix Dry Ingredients
In a big bowl, whisk together the flour, baking powder, baking soda, salt, and cinnamon. This step is crucial for even rising. I always sift or whisk thoroughly because clumps make the texture uneven—trust me, it’s worth the little extra effort.
Step 3: Mix Wet Ingredients
In another bowl, beat the eggs, then add the sugars, oil (or butter), vanilla, and milk. Mix until well combined—look for a smooth, slightly frothy mixture. I like using a whisk here because it gets rid of lumps and aerates the batter just a little.
Step 4: Combine
Add the wet ingredients into the dry, folding gently with a spatula or wooden spoon until just combined. Avoid overmixing—this is how you get that tender crumb. Stir in the grated zucchini last, making sure it’s evenly dispersed.
Step 5: Prepare Filling
Mix the brown sugar, cinnamon, and softened butter until crumbly but paste-like. Fold in nuts or raisins if you’re using them. This mixture is what creates those lovely cinnamon swirls; don’t skip this step—it’s the secret to that bakery look and taste.
Step 6: Layer & Swirl
Pour about half of the batter into the prepared pan. Drop spoonfuls of the cinnamon filling on top, then spread the rest of the batter over it. Using a butter knife or skewer, swirl gently through the batter to create a marbled, ribbon-like effect. Keep it loose—you want to see the swirls, not just a big blob of filling.
Step 7: Bake
Pop it in the oven for about 40-45 minutes. You’ll know it’s ready when a toothpick inserted in the center comes out clean. Don’t be alarmed if the sides slightly pull away from the pan—that means it’s perfectly baked. Every oven is different, so start checking around the 38-minute mark.
Step 8: Cool & Glaze
Let the cake cool in the pan for about 15 minutes, then transfer it to a wire rack. While it cools, whisk together your glaze ingredients until smooth. Drizzle the glaze over the slightly warm cake—it will soak in just enough to add that shiny, sweet finish with a hint of cinnamon.
Step 9: Slice & Serve
Use a sharp knife to cut into squares or slices—don’t rush this part! For clean cuts, wipe the knife in warm water between slices. Serve this warm or at room temperature, maybe with a cup of coffee or tea, and watch everyone’s eyes light up. Bonus points if you add a dollop of whipped cream or a scoop of vanilla ice cream on the side when serving as dessert.
What to Serve It With
This cake is basically a chameleon—great at breakfast, brunch, or dessert. For breakfast, pair it with a hot coffee or a foamy latte, and maybe some fresh fruit on the side. It’s fantastic sliced and stacked for brunch, served with a tall glass of milk or a mimosa for the grown-ups. When I want to treat myself after dinner, I love giving it a extra drizzle of glaze and maybe a dusting of powdered sugar—simple, elegant—and my family always asks for seconds. If you like it super cozy, a cup of herbal tea or spiced cider is perfect. I’ve even made little muffins with this batter for a quick grab-and-go breakfast—they turn out just as moist and inviting. Honestly, it’s the kind of baked good that tastes like home—sweet, comforting, and just right.
Top Tips for Perfecting Your Zucchini Coffee Cake
Over the years, I’ve learned a few tricks to make this recipe turn out even better. First, when grating zucchini, I always squeeze out excess moisture—this keeps your batter from being too wet, which can sometimes make the cake heavy. I do this by wrapping the grated zucchini in a clean towel and pressing gently—trust me, it makes a huge difference. Second, don’t overmix when combining wet and dry ingredients; just fold until you see no streaks—this ensures a tender crumb. For the swirl pattern, I like to drop spoonfuls of the filling randomly across the batter before swirling, so it’s more chaotic and natural-looking, which I think looks prettier. Variations? Oh, I’ve tried swapping walnuts for pecans, or adding a handful of chocolate chips—delicious! Adjusting the sugar is also simple: if you prefer less sweetness, cut the brown sugar by a quarter; just keep in mind it might affect moistness slightly. When baking, every oven is different, so start checking around 38 minutes—overbaking can dry out the cake. If your glaze feels too runny, add a bit more powdered sugar; if it’s too thick, a tiny splash of milk does the trick. The key is patience and a little love—the rest comes naturally.
Storing and Reheating Tips
To keep this zucchini coffee cake fresh, store it in an airtight container. At room temperature, it’s best enjoyed within 24 hours—if you want it to stay moist, cover it lightly with foil, and it’ll stay soft and delicious. If you’re making it ahead, I prefer refrigerating it—just wrap it well or store in a container with a lid—for up to 3 days. When it’s time to serve again, I just pop a slice in the microwave for about 10 seconds, or heat it gently in the oven at 300°F for a few minutes. Freezing works beautifully, too: wrap individual slices tightly with plastic wrap and then foil, and they’ll last up to 3 months. Thaw at room temperature or heat from frozen. If you plan to glaze it later, I recommend adding the glaze just before serving—it keeps that shiny, moist look and fresh flavor. Also, for best flavor, don’t forget to bring the cake to room temperature before slicing—it makes all the difference in texture and taste. Believe me, once you get used to making this, it becomes a pantry staple. It’s my secret weapon for quick, delightful baking whenever I need a comforting fix.
Frequently Asked Questions
Final Thoughts
This zucchini coffee cake isn’t just a recipe—it’s a little piece of family comfort that I’ve shared with friends and loved ones over countless cups of coffee. Its moist crumb, warm cinnamon swirls, and the sweet glaze make it feel like a special treat, even though it’s surprisingly easy to make. I love how it can adapt—add nuts, swap in different spices, or try gluten-free flours—and still turn out fantastic every time. It’s one of those dishes that feels like a hug in dessert form, and once you’ve made it a few times, you’ll see how simple and forgiving it truly is. Whether it’s a weekend brunch or a quick snack for the kids, this cake always disappears in minutes at my house. Remember, baking should be fun—so don’t sweat the small stuff, and enjoy the process as much as the finished product. I’d love to hear how yours turns out—share your tweaks and tips in the comments or tag me in your photos. Happy baking, and here’s to many more cozy, delightful moments in the kitchen!
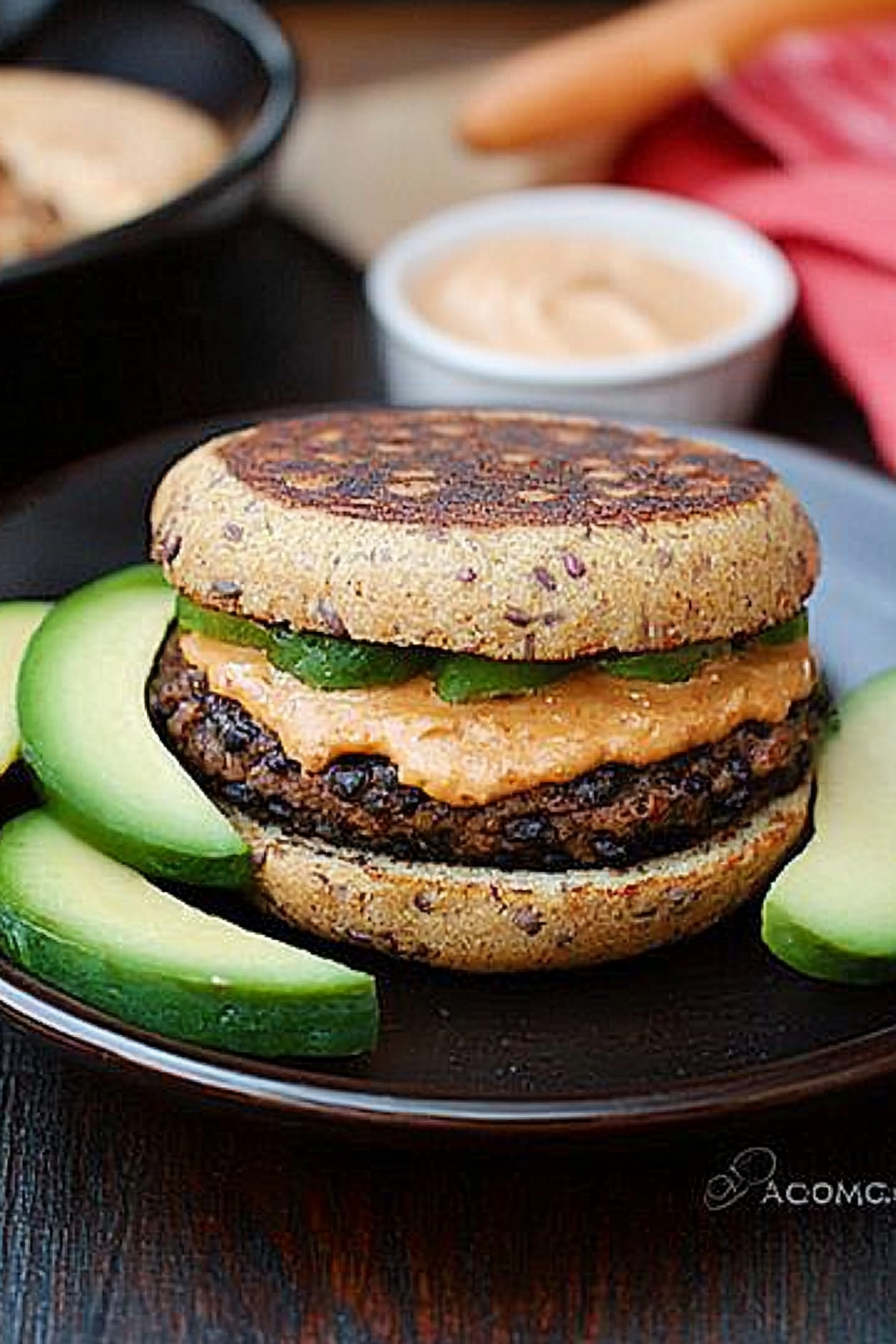
Black Bean Burgers
Ingredients
Method
- Rinse and drain the black beans thoroughly and mash them in a large bowl until pasty.
- Finely chop garlic and cilantro, then add to mashed beans along with cumin, salt, and hot sauce.
- Stir in the oats until well combined to form a mixture that can be shaped into patties.
- Divide the mixture into four equal portions and shape into burger patties.
- Preheat a skillet over medium heat and lightly spray with oil. Cook the patties for about 7-8 minutes on each side until browned and cooked through.
- Toast the buns lightly and assemble the burgers with sliced avocado and desired toppings.


I love how simple recipes like this can still feel special—your tip about adding a little extra love really makes a difference!
I totally agree—adding a little love really makes a difference! I tried this recipe last week and it turned out amazing.
I absolutely love this recipe—so easy and delicious every time! Thanks for sharing such a great tip.
I totally agree—adding that little extra love really makes all the difference! Your zucchini coffee cake sounds amazing.
I love how simple yet delicious these black bean burgers are! The zesty flavor really makes them stand out.