

Easy Italian Chicken Francese Recipe
There’s nothing quite like the smell of a warm, freshly baked cake filling up my kitchen on a lazy Sunday afternoon. Honestly, baking this zucchini swirl cake takes me straight back to my grandma’s house, where she’d always have a batch ready, scenting her entire home with cinnamon and vanilla. My kids run to the kitchen when they catch that smell, knowing a treat is imminent. I always do this when I want something cozy but also a little bit special—because this cake isn’t just comforting, it’s surprisingly easy to whip up, even with a busy schedule. And trust me, it’s a total crowd-pleaser. The best part? It’s essentially a lazy-day masterpiece—moist, sweet, with a beautiful marbled swirl of cinnamon-spiced filling. It’s kind of like a coffee cake but with a personal twist that makes it feel like a warm hug in every bite. If you love a recipe that looks gorgeous but requires barely any fuss, stick around—I’ll show you exactly how I make my favorite zucchini swirl cake, with tips from my kitchen to yours.
What is Zucchini Swirl Cake?
This zucchini swirl cake is a delightful twist on classic sheet cakes—think moist, tender crumb with a fun marbled moment of cinnamon-spiced swirl running through it. It’s like a cross between a coffee cake and a quick bread, but baked in a regular cake pan. The magic lies in the zucchini—it adds moisture and a subtle vegetable sweetness that makes the cake incredibly tender, without any of that shreds-of-zucchini feeling. The swirl is a simple mixture of cinnamon, sugar, and butter, layered lazily in the batter and then swirled with a toothpick or skewer for that beautiful marbled effect.
Its name comes from the way you layer and swirl the filling through the batter, creating those pretty, teasing ribbons of cinnamon on every slice. Think of it as a rustic, slightly indulgent breakfast, a perfect afternoon snack, or even an elegant dessert when topped with a dollop of whipped cream or a drizzle of glaze. No matter when or how you serve it, one thing’s for sure—this cake is loved by everyone, kid and adult alike. And what’s even better? It uses everyday ingredients, and I promise, you probably already have everything you need in your pantry and fridge!
Why you’ll love this recipe?
What I love most about this zucchini swirl cake is how it manages to be so satisfying yet completely unpretentious. First, the flavor—moist, tender cake with that warm cinnamon-spice swirl, it’s like comfort food in dessert form. The aroma alone is enough to make your whole house smell heavenly. Second, the simplicity—no fancy gadgets or hard-to-find ingredients. I’ve made this countless times, and it has never failed me. It’s perfect when I need a quick dessert or a special treat for brunch, yet it’s fancy enough to serve to guests without feeling like I slaved away for hours.
Plus, it’s incredibly budget-friendly. Zucchini is cheap and abundant in summer, and I often make this cake as a way to use up a stubborn zucchini or two before they go bad. I’ve tested this with almond milk and it actually made it even creamier—so feel free to swap non-dairy options! What’s more, this recipe is versatile—you can serve it warm with a scoop of vanilla ice cream, or cool it and dust it with powdered sugar for a more polished look. It’s one of those “recipe closet favorites” that I turn to when I want something wholesome, homey, and kinda special—all at once. Honestly, it’s become a family tradition—I make it for almost every holiday brunch, and my kids ask for it all the time.
How do I make Zucchini Swirl Cake?
Quick Overview
This cake comes together effortlessly. Start by grating zucchini and squeezing out the excess moisture—trust me, it makes a huge difference in keeping your cake moist without it becoming too dense or gummy. You’ll prepare a simple batter, mix up the cinnamon swirl, and then layer and swirl everything together before baking. The secret is not overmixing once you combine the wet and dry ingredients—just fold gently to keep it tender. Once baked, cooling it before topping with glaze or dusting of confectioners’ sugar is key. This process is kind of foolproof, and the result always looks charming—like those beautiful bakery cakes, but with way less fuss.
Ingredients
For the Main Batter:
- 2 cups all-purpose flour (or a blend of whole wheat and white flour for a nuttier flavor)
- 1 cup granulated sugar
- 1/2 teaspoon baking powder
- 1/2 teaspoon baking soda
- 1/4 teaspoon salt
- 1 teaspoon vanilla extract
- 1 cup vegetable oil or melted butter
- 3 large eggs
- 1 cup grated zucchini (squeezed dry)
- 1/3 cup milk (dairy or almond, depending on what you prefer)
For the Filling:
- 1/2 cup brown sugar
- 2 teaspoons ground cinnamon
- 2 tablespoons softened butter
For the Glaze:
- 1 cup powdered sugar
- 2-3 teaspoons milk or lemon juice
- A splash of vanilla (optional)
Step-by-Step Instructions
Step 1: Preheat & Prep Pan
Set your oven to 350°F (175°C). Grease a 9-inch square baking pan or line it with parchment paper—trust me, it makes removing the cake much simpler. I always do this first so I don’t forget as I go along. You want a nice, even baking surface, and a little butter or non-stick spray will do the trick.
Step 2: Mix Dry Ingredients
In a big bowl, whisk together the flour, sugar, baking powder, baking soda, and salt. Mixing dry ingredients well ensures everything is evenly distributed, which means your cake will rise beautifully and have a consistent texture. I usually do this step before tackling the wet ingredients—it’s my pre-baking ritual!
Step 3: Mix Wet Ingredients
In a separate bowl, whisk together the eggs, vanilla, oil, and milk. If you’re using almond milk or any other non-dairy option, it works just fine here. Grate your zucchini and squeeze out the excess water—I learned the hard way that too much moisture makes for a dense cake. Stir the zucchini into the wet mixture until evenly combined.
Step 4: Combine
Gradually pour the wet ingredients into the dry, gently folding with a spatula until just combined. Be careful not to overmix—stop as soon as there are no visible streaks of flour. A few lumps are okay! Overmixing can lead to a tougher crumb, and I’ve learned that the hard way.
Step 5: Prepare Filling
Mix the brown sugar, cinnamon, and softened butter in a small bowl. You want a crumbly, spicy-sweet mixture—this is what gives the swirl its signature flavor. If you prefer a more caramel-y flavor, a touch of maple syrup or honey can be swapped in here. For a nutty twist, sprinkle some chopped pecans or walnuts on top before swirling.
Step 6: Layer & Swirl
Pour half of the batter into your prepared pan. Dot or evenly spread half of the cinnamon filling over the batter, then repeat with the remaining batter and filling. Use a toothpick or skewer to gently swirl through the batter—think of it as creating gentle marbling, not a chaotic mess. The key is to keep the layers distinct but intertwined, giving you those gorgeous ribbon effects when sliced.
Step 7: Bake
Pop the cake into the oven and bake for about 45-50 minutes. Check the doneness with a toothpick—insert it in the center, and it should come out clean or with just a few moist crumbs. If it starts to brown too fast, tent it with foil. The smell of cinnamon and zucchini will fill your house and make everyone curious!
Step 8: Cool & Glaze
Let the cake cool in the pan for at least 15 minutes—you don’t want it to fall apart when slicing. Then, transfer it to a wire rack. Mix your powdered sugar with milk or lemon juice to make a smooth glaze. I like to drizzle it right over the warm cake so it seeps into the cracks and adds that shiny finishing touch.
Step 9: Slice & Serve
Use a serrated knife to cut clean slices. Let the cake cool completely if you’re going for a neat presentation, but I often can’t resist a warm piece with a splash of extra glaze or a dollop of whipped cream. Serve on a pretty platter, maybe with a sprig of mint or a handful of fresh berries for that extra pop. This makes a lovely breakfast treat or afternoon indulgence—either way, everyone ends up grabbing seconds.
What to Serve It With
This zucchini swirl cake is pretty versatile. For breakfast, pair it with a strong cup of coffee or a glass of cold milk—my kids love it in the mornings, especially with a smear of cream cheese or ricotta on top. It’s a wonderful brunch centerpiece, especially when served alongside fresh fruit and a pot of tea. At dinner parties or family gatherings, I like to present it sliced and dusted with powdered sugar, with a side of vanilla ice cream or a drizzle of honey for an elevated dessert vibe. And for those cozy afternoons, a simple cup of hot cocoa or spiced chai makes it even better. Honestly, I’ve served this to friends for so many occasions, and it always gets rave reviews—partly because it’s homey and partly because it’s just downright delicious. I’ve learned that slicing it neat and serving with a little extra glaze makes all the difference—people love that little extra touch of sweetness.
Top Tips for Perfecting Your Zucchini Swirl Cake
Over the years, I’ve picked up a few tricks to make this cake truly shine. First, always squeeze out as much excess moisture from the zucchini as possible—unless you want a soggy bottom, trust me! A clean tea towel or cheesecloth is perfect for this step. Second, don’t overmix the batter once you add the wet ingredients. It sounds cliché, but overmixing toughens the crumb. Mix just until everything looks combined and that’s enough.
When swirling your cinnamon mixture, think gentle—don’t overdo it or you’ll lose that beautiful marbled effect. A few zig-zags with a skewer do the trick, creating a pretty pattern that’s almost too pretty to cut. For ingredient swaps, I’ve tried coconut oil instead of butter, and it was surprisingly good—just adjust the sugar a bit because coconut oil can add a little sweetness naturally. For the glaze, I sometimes add a splash of bourbon or vanilla extract for a richer flavor, but plain lemon juice keeps it fresh and bright. Baking tips? Always check your oven temp with an oven thermometer—mine runs a little cool, so I add an extra 5 minutes to the baking time sometimes. And don’t skip the cooling step—resist the urge to frost or glaze it hot. The texture needs to set, and that way, your slices stay pretty and neat.
Storing and Reheating Tips
This cake keeps well for a few days at room temperature if covered tightly with foil or in an airtight container—up to two days at least. After that, I pop it into the refrigerator, which prolongs freshness and prevents mold. For best results, store sliced pieces separately if you plan to keep it longer—this helps prevent the cake from drying out. When reheating, I just pop a slice in the microwave for about 15-20 seconds—perfect for that fresh-baked warmth. If you want to keep the glaze shiny and fresh, add it just before serving, or sprinkle powdered sugar on individual slices. For freezing, wrap slices tightly in plastic wrap, then foil, and store for up to three months. Thaw at room temperature and maybe give it a quick warm-up in the microwave. Just make sure the glaze doesn’t get soggy from the freezing process—reapply if needed. Trust me, this cake always “magically” tastes just as good after a few days, especially when warmed a little or topped with more glaze. It’s like a little slice of home comfort, no matter when you enjoy it.
Frequently Asked Questions
Final Thoughts
Honestly, this zucchini swirl cake has become a favorite in my home because it strikes that perfect balance between simple and special. It’s a treat that brings smiles to the table, whether I’m whipping it up on a weekday afternoon or serving it as the star of a weekend brunch. The combination of moist, tender crumb and that delicious cinnamon swirl makes every slice feel like a little celebration. Plus, knowing I can sneak some extra zucchini into my family’s diet without complaints makes it even sweeter. I hope you give this recipe a try and that it becomes just as beloved in your house as it is in mine. Remember, baking is about pouring love and a little bit of chaos into the kitchen—so don’t stress if it’s not perfect the first time. Trust me, every batch gets better with a little practice—and a lot of taste testing! I’d love to hear how yours turns out, so drop a comment or share your twists. Happy baking, and enjoy every cozy bite!

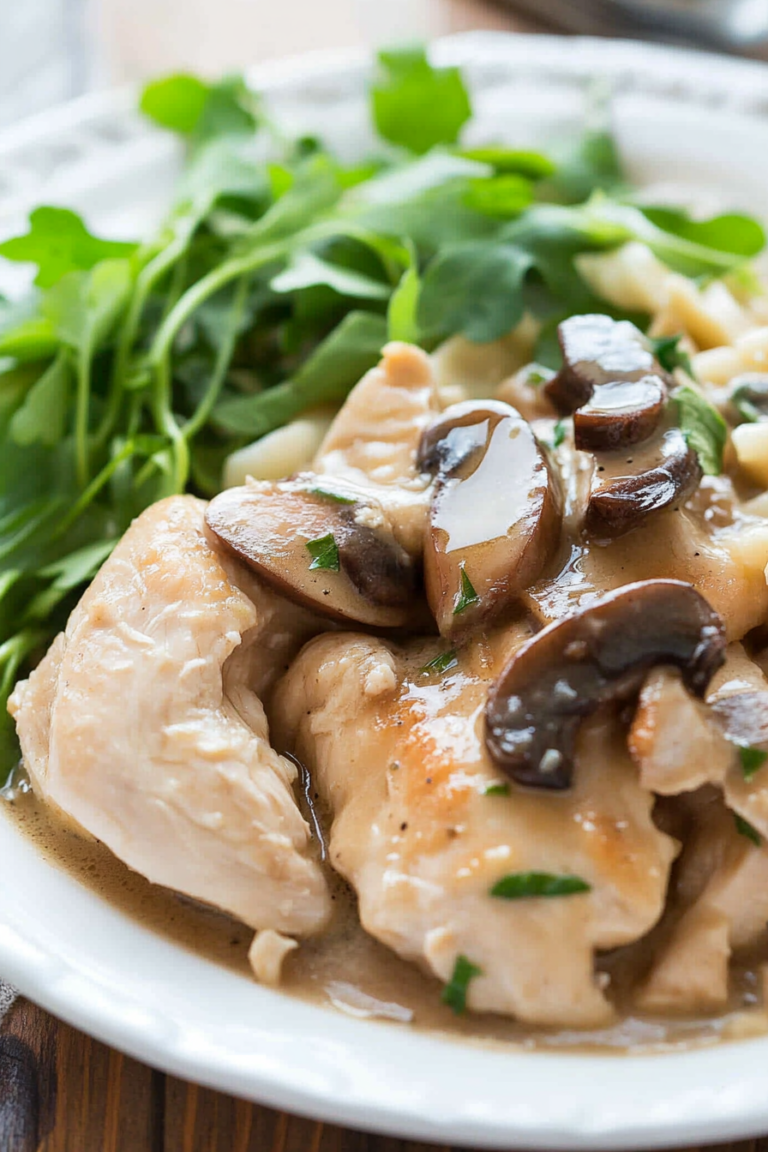
Chicken Francese
Ingredients
Method
- Season the chicken with salt and pepper.
- Place the flour in a bowl, and the beaten egg whites in another bowl.
- Heat a large non-stick pan over medium heat. Spray with cooking spray.
- Lightly flour chicken, dip in eggs, then sauté in hot pan for 2-3 minutes per side. Transfer to a plate.
- Repeat until all chicken is cooked and set aside.
- In the same pan, whisk together chicken broth and 1 tbsp flour. Add lemon juice, slices, parsley, and butter. Simmer for 2 minutes until slightly thickened.
- Return chicken to the pan, spoon sauce over, and cook for 1-2 more minutes.
- Serve immediately topped with sliced lemon and parsley.


This recipe sounds amazing—Italian Chicken Francese always hits the spot. I can already imagine the rich flavor and tender texture.
I love the aroma of baking zucchini swirl cake! It feels so cozy and comforting.
I love this recipe! The zucchini swirl cake always turns out so moist and delicious. Perfect for a cozy Sunday treat.
I just tried this zucchini swirl cake recipe—it was moist and delicious, plus the kitchen smelled amazing! Can’t wait to make it again.
I love the cozy vibe of baking on a lazy Sunday—this recipe sounds perfect for a comforting, homemade treat!