

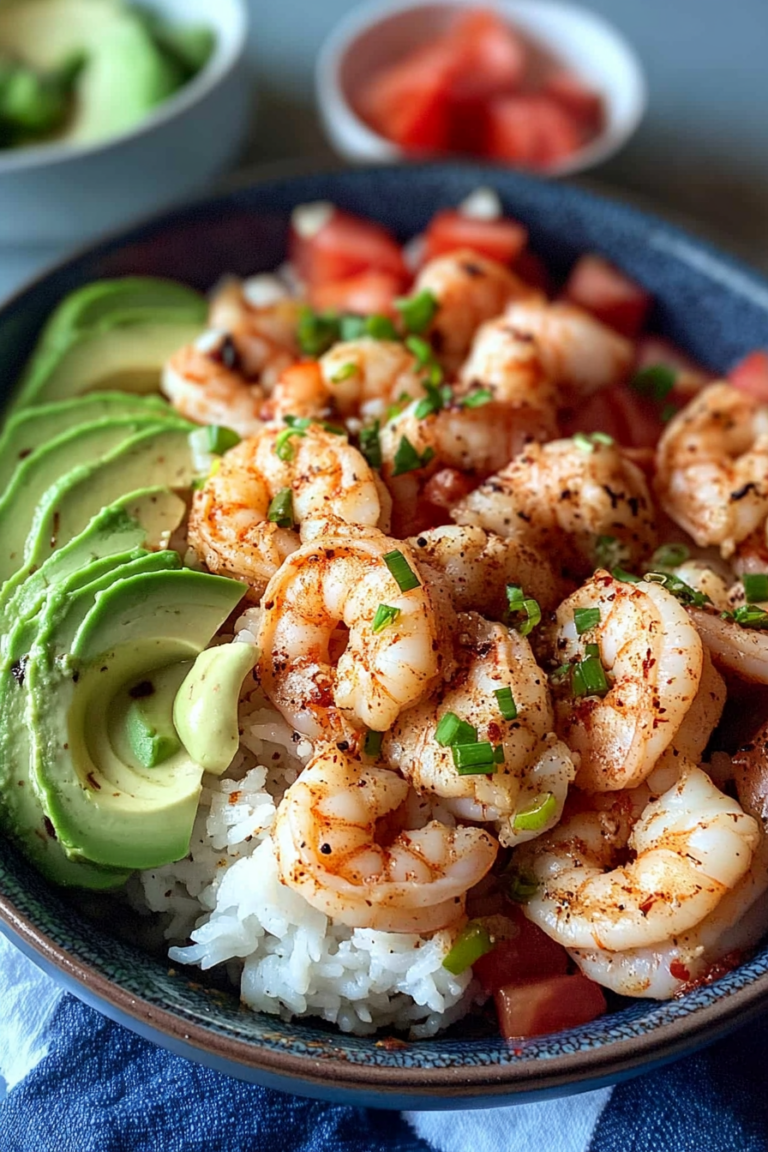
Easy Mexican Shrimp Salad Recipe
There’s just something about a slice of cake that makes everything feel a little brighter, right? I remember my grandma’s kitchen, the smell of warm vanilla, and those mornings when she’d slice thick pieces for the family. Over the years, I’ve played around with different recipes, but this zucchini swirl cake? It’s become my go-to when I want something cozy, moist, and just a little bit special. It’s sweet, it’s soft, and the swirl of cinnamon and sugar inside makes every bite feel like a warm hug. I always do this when I need a quick dessert or even a sneaky way to get the kids to eat more veggies—they have no idea they’re munching on zucchini! Trust me on this one, this recipe’s a lifesaver on busy nights, and the best part? It’s so easy—no fancy equipment needed, just a spoon and a little love. The smell alone when this gets baking will have everyone racing to the kitchen. That’s my kind of baking magic!
What is Zucchini Swirl Cake?
Think of zucchini swirl cake as the lovechild of a classic cinnamon roll and your favorite moist cake. It’s essentially a tender, buttery batter infused with subtle sweetness, with a generous swirl of cinnamon sugar running through the middle. The twist? It’s packed with zucchini! Yep, those humble green veggies that everyone thinks of as a summer squash are the secret ingredient that keeps this cake incredibly moist and slightly nutritious—without compromising on flavor. The name might be a little deceiving, sounding fancy or unsure, but really, it’s just a simple, approachable cake you can whip up any time. Think of it as that cozy cake you want to serve with a cup of coffee on a lazy Sunday or pack for a picnic—you’ll love how versatile it is. And if you’re anything like me, the fact that it sneaks in a veggie makes it even more tempting!
Why you’ll love this recipe?
Honestly, what I love most about this zucchini swirl cake is how it combines everyday ingredients into something unexpectedly delicious. The first time I made it, I was amazed by how moist and tender the crumb was—every bite just melts in your mouth. Plus, it’s so simple that even kitchen novices can pull it off without breaking a sweat. The whole thing comes together in one bowl, and you don’t need any fancy gadgets—just a whisk, a spatula, and a loaf pan or cake tin. What’s more, it’s budget-friendly: ingredients like flour, sugar, eggs, and zucchini are staples I always have on hand. And because of the swirl, each slice is a little work of art—pretty enough for a brunch treat yet straightforward enough for a weeknight dessert. I’ve tested this with different kinds of sweeteners, and honestly, using honey or maple syrup just makes it even more comforting. My kids ask for this all the time, and I’ll admit, I’ve sneaked a few extra slices for myself when no one’s looking! It’s perfect when you’re craving something sweet but don’t want to go all-in on a giant cake or complicated dessert. Plus, the aroma that fills the house while baking? Divine. It’s like fall in a loaf.
How do I make Zucchini Swirl Cake?
Quick Overview
This zucchini swirl cake is a one-bowl wonder that starts with grating fresh zucchini, mixing it into a simple batter, and then swirling cinnamon sugar inside before baking to perfection. The process is straightforward, and I promise, it’s foolproof once you get the hang of it. The key is to keep the batter moist but not runny, and to swirl the filling evenly so each slice is gorgeous. What I love about this recipe is how it’s adaptable—you can add chopped nuts, chocolate chips, or even swap out the zucchini for grated carrots if you’re feeling adventurous. The whole baking process takes about 45 minutes, give or take, with minimal prep. Perfect for when you want a cozy treat without spending hours in the kitchen. The best part? You’ll end up with a beautiful, fragrant cake that’s as good warm as it is at room temp—trust me, leftovers won’t last long!
Ingredients
For the Main Batter:
– 2 cups all-purpose flour (I like unbleached for a richer flavor)
– 1 cup granulated sugar (or coconut sugar for a deeper caramel note)
– 1 teaspoon baking powder
– ½ teaspoon baking soda
– ½ teaspoon fine sea salt
– 1 teaspoon vanilla extract
– ½ cup vegetable oil (or melted coconut oil for a hint of flavor)
– 3 large eggs (at room temp)
– 1 cup grated zucchini (squeezed dry to reduce moisture)
For the Filling:
– ¼ cup brown sugar
– 2 teaspoons ground cinnamon
– 2 tablespoons melted butter or coconut oil (to make it sticky and spreadable)
– Optional: a handful of chopped nuts or chocolate chips
For the Glaze:
– ½ cup powdered sugar
– 1–2 teaspoons milk or lemon juice
– A splash of vanilla (optional)
– Or skip the glaze if you prefer a simpler treat!
Step-by-Step Instructions
Step 1: Preheat & Prep Pan
Start by heating your oven to 350°F (175°C). Grease a loaf pan or line it with parchment paper—this helps with easy removal later. I always do this first so I don’t forget once the batter is ready. If you’re using a different shape, just adjust the baking time a bit — loaves are usually 45-50 minutes, cupcakes 20-25. I also like to sprinkle a little flour or non-stick spray inside the pan to prevent sticking, especially if you’re using a metal pan.
Step 2: Mix Dry Ingredients
In a large mixing bowl, whisk together the flour, sugar, baking powder, baking soda, and salt. Sifting is optional but helps create a lighter batter. Mix until everything is evenly distributed—you want no clumps here. This step ensures your cake rises evenly and gets a lovely crumb. I’ve learned the hard way that skipping this can lead to dense patches — not fun.
Step 3: Mix Wet Ingredients
In a separate bowl, beat the eggs lightly until frothy. Add the vanilla and oil, whisking until smooth. Then, stir in the grated zucchini, making sure it’s evenly dispersed. I always squeeze out some excess water from the zucchini—it’s a small thing but makes a huge difference to keep the batter from getting too watery.
Step 4: Combine
Pour the wet mixture into the dry ingredients and gently fold everything together with a spatula. Don’t overmix—just combine until everything looks just combined. Overmixing can lead to a tough texture, and nobody wants that in a cake. If there are a few small lumps, that’s totally fine. The batter should be thick but spreadable.
Step 5: Prepare Filling
Mix the brown sugar and cinnamon in a small bowl. Add melted butter or coconut oil and stir until it’s crumbly but spreadable. If you want a nutty crunch, sprinkle in some chopped pecans or walnuts. Keep this mixture to the side while you prepare your batter—the swirl magic happens next.
Step 6: Layer & Swirl
Pour half of the batter into your prepared pan, spreading it out evenly. Dollop half of the cinnamon sugar mixture on top, then carefully add the remaining batter. Finish with the rest of the cinnamon sugar. Using a skewer or knife, gently swirl through the batter to create pretty marbled patterns—don’t overdo it, or the swirl will disappear!
Step 7: Bake
Pop it into the oven and bake for 45 minutes, or until a toothpick inserted in the center comes out clean. Every oven is different, so start checking around the 40-minute mark. If it’s browning too fast, tent with foil. I always place the pan on the middle rack for even heat distribution. The smell that fills your home during baking is worth every minute of waiting.
Step 8: Cool & Glaze
Let the cake cool in the pan for about 15 minutes, then transfer it to a wire rack to cool completely. If you’re using the glaze, whisk together powdered sugar, a splash of milk or lemon juice, and vanilla until it’s smooth. Drizzle this on once the cake is just warm or cooled—you’ll love how it adds a sweet, glossy finish. My kids ask for extra glaze, so I usually make a little more just in case.
Step 9: Slice & Serve
Once cooled, slice into thick pieces with a serrated knife. This cake holds together beautifully, but be gentle—especially if you added nuts or chips. Serve it warm with a dollop of whipped cream or coffee on the side. It’s equally fantastic at room temperature—so you can totally make it ahead of time for gatherings or school snacks. Trust me, the first slice disappears in minutes around here!
What to Serve It With
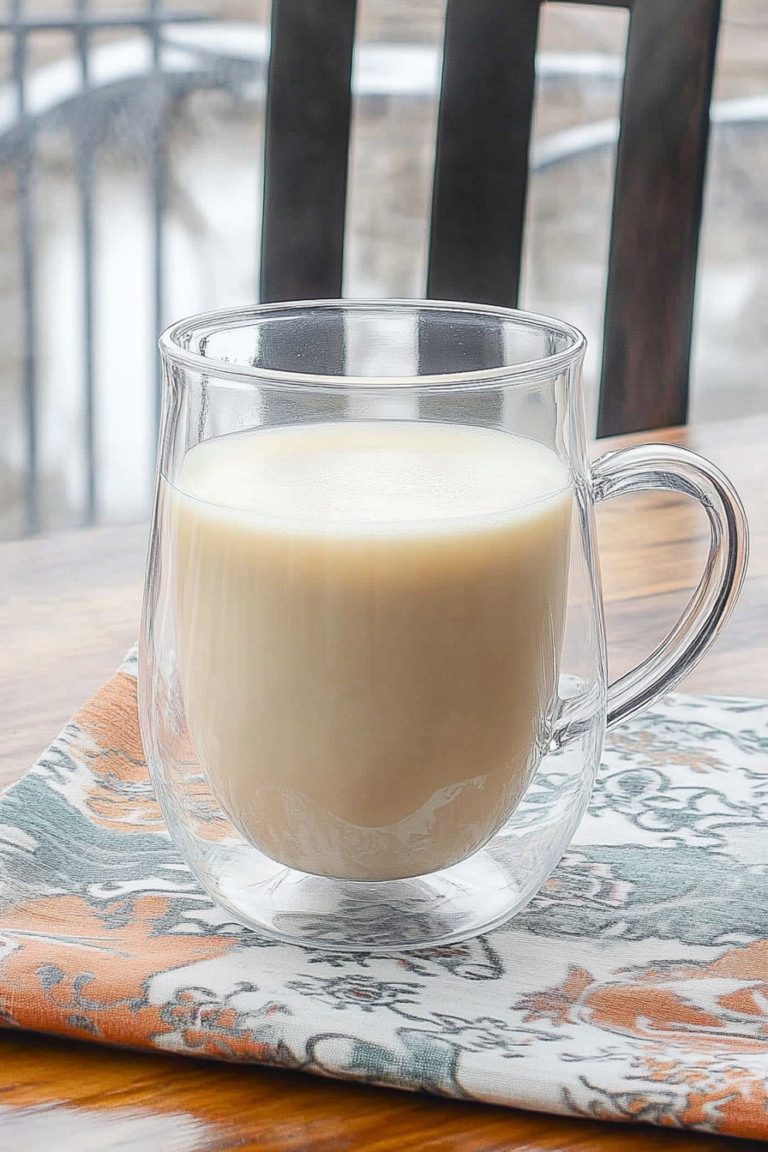
This cake is super versatile! For breakfast, I love serving a warm slice with a cup of black coffee or a frothy cappuccino. My kids think it’s a treat and often request it as their weekend brunch. When hosting a brunch, I set it out alongside fresh berries, a yogurt parfait, and perhaps a little extra cinnamon sugar sprinkle on top. For more of an indulgent treat, pair it with a scoop of vanilla ice cream or a drizzle of caramel—my absolute favorite combo. It’s also perfect as a cozy dessert after dinner. Just warm it slightly, add a little whipped cream or extra glaze, and you’re set. I’ve even sliced it into smaller squares and packed it for picnics—trust me, it holds up well and tastes just as good cold or at room temp. This cake feels like a warm hug, no matter how you serve it, and it’s guaranteed to have everyone reaching for seconds!
Top Tips for Perfecting Your Zucchini Swirl Cake
Over the years, I’ve tried and tested this recipe countless times, and here are some tips I swear by:
- Zucchini Prep: Always squeeze out excess moisture from the grated zucchini. I use a clean kitchen towel or cheesecloth for this—it keeps the batter from turning runny and helps the cake stay moist without feeling heavy.
- Mixing Advice: Don’t overmix once you add the wet to dry ingredients. Gently fold until just combined—this keeps your crumb tender and light. If you overmix, you might end up with a denser texture.
- Swirl Customization: Use a skewer or butter knife to create a gentle swirl—think of it as drawing a lazy spiral. Be careful not to over-mix, or the pattern gets lost. If you want a more dramatic swirl, layer the batter and filling separately and then swirl more deeply.
- Ingredient Swaps: For a dairy-free version, substitute almond or oat milk for milk and coconut oil for butter. You can also swap the sugar for honey or agave—just reduce the liquid slightly. The zucchini keeps everything moist, so you don’t need much fat.
- Baking Tips: Check for doneness a few minutes early. Every oven cooks differently, so a toothpick should come out with just a few moist crumbs, not wet batter. The edges should be golden brown but not burnt.
- Glaze Variations: Instead of powdered sugar, try a honey glaze or a drizzle of dark chocolate for a richer finish. Apply the glaze while the cake is slightly warm for better adhesion, but don’t wait too long or it won’t do its magic.
From trial and error, I’ve learned that small tweaks really matter—like squeezing out zucchini or adjusting oven racks— and every batch gets better with a little practice. This recipe has become a real family favorite, and I love putting my own spin on it every time.
Storing and Reheating Tips
This cake keeps nicely for several days if stored properly. I usually wrap it tightly with plastic wrap or place it in an airtight container. At room temperature, it stays fresh for about 2 days; after that, I recommend refrigerating it to keep it tasting lively. To reheat, a quick 10-15 second zap in the microwave restores that just-baked warmth—we all love that cozy feeling, right? If you want to keep it longer, pop slices in the freezer, wrapped well, for up to 3 months. Thaw at room temp or in the fridge—either way, it’s delicious. If you added glaze, it’s best to add it fresh or warm the slices briefly before serving to get that glossy, sweet finish again. This cake is sturdy yet tender, and with a little care, it can be enjoyed over several days, making it perfect for busy mornings or lazy afternoons. Just a little planning, and dessert’s always ready when you want it!
Frequently Asked Questions
Final Thoughts
If you’re looking for a cake that’s moist, flavorful, and just a little bit sneaky—this zucchini swirl cake is your new best friend. It captures that warmth of homemade baking but leaves you feeling a little healthier (thanks to the zucchini!). I’ve made it for everything from casual family dinners to holiday brunches, and it never disappoints. The best part? It’s so forgiving and adaptable; you can tweak the fillings, swap ingredients, or add extras without losing that cozy, homey charm. Once you get the hang of swirling and baking it, I bet it’ll become a staple in your kitchen too. I’d love to hear how yours turns out—leave a comment or share your variations! Happy baking, and don’t forget to enjoy a big slice with someone you love.
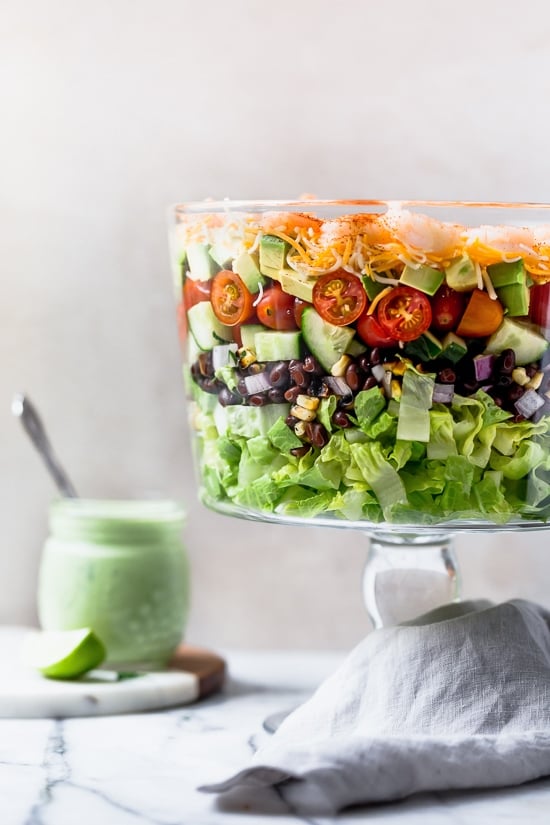
Mexican Shrimp Salad
Ingredients
Method
- Rinse shrimp and chop into large chunks. Toss shrimp with a little salt, chipotle chili powder, and fresh lime juice.
- Combine drained beans, corn, red onion, cilantro, lime juice, and salt to taste.
- In a large bowl, layer the salad ingredients starting with shredded lettuce, followed by bean mixture, cucumbers, tomatoes, avocado, cheese, and cooked shrimp on top.
- Serve with your favorite dressing such as avocado buttermilk dressing on the side.


This recipe looks amazing! I love how easy it sounds—perfect for a quick dinner with a little extra flavor.
This recipe sounds so fresh and flavorful! I can already imagine how delicious it must be.
This recipe sounds amazing! I love how easy and fresh it is—definitely adding this to my meal rotation.
This sounds so comforting—like a warm hug in dessert form. Love how it brings back those sweet family memories!
This sounds so comforting! I love how food can bring back such sweet memories.