

Peanut Butter Cupcakes How to Make Them
There’s something about the smell of freshly baked bread that just wraps your whole house in a warm hug, isn’t there? I remember the first time I made this zucchini banana swirl bread — I was in a rush after work, craving something sweet but didn’t want to turn on the oven for hours. So I threw this together with a couple of overripe bananas, a zucchini I forgot I had in the fridge, and a handful of pantry staples. The result? Pure magic. It’s incredible how a simple mix of ingredients can turn into such a moist, flavorful, and utterly comforting treat. Plus, it’s one of those recipes that looks fancy but is honestly super forgiving. My kids ask for this all the time — especially when they’re craving something sweet at 10pm but I’m not about to bake a full cake. This one’s a lifesaver on busy nights. Trust me, once you try it, it’ll become a staple in your kitchen too — especially because it’s just so good for sneaking in some veggies without a fuss!
What is Zucchini Banana Swirl Bread?
Think of this zucchini banana swirl bread as the lovechild of your classic banana bread and a cozy veggie upgrade. It’s essentially a moist, tender loaf made with wonderfully ripe bananas, shredded zucchini, and a little swirl of cinnamon-spiced batter that makes every bite feel like a sweet hug. The name might sound fancy, but don’t let it scare you — it’s totally approachable. The zucchini is there to add moisture and a subtle vegetable boost, but nobody will guess it’s in there. It’s kind of like hiding a secret ingredient that makes the bread stay soft for days, yet tastes rich and buttery with those chewy banana notes. It’s perfect for breakfast, a snack, or even paired with a dollop of cream cheese or a drizzle of honey. Think of it as a way to indulge without the guilt — and with the added bonus of sneaking in some veggies!
Why you’ll love this recipe?
What I love most about this zucchini banana swirl bread is how it feels like a warm, homemade hug each time it comes out of the oven. The flavor? Honestly, it’s like biting into a slice of heaven — the sweetness of the bananas and the cinnamon swirl perfectly balance the mild, earthy zucchini. It’s seriously crave-worthy with that tender crumb that practically melts in your mouth. And here’s the best part: this recipe is so forgiving that even if you’re not a baking pro, you’ll still end up with a loaf that looks stunning and tastes even better. I’ve tested it with less sugar, with almond milk instead of dairy — and it still comes out just as moist and flavorful! This one’s a no-fuss, budget-friendly solution for busy mornings or lazy weekends. Plus, it’s versatile — you can swap in walnuts, chocolate chips, or even blueberries if you’re feeling adventurous. What I love most about this is that my kids ask for seconds, and I don’t have to feel guilty about all those extra veggies sneaking into their treat!
How do you make Zucchini Banana Swirl Bread?
Quick Overview
This bread comes together so easily, I almost feel like I’m cheating! You start by grating the zucchini and mashing the bananas, then mix the dry ingredients in one bowl, wet in another, and combine just until barely mixed. The batter is thick but silky, and I love swirling in a cinnamon-spiced batter before baking. The smell that hits your kitchen while it’s baking? Pure comfort — sticky, sweet, and spicy all at once. It’s a one-bowl wonder with the bonus of a beautiful swirl on top, making it look almost too pretty to cut. Best of all, it stays moist for days, and the scoops disappear quickly — I’ve made this for brunch, afternoon snacks, and even as a quick breakfast to get out the door on busy mornings. At its core, it’s simple, cozy, and the kind of recipe that gets better with each batch.
Ingredients
For the Main Batter:
– 2 cups all-purpose flour (or your favorite gluten-free blend, see tips below)
– 1 teaspoon baking soda
– ½ teaspoon baking powder
– ¼ teaspoon salt
– 1 teaspoon ground cinnamon
– ½ teaspoon ground nutmeg (optional but adds warmth)
– ⅓ cup brown sugar (can swap with honey or maple syrup for a different sweetness level)
– ¼ cup granulated sugar
– ½ cup vegetable oil or melted coconut oil
– 2 large eggs
– 3 ripe bananas, mashed
– 1 cup shredded zucchini (squeezed dry — trust me, this keeps it from getting soggy)
For the Filling:
– ¼ cup cooled, melted butter or coconut oil
– 2 tablespoons sugar
– 1 teaspoon ground cinnamon
– Optional: chopped nuts, chocolate chips, or berries
For the Glaze:
– ½ cup powdered sugar
– 1-2 teaspoons milk or cream
– A dash of vanilla extract or lemon juice for flavor
Step-by-Step Instructions
Step 1: Preheat & Prep Pan
Set your oven to 350°F (175°C) and line a loaf pan with parchment paper or grease it well. This is the kind of recipe where I always do this first — it saves me from disasters later. I like to use a 9×5-inch loaf pan, but if yours is a bit different, just keep an eye on that baking time. Also, I like to lightly spray or butter the sides for easy removal.
Step 2: Mix Dry Ingredients
In a large bowl, whisk together the flour, baking soda, baking powder, salt, cinnamon, and nutmeg. Doing this ahead avoids clumps and ensures everything’s evenly distributed. The smell of those spices blending is honestly one of my favorite parts, even before the batter comes together!
Step 3: Mix Wet Ingredients
In another bowl, mash your bananas until smooth. I like using a fork; it’s nice and rustic. Then whisk in the eggs, oil, and sugars until combined. If you’re feeling like a flavor boost, add a splash of vanilla here. The batter will look a little thick — that’s perfect.
Step 4: Combine
Pour the wet into the dry and gently fold everything together just until it’s barely blended. Be careful not to overmix — this is what keeps the bread nice and tender. If there are a few lumps, that’s totally fine. Overmixing makes bread dense and chewy, and nobody wants that.
Step 5: Prepare Filling
Mix the melted butter, sugar, and cinnamon for the swirl. I like to keep it simple, but feel free to add chopped nuts or chocolate chips to make it extra special. You’ll spread half the batter in the pan, sprinkle your cinnamon-sugar, and then add the rest of the batter on top.
Step 6: Layer & Swirl
Drop spoonfuls of your cinnamon mixture on top of the batter. Using a skewer or butter knife, swirl gently — not too much, just enough to create pretty marbled streaks. This part is so satisfying because it’s like creating a little edible art.
Step 7: Bake
Pop it in the oven and bake for about 50-60 minutes. Check for doneness by inserting a toothpick — it should come out clean or with just a few crumbs. Keep an eye after 45 minutes, as oven temperatures vary. If the top gets too golden too quickly, tent it with foil for the remaining baking time. This is the moment I turn on my kitchen timer and try *not* to sneak tastes while it’s baking!
Step 8: Cool & Glaze
Once out of the oven, let the bread cool in the pan for about 15 minutes, then transfer it to a wire rack. This step helps set the crumb and makes slicing easier. When it’s cooled slightly, whisk together your glaze and drizzle it over the top. The glaze adds a lovely touch of sweetness and a glossy finish — perfect for slicing thin and serving with coffee.
Step 9: Slice & Serve
This bread slices best when slightly cooled. Use a serrated knife and cut straight down — no sawing! I like to serve it warm with a pat of butter or some cream cheese. It’s also amazing toasted the next day, especially if you sprinkle a little cinnamon sugar on top. My family loves this best for breakfast or as an afternoon treat — it’s one of those recipes that feels like a big hug in food form.
What to Serve It With
Honestly, this bread is so versatile that it can go anywhere. For breakfast, I love pairing it with strong black coffee or a frothy cappuccino — the bitterness balances out the sweetness perfectly. I often slice it thick for a quick snack or breakfast on the go; it’s handy enough to pack in a lunchbox, too. On weekends, I serve slices with a dollop of Greek yogurt and a handful of fresh berries for a brunch spread that everyone raves about.
If I’m feeling fancy, I’ve topped it with a quick cream cheese spread, drizzled honey, and a sprinkle of chopped nuts. My kids prefer it warm with peanut butter — it’s honestly a little dessert and a little breakfast rolled into one. It’s also such a crowd-pleaser that I’ve made mini muffins with the leftover batter, which makes for adorable, kid-friendly bites. My favorite tradition is sharing it with neighbors during Sunday brunch — everyone always asks for the recipe!
Top Tips for Perfecting Your Zucchini Banana Swirl Bread
One thing I’ve learned after making this several dozen times is that moisture control makes all the difference. If your zucchini is extra watery, squeeze out as much liquid as possible — it keeps the bread from becoming gummy. I’ve tested with both fresh and frozen zucchini; frozen works just as well if thawed and drained properly. Sometimes I’ve used almond milk instead of regular milk for a dairy-free version, and it actually made the bread even creamier!
When swirling in the cinnamon mixture, go slow — rushing can make the batter blend unevenly. A gentle swirl creates those beautiful marbled streaks that make this loaf look bakery-worthy. Overmixing the batter or over-swelling it during baking? That can cause gaps or uneven doming, so handle the batter lightly. Honestly, patience is key here. And don’t forget to check your oven’s temperature with a thermometer — oven heat varies, and that’s often why baked goods don’t turn out as planned.
For spice lovers, a pinch of cloves or a teaspoon of cardamom can add complexity, but I keep it simple for kids. And if you want to tweak the sweetness, just reduce the sugar slightly — I find that the bananas help keep it naturally sweet enough, especially when ripe. If you’re feeling adventurous, swap the sugar for ripe mashed plantains or even applesauce for a different flavor profile. The trick is to keep that moist, tender crumb, so don’t skimp on the zucchinis or bananas!
Finally, a tip I swear by: underbake slightly if you’re planning to toast slices later. The residual heat will finish it off perfectly, and you won’t end up with a dried-out loaf. Honestly, making this bread has become my go-to comfort baking — it never disappoints, and my family loves how fragrant and cozy it smells fresh from the oven. Plus, the swirl pattern? So pretty — it feels like I’ve put a little extra love into each loaf.
Storing and Reheating Tips
This bread stays soft and delicious for days, which is a miracle in my house. I usually store it in an airtight container or wrap it tightly with plastic wrap. At room temperature, it’s good for about 2-3 days — I suggest slicing only what you need to keep the rest fresh. For longer storage, I pop slices into a resealable bag and stash them in the fridge; they last up to a week, and you can toast slices to revive the cozy, melt-in-your-mouth texture.
If you want to make it last even longer, wrapping slices individually and freezing is a game changer. Just thaw at room temperature or pop in the microwave for a quick warm-up. Be mindful that the glaze might soften or crack when reheated, so you can always quickly re-glaze if needed. I’ve tested reheating in a low oven (around 300°F) for about 10 minutes, and it’s just as good as fresh. The smell alone will make your kitchen smell like a cozy bakery!
When it comes to glazing again after storage, I recommend adding the glaze just before serving to keep that shiny, sweet finish. If you made muffins or smaller loaves, wrap them carefully to prevent staling or crushed edges. Honestly, leftovers don’t tend to last long around here — it’s just that good and so easy to grab when hunger strikes!
Frequently Asked Questions
Final Thoughts
This zucchini banana swirl bread has become a comfort in my kitchen — a little bit of baking magic that always brightens my day. It’s cozy, simple, and endlessly adaptable, which makes it perfect for every season. The best part? It’s such a crowd-pleaser. Feed it to the kids for breakfast, serve it to guests at brunch, or slip a few slices into the freezer for when that sweet craving hits late at night. I honestly believe that the secret to good baking is a bit of love and patience — and this recipe definitely gets a generous dollop of both. So go ahead, give it a try — I promise you’ll fall in love with that first warm bite. Happy baking! And I’d love to hear how yours turns out, so don’t forget to leave a comment or share your variations. Enjoy!
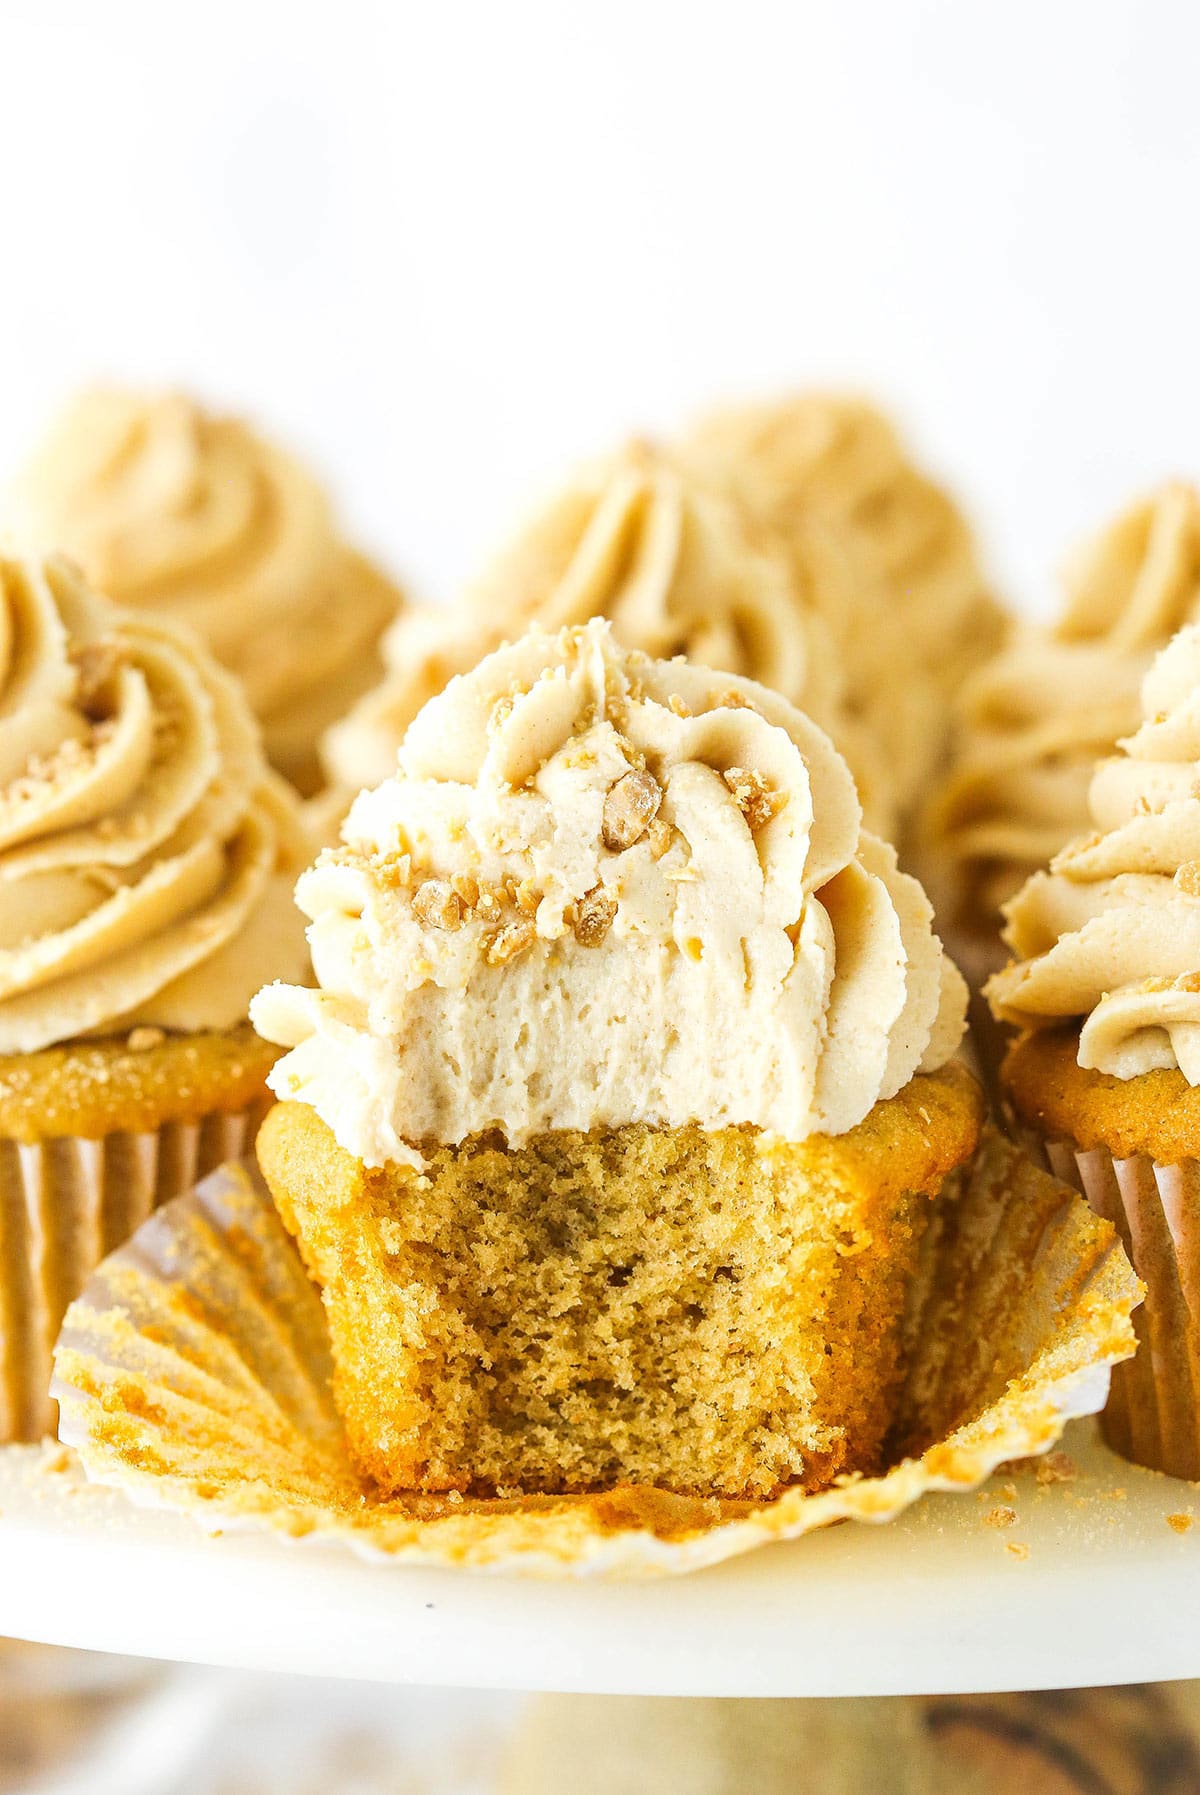
peanut butter cupcakes
Ingredients
Method
- Preheat oven to 350°F and line a cupcake pan with liners.
- Combine flour, baking powder, baking soda, and salt; set aside.
- Cream together butter, sugars, and peanut butter until fluffy, about 3-4 minutes.
- Blend in sour cream and vanilla.
- Add eggs one at a time, mixing well after each, then incorporate egg yolk.
- Gradually mix in dry ingredients, then add milk and mix until smooth.
- Distribute batter evenly into liners and bake for 13-17 minutes. Cool on racks.
- Prepare peanut butter frosting by beating butter, peanut butter, and powdered sugar until fluffy.
- Add vanilla, salt, and sufficient milk for desired consistency. Frost cooled cupcakes and decorate as desired.


I love how peanut butter cupcakes bring back those cozy baking memories—your description made me want to whip some up right away!
I love the cozy feeling of baking peanut butter cupcakes—my whole house always smells amazing! I’ll definitely try this recipe.
I love the warm, cozy vibes of baking peanut butter cupcakes—definitely a family favorite! The smell alone makes everything worth it.
I love how you describe that cozy baking vibe—peanut butter cupcakes sound perfect for a rainy afternoon!
I love how comforting that peanut butter cupcake scent must be! Your description makes me want to bake them right now.